

The bill arrives higher than the same month last year. Nothing changed. Same showers, same laundry, same irrigation schedule, same number of people in the house. Then the hallway tile feels faintly warm underfoot at seven in the morning, and the linen closet smells like the inside of a cooler that sat closed too long.
Water takes a little every hour. It hides behind drywall, soaks the bottom plate of a wall, and leaves the paint above it perfectly smooth. By the time a stain shows up, you're no longer pricing a plumbing repair. You're pricing drywall, insulation, baseboard, and possibly a mold assessment.
What separates a forty-minute diagnosis from a two-week demolition project is location. The leak detection Sarasota FL homeowners need is a search for one coordinate: which pipe, at what depth, behind what surface. That coordinate decides the test, the size of the access cut, the drying plan, and how the insurance claim gets written.
How to Tell If You Have a Hidden Leak
A hidden leak is a location problem before it is a repair problem. Find which branch is moving water, and you know which test to run, how big the access has to be, and whether the file is a simple fixture repair or a water-damage claim with drying attached.
Start with the meter. Give it a quiet two-hour window and a flashlight. Everything in the house stays off, and the dial is the only witness.
The no-cost meter test
- Shut everything down. Every faucet, both toilet supply valves, the washing machine, the ice maker, the pool fill, and every irrigation zone. Close the irrigation main if it has its own shutoff. Tell everyone in the house not to run water, including a quick hand wash.
- Write down the reading. Note every digit, including the red or white sweep hand, and photograph the dial with your phone. The photo settles arguments later.
- Wait about two hours. Read a book. Don't run a glass of water, don't start the dishwasher, don't hose off the lanai.
- Read the meter again. Any movement at all means water is passing through the meter and into the property, even if nothing looks wet anywhere.
- Split the house into branches. With the meter still moving, close the angle stop behind each toilet, then each sink, then the valve feeding the water heater. When the dial stops sweeping, you've found the branch that holds the leak.

That branch is the trade-off. A toilet angle stop that stops the dial is a fixture you can reach without opening a wall. A dial that keeps moving after every indoor valve is closed points past the fixtures, often to a slab line, a service line, or the yard. Those need a different test, a planned access cut, and paperwork that names the location, not just "leak."
Irrigation is the zone most homeowners get wrong, because a cracked head can run for weeks without leaving a puddle. Detecting hidden irrigation leaks works better by running one zone at a time and watching the meter than by staring at the grass.
Signs that show up before the meter does
- A bill that jumps with no change in how the house is used
- A warm or spongy spot on tile or vinyl, which usually means a hot line is losing water under the slab
- A musty smell near the water heater, under a sink, or inside a closet that shares a wall with a bathroom
- Paint that bubbles or blisters along a plumbing wall, often at the same height as a fixture on the other side
- Baseboard that swells or separates from the drywall while the wall above stays dry
The scale here isn't trivial. The U.S. Environmental Protection Agency's WaterSense program puts the average household leak at more than 9,300 gallons a year, with about 9% of homes losing at least 50 gallons a day, and a toilet with a stuck fill valve wasting up to 4,300 gallons per day on its own. A toilet you can shut off is still a plumbing repair. A line you can only prove with the meter is already a moisture problem in whatever it is soaking.
Practical rule: a meter that keeps sweeping with every fixture closed is never a wait-and-see situation. Stop testing and get it located.
If a stain has already broken the surface, don't cut into it to look. Read the signs of hidden water damage behind drywall first, then let a technician open a controlled area instead of an exploratory hole. A small, placed opening lets you confirm the wet cavity, dry it, and document the damage. A random hole just adds a repair.
Common Leak Sources in Sarasota Homes
A ceiling stain after a hard rain and a warm spot in the tile can both show up as a damp hallway. The source still decides the test, how much of the house has to be opened, and the note an insurer will want: plumbing or weather.
FEMA's National Risk Index rates Sarasota County's hurricane risk as "Very High," at the 99.3rd national percentile, with an estimated 3.7 coastal-flooding events per year. City floodplain planning treats flooding as Sarasota's most frequent natural hazard. Depths vary widely, and inland flooding shows up from heavy rain even when no tropical system is nearby. A failed supply line and water that entered through the roof can leave the same wet finish inside.
| Source | First sign | Check it yourself? |
|---|---|---|
| Toilet flapper or fill valve | Toilet refills on its own, meter keeps moving | Yes, with care |
| Dripping faucet or showerhead | Steady drip, bill climbs | Yes |
| Appliance hoses (washer, dishwasher, refrigerator) | Puddle under the cabinet, swollen base | Yes, visible connections only |
| Water heater connections | Pooling or rust at the fittings | Visible check only |
| Slab or in-wall supply line | Warm floor spot, musty odor, no visible water | No, needs professional testing |
| Irrigation line or sprinkler head | Soft or greener lawn patch, high bill | Partly, zone shut-off test |
| Roof or storm intrusion | Ceiling stain after rain, damp insulation | No, needs inspection |
I treat the first four rows as homeowner work and the last three as locate-first work. A toilet that refills, a faucet that drips, a hose you can see, or rust at a water-heater fitting can be checked without opening a wall. Shut that supply and watch whether the water stops. That answer is usually enough for a simple repair, and for a short note on when the drip started.
Slab and in-wall lines are a different access problem. There is nothing to tighten until the leak point is confirmed, and leak detection under a slab is why concrete gets opened only after that point is known. Cutting first means a larger repair and a weaker record of where the water left the pipe.
Irrigation sits in between. You can shut a zone and see whether the soft lawn patch stops getting wetter. You still cannot see a buried lateral from the grass.
Roof water follows framing before it stains a ceiling, so the wet spot is often not under the failed flashing. The leak tips from Ventura County Roof Cleaners walk through that travel path, which is how you separate a roof problem from a plumbing one. For a claim, write the source you can support: fixture, slab, irrigation, or roof after rain. That line is what keeps a plumbing loss from being filed as storm water, or the reverse.
Leak Detection Methods Compared
No single tool finds every leak, which is why a good investigation layers methods from least to most invasive. The cheapest method that answers the question wins. Expensive equipment gets deployed only when the evidence points somewhere it can actually resolve.
That's not a sales pitch for gadgets. Thermal imaging needs a temperature difference to show anything, so it struggles in a house where the AC has been off all day and every surface sits at the same temperature. Acoustic listening picks up the hiss of pressurized water escaping a supply line, but it's much weaker on gravity-fed drain lines. A camera needs a place to enter. Tracer gas needs a system you can isolate and seal. Pressure testing confirms a line is losing water without telling you where.
| Method | What it finds | Best for | Main limit |
|---|---|---|---|
| Electronic moisture meter | Moisture in drywall, subfloor and flooring | Confirming and mapping wet materials | Shows moisture, not the exact pipe location |
| Thermal imaging camera | Temperature differences caused by cool water | Leaks under floors and behind walls | Needs a temperature difference to show |
| Acoustic listening | Sound of pressurised water escaping | Pressurised supply lines | Weaker on drain and sewer lines |
| Video pipe inspection | Cracks, roots, offsets and blockages in drains | Drain and sewer lines | Needs an access point |
| Tracer gas | Gas released into an isolated line, detected at the surface | Hard-to-reach pressurised lines | Needs an isolated system |
| Pressure testing | Pressure drop in a sealed line | Confirming a line is losing water | Confirms a leak but does not pinpoint it alone |
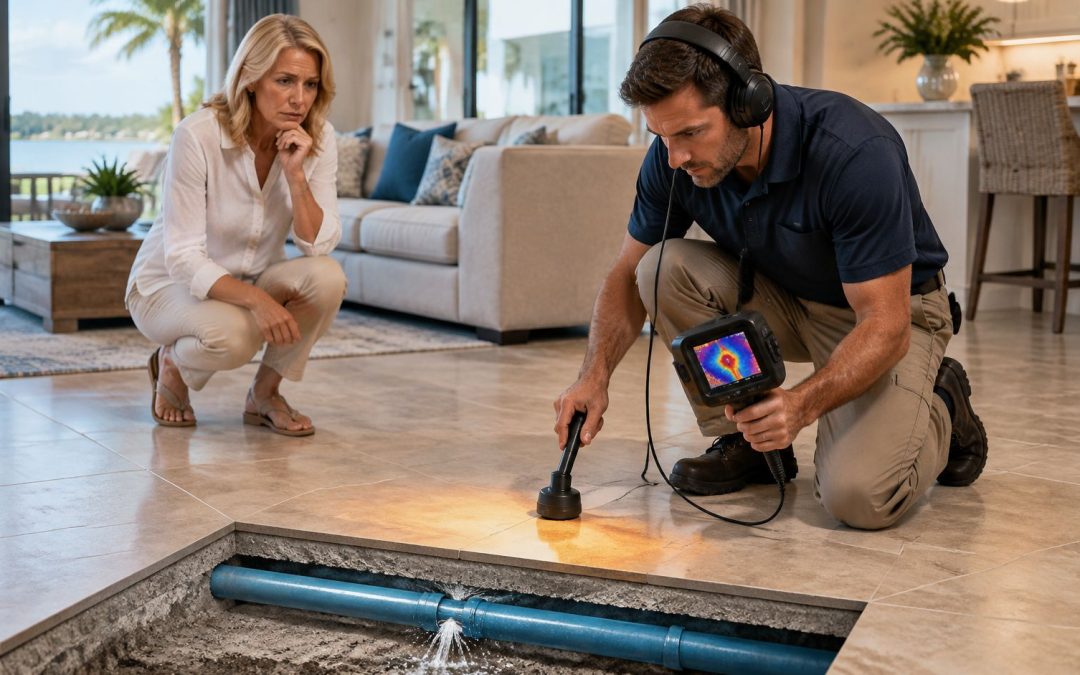
Here's how the layering works in practice. Say a living room floor has one warm patch about the size of a dinner plate. A moisture meter confirms the hardwood is wet and maps how far the moisture has crept past the visible spot. Thermal imaging narrows the source to a strip maybe three feet long. Acoustic listening over that strip confirms a pressurized hot line is losing water at one point. Only then does anyone cut, and the cut is a single square of flooring, not a trench across the room.
Ask which methods the technician plans to use and what each one is expected to rule out. A vague answer usually means the plan is to start opening surfaces and see what turns up.
Thermal work is only as good as the conditions. Thermal imaging leak detection depends on running the hot water first and letting the camera read the contrast while it lasts, which is why a technician may ask you to do something odd before scanning a floor.
How a Professional Leak Investigation Works

Water under a kitchen cabinet and water at the curb are different jobs. Cabinet water usually means a supply or drain line inside the house: shut that zone, confirm whether pressure is dropping or a drain is failing, then open only at the cabinet floor or the slab edge. Water at the street, a manhole, a hydrant, or the meter box is on the utility side, so the next step is a county call, not a cut in your floor. Location picks the test, the access, and the paperwork an adjuster will accept.
Source type comes before any opening. Clean supply, sewage, reclaimed water, and storm surge are not the same loss, and nobody works in the wet area until that source is identified. Sarasota County's water field operations FAQs describe recent surcharged wastewater, reclaimed-water releases, and sewer-system failures, including a reported 54,000-gallon reclaimed-water spill in June 2025 and a wastewater spill response in July 2025, and they state that utility staff typically visually inspect reported public-water leaks within one business day. Knowing which side of the meter the leak is on avoids days spent opening the wrong building.
- Intake and source classification. Where does the water appear, when did it start, what changed, and what do the last two bills say? A rising bill with no visible drip points at a pressurized supply line. A stain that grows only when a fixture drains points at waste. That split decides whether the next test is a meter check or a camera in a drain.
- Moisture mapping. Readings on drywall, baseboard, subfloor, and framing show how far the water traveled, including into materials that feel dry to the hand. The map sets the edge of later drying and of what gets photographed for the claim.
- Isolation. Zones get shut down and the meter test repeats, which separates a supply leak from a drain, fixture, or irrigation leak.
- Non-invasive testing. Methods run from least invasive to most invasive until one point is confirmed. A floor leak and a wall-cavity leak do not get the same tool order.
- Targeted access. The smallest opening that allows the repair, placed only over that confirmed point. A line under the slab needs different access than a fitting behind a vanity, and the scope should name which one.
- Structural check. A structural inspection identifies hidden or secondary damage such as weakened supports, compromised drywall, and damaged insulation, which is often where the main cost sits. That damage belongs in the file even when the leak itself is a small fitting.
- Documentation. Photos, moisture readings, the confirmed location, and a written summary go to you and, if you're claiming, to the carrier. The location has to be specific enough to show why that access and that repair were chosen.
- Repair plan. The scope, the drying plan, and the decisions that belong to you: what will be opened, what will be dried in place, and what is optional.
What you should walk away with: a written report with photos, the confirmed leak location, the moisture readings, and a scope of work. I would not accept a service charge that leaves the location unconfirmed.
Drying Timelines and What Drives Cost
Finding the source is half the job. The other half is what's already wet.
The EPA's mold guidance treats moisture control as the central mechanism for preventing indoor mold growth and says wet materials and affected areas should be dried within 24 to 48 hours after a leak, flood, or plumbing failure. Locating a leak doesn't help if water is still sitting in drywall, flooring, insulation, or ductwork. The same guidance notes that absorbent materials such as carpet and ceiling tiles may need replacement once mold develops, while hard surfaces can generally be cleaned with detergent and water and then dried completely.
That 24 to 48 hour window is the practical line between an inspection and a mitigation job. Cross it with wet drywall and the conversation shifts from drying equipment to cutting and rebuilding.
| Stage | Typical timing | What drives cost |
|---|---|---|
| Leak location and isolation | Usually within the first visit | Access points and number of zones tested |
| Moisture mapping and drying | Drying of wet materials should start within 24 to 48 hours | Size of wet area and equipment needed |
| Material removal | Same visit or the days that follow | Carpet, pad, drywall or tile to replace |
| Mold assessment if growth is present | Scheduled after the moisture readings, not before | Visible growth area and testing needs |
| Leak repair | After the leak is confirmed and access is open | Slab or in-wall access and pipe material |
| Final cost | Written estimate after the free inspection | Combined scope of every stage above |
The drivers that move a number up or down are consistent: whether access is through drywall or through a slab, the square footage of wet material, how many material types have to come out, whether mold is present, and how long the water ran before anyone found it.
A slab leak in a tiled hallway and a failed supply line above a laundry room can produce the same bill, or bills twenty times apart. The difference is where the water went, not how big the pipe was.
Ask for the drying plan, the materials list, and the repair scope in writing. A single lump number with no breakdown gives you nothing to compare. For a sense of how long wet building materials take, how long drywall takes to dry after a leak covers the variables that matter.
Insurance Claims and Flood Coverage Timing
A plumbing leak and floodwater can leave similar damage but fall under different policies. Plumbing leaks are generally handled through a homeowner's policy, while flood damage calls for a flood policy. Identify the likely cause before contacting your insurer so the claim reaches the right carrier.
Flood coverage also has timing rules. Florida's Chief Financial Officer explains that a new flood policy generally has a 30-day waiting period, with exceptions for certain loan-related purchases or changes and policies assumed by a new property owner. The Florida flood insurance overview explains those terms. For an NFIP policy, report a flood loss promptly and submit a Proof of Loss to the flood insurer within 60 days, as described in the Florida flood insurance overview.
Keep a clear record from the first sign of water:
- Suspected source: describe it plainly and note when you noticed it.
- Timeline: record actions taken and when, including meter readings.
- Photos: take wide and close views before and after mitigation.
- Mitigation: list work completed and why it was needed.
- Receipts: save costs for equipment rental and emergency materials.
Document the leak location and the areas affected. That information helps connect the cause to the damage in the claim file. Preserve damaged materials where safe, so the adjuster can assess their condition before disposal.
AMPM Restoration Services can provide documentation such as photos and moisture readings, and offers financing options. The guide to filing a water damage insurance claim explains the information adjusters typically request.
Frequently Asked Questions About Leak Detection
Does leak detection damage walls or floors?
Non-invasive methods come first, and any opening is kept small and placed near a confirmed leak. For example, a floor leak may require lifting one square of flooring to reach the repair point.
How long does a leak investigation take?
A leak investigation can often be completed in one visit. Drying and repairs take additional time, depending on which materials are wet and how much access the repair requires.
Can a homeowner fix a slab leak alone?
Slab and hidden supply lines need locating equipment and controlled access. Digging under a slab without locating the line can cause further damage and expand the repair.
Is a hidden leak the same as mold?
No. A leak is the source of water; mold can develop if materials stay damp. Moisture mapping helps identify affected areas and whether a mold assessment is appropriate.
Is a hidden leak covered by insurance?
Coverage depends on the policy and the source of the water. See the insurance claims section for how plumbing leaks and flood losses can be treated differently.
Do you serve Siesta Key, Venice and North Port?
Yes. AMPM Restoration serves Sarasota County, including Sarasota, Siesta Key, Venice, Osprey, Englewood, North Port, and Longboat Key, as well as Manatee County.
Call for a Free Leak Inspection in Sarasota
A leak near a fixture may need only limited access, while water beneath flooring or behind a wall can require a different repair approach. The location also affects what details are useful for an insurance conversation, so note where moisture appears and when you first noticed it.

Call 941-946-7807 to request a free leak inspection and estimate in Sarasota, FL. AMPM Restoration Services is located at 4301 32nd St. West, Suite B18, Bradenton, FL 34205, and serves Sarasota County and Manatee County. Financing options are available, and the company coordinates with insurance carriers.
Before calling, gather the meter reading and the time you took it, the area where water is showing, and any photos you have. If you know the plumbing's age, include that too. These details can help focus the inspection.
Call 941-946-7807 to request your free inspection and estimate. AMPM Restoration provides restoration services across Florida's Suncoast, with 24/7 availability and a one-hour response time. You can also visit AMPM Restoration Services to request an inspection.