

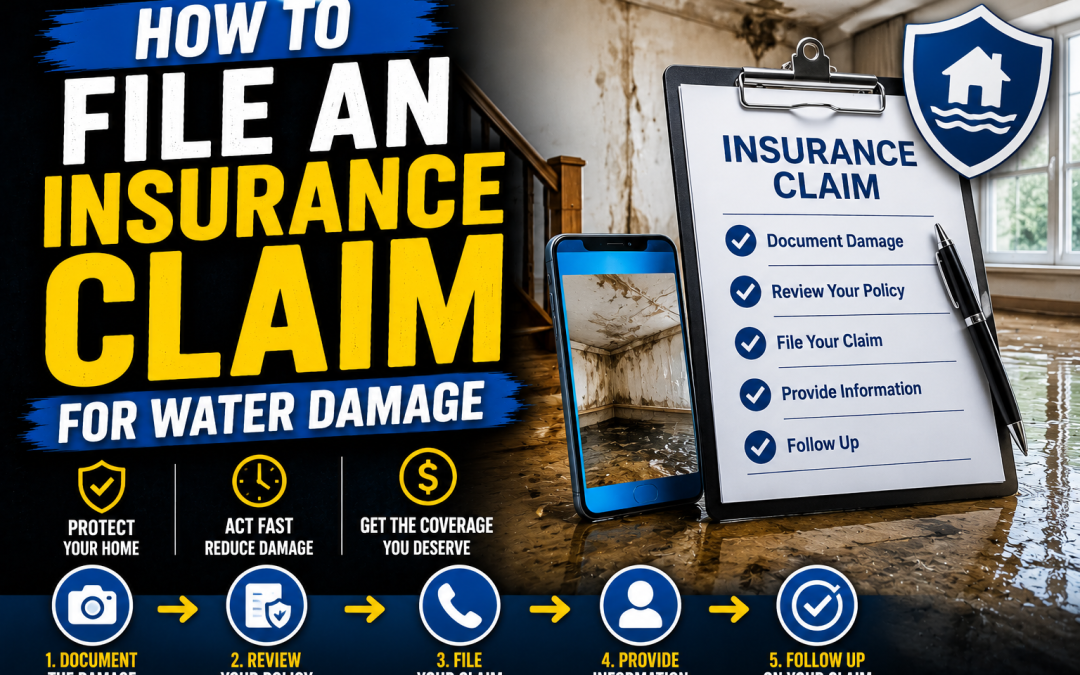
Water shows up fast on the Florida Suncoast. You step onto a wet floor in Bradenton before sunrise, hear a supply line hissing behind a wall in Lakewood Ranch, or notice a ceiling stain spreading after a hard storm rolls through Sarasota. In that moment, most homeowners have two questions. How bad is this, and what do I do first?
Knowing how to file an insurance claim for water damage matters because the cleanup and the claim start at the same time. If you wait too long, the property gets worse. If you say the wrong thing, throw things out too soon, or fail to document the loss, you make the insurance side harder than it needs to be. On the Suncoast, humidity adds pressure because wet materials don’t stay stable for long.
Your Guide to Water Damage Insurance Claims on the Florida Suncoast
If you’re dealing with a leak, overflow, or pipe break right now, slow down and work in order. A water claim is manageable when you treat it like two jobs happening at once. First, stop further damage. Second, build a clean record of what happened.

Water damage is a major claim category. It is the second most common home insurance claim, accounting for nearly 30% of all filings, with an average claim cost of $13,954, according to Guardian Service’s water damage statistics. For Florida homeowners, that makes a properly handled claim more than paperwork. It directly affects how much of the loss gets covered and how smoothly repairs move.
What Suncoast homeowners get wrong
Most online advice is too generic for this area. It tells you to call insurance and take pictures, but it skips the local issues that change outcomes:
- Humidity changes the timeline: Wet drywall, cabinets, and flooring in Bradenton or St. Petersburg can become a mold problem quickly.
- Storm events create confusion: Wind-driven rain, plumbing leaks, and floodwater are not treated the same way under a policy.
- Older housing stock matters: In some neighborhoods, the cause of loss can be disputed if the insurer sees signs of long-term wear.
If you haven’t looked at your policy in a while, Professional Insurance Advisors’ policy guide is a useful primer for understanding the language around exclusions, deductibles, and covered perils before you’re deep in a dispute.
Practical rule: Treat the first day as evidence day. Every decision you make should protect the structure and preserve proof.
Your First 60 Minutes After Discovering Water Damage
The first hour isn’t about paperwork. It’s about control. If you handle this hour well, you limit damage, reduce claim friction, and give the insurer less room to argue that the loss worsened because no one acted.
Start with safety and source control
Don’t rush into standing water if outlets, extension cords, appliances, or ceiling fixtures are involved. If the area isn’t safe, stay out and get help. A wet room can also hide sagging drywall, swollen flooring, and unstable ceiling sections.
Then stop the source if you can do it safely. That may mean shutting off the fixture valve behind a toilet, turning off the valve feeding a washing machine, or closing the home’s main water valve. If the intrusion came from weather and not plumbing, your job is to protect the opening as best you can without starting permanent repairs.
Three actions belong at the top of your list:
- Protect people first. Move children, pets, and anyone with mobility issues out of affected areas.
- Stop active water. Shut off the supply if a plumbing line, appliance, or fixture failed.
- Prevent the next layer of damage. Move rugs, electronics, documents, and soft goods out of the wet zone if you can do that without disturbing evidence.
Why speed matters in Florida homes
According to FEMA guidance summarized by C&S Insurance’s water damage claim article, mold and mildew can begin to grow within 24-48 hours of water exposure, and insurers often require claim filing within that same 24-48 hour window. In practice, that means drying and notification should happen together, not one after the other.
That timing is why waiting for the adjuster before you begin mitigation is a mistake. The adjuster needs evidence, but the property needs drying now. Those are not competing priorities. You can document first and still start extraction and dehumidification immediately.
If water is still present, the claim is still getting worse.
Make the first call that protects the property
A lot of homeowners call the insurer first and then wait. That often costs them. The better sequence is to stop the source, document visible conditions, and get emergency drying underway while the claim is being opened.
A professional mitigation crew typically handles:
- Water extraction: Removing standing water from floors, carpet, and cavities
- Moisture mapping: Identifying wet drywall, baseboards, cabinets, and subfloor areas
- Drying setup: Air movers and dehumidifiers placed to reduce secondary damage
- Job documentation: Photos and moisture records that support the claim file
For a plain-language example of emergency thinking, even outside Florida conditions, EZ Plumbing’s guide to stopping basement water in Los Angeles is useful because it reinforces the same first principle. Stop the intrusion before you start debating the paperwork.
What not to do in the first hour
Homeowners usually hurt their claim in familiar ways. They start tearing out materials before documenting them, throw away damaged contents, or mop everything up so thoroughly that the adjuster can’t see the extent of the loss.
Avoid these mistakes:
- Don’t start permanent repairs. Temporary protection is fine. Full rebuild work is too early.
- Don’t discard damaged items yet. Set them aside if possible.
- Don’t use fans blindly. Air movement helps, but it won’t replace structured drying.
- Don’t speculate about cause. If you don’t know exactly why the pipe failed or where the water first entered, say that.
If you want a practical companion piece for the immediate response window, this first-24-hours guide on emergency water damage repair walks through the field side of those early decisions.
Building Your Case A Comprehensive Documentation Checklist
Insurance companies pay based on proof. Not based on how upset you are, how obvious the damage feels in person, or what you remember seeing before cleanup started. If you want to know how to file an insurance claim for water damage the right way, think like you’re assembling a claim file for someone who wasn’t there.
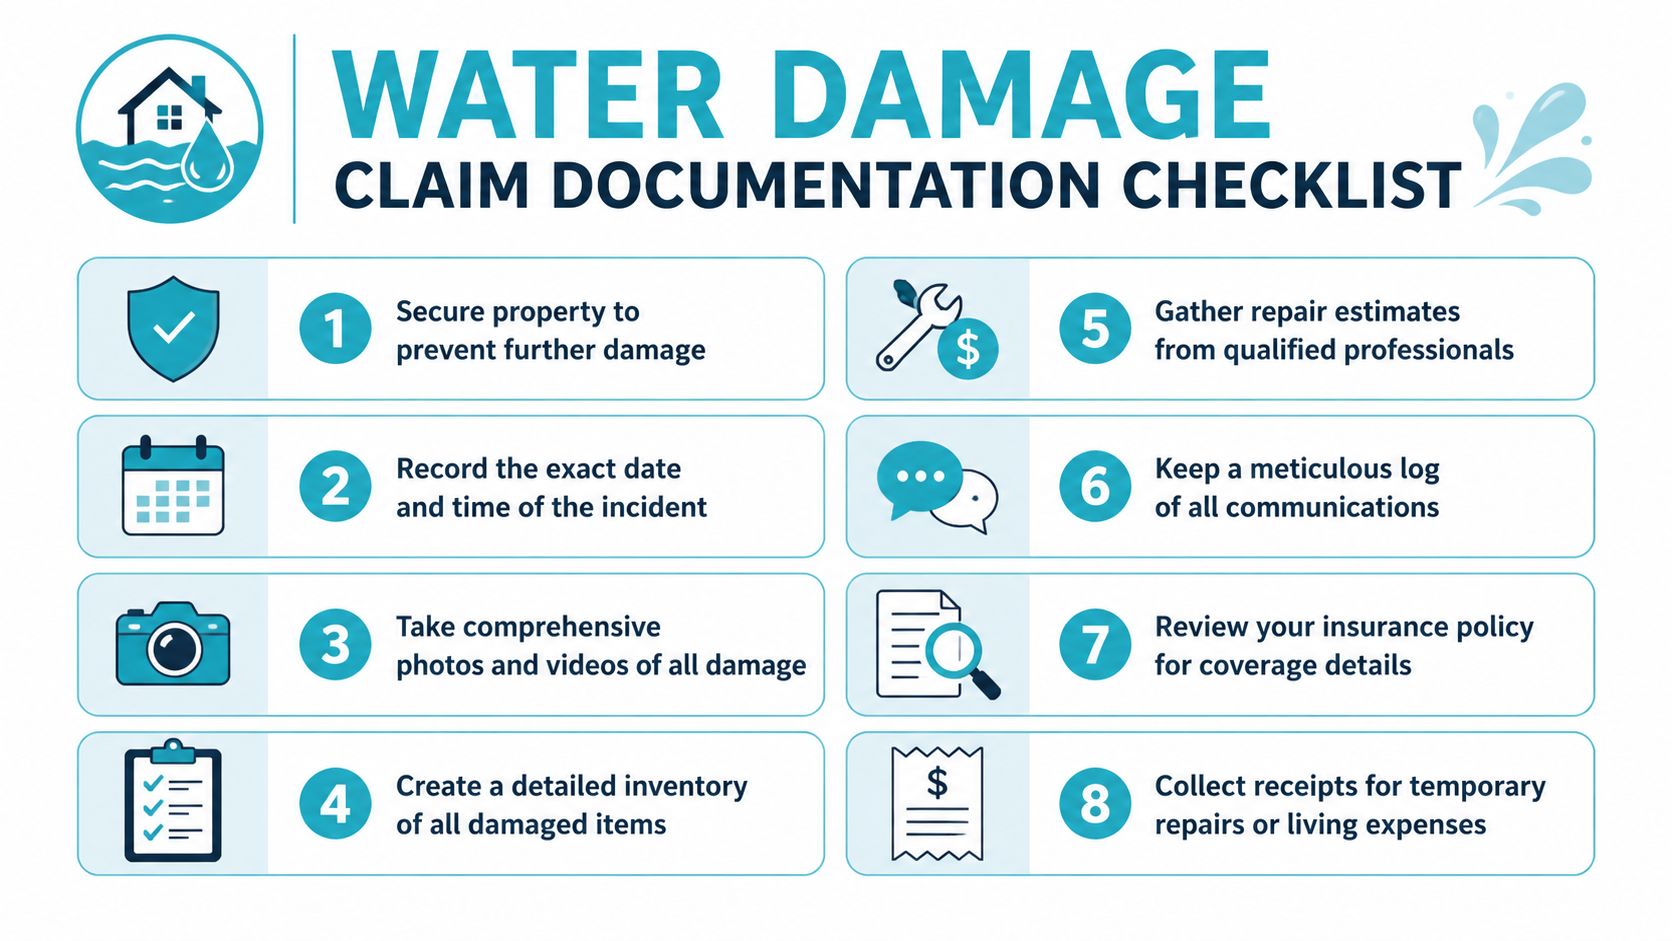
A strong claim depends on a multi-layered documentation strategy that includes photos, videos, an itemized inventory with original purchase details, and receipts for emergency expenses. One common mistake is cleaning too early and destroying visual evidence the adjuster needs, as outlined in Noble PA Group’s guide to filing a water damage claim.
Photograph the structure before cleanup changes it
Start with wide shots of every affected room. Stand in doorways and corners so the photos show scope, not just damage details. Then take close-ups of staining, swelling, buckling, separation at seams, damaged trim, wet contents, and the suspected source area.
Video helps because it captures context. A slow walk-through with spoken notes can show where water traveled from one room to another, where it pooled, and what materials were affected.
Focus your camera work on:
- Ceilings and walls: Water stains, bubbling paint, soft drywall, seams, and sagging
- Floors: Cupped wood, lifted vinyl, wet grout lines, detached transitions, soaked carpet
- Cabinetry and trim: Swollen toe kicks, delaminating panels, stained baseboards
- Mechanical areas: Water heaters, supply lines, shutoff valves, A/C closets, appliance hookups
Build an inventory like you’re preparing for disagreement
A vague list slows claims down. “Damaged couch, TV, and rug” doesn’t do much. The better approach is detailed and boring. That’s what works.
For each damaged item, record:
- What it is
- Brand and model if available
- Approximate age
- Purchase price if known
- Current condition
- Photo of the item
- Receipt, statement, or order confirmation if you have it
If the item is too wet or damaged to keep in place, photograph it thoroughly before moving it. Grouping items in the garage without individual photos usually creates avoidable disputes later.
The insurer doesn’t see your memory. The insurer sees your file.
Save every receipt connected to the loss
Out-of-pocket costs matter, but only if you track them. Keep receipts for emergency plumbing work, tarps, cleanup supplies, temporary housing, meals tied to displacement, laundry, storage, and any mitigation invoices.
A simple folder works. A notes app and photo album work too, as long as everything is organized. The key is consistency. If you spent money because of the water event, save the record.
Here is a practical checklist you can follow:
| Claim evidence | What to include | Why it matters |
|---|---|---|
| Structural photos | Wide shots and close-ups before major cleanup | Shows scope and severity |
| Video walkthrough | Narrated room-by-room recording | Preserves context |
| Content inventory | Description, age, brand, model, receipts | Supports personal property reimbursement |
| Emergency receipts | Plumbing, tarping, drying, lodging, supplies | Substantiates reimbursement requests |
| Repair estimates | Written scopes from licensed contractors | Helps challenge low settlement numbers |
| Communication log | Dates, names, emails, claim notes | Keeps the process accountable |
Keep a clean communication trail
Every call with the insurer should be logged. Write down the date, who you spoke with, what they said, and what they asked for. Save emails, claim portal screenshots, and text messages if they relate to approvals, inspections, or document requests.
This matters more than homeowners think. Claims don’t usually get messy because of one giant conflict. They get messy because no one can prove who said what three calls ago.
Use professional documentation when the damage isn’t obvious
Water rarely stays where you first see it. It moves under flooring, into wall cavities, behind cabinets, and into adjacent rooms. Moisture meters, thermal imaging, and written drying records can reveal conditions a homeowner wouldn’t catch with a phone camera alone.
If you’re unsure whether staining, swelling, or odor points to current moisture, this guide on whether it’s actually water damage is helpful for understanding what should be documented before conditions change.
In practice, this is the stage where a restoration contractor can materially improve the claim record. AMPM Restoration Services documents moisture conditions, mitigation steps, and affected materials in a format carriers routinely review, which helps align the field work with the claim file.
Contacting Your Insurer and Navigating the First Call
By the time you call the insurer, you want three things already in motion. The source has been stopped if possible. Initial documentation has started. Reasonable mitigation is underway. That puts you in a much stronger position than calling in a panic with half the facts missing.
What to say on the first call
Keep the conversation factual and narrow. You are reporting a loss, not arguing the entire claim on day one.
A simple script works well:
“I’m calling to report water damage at my home. I discovered it on [date] at about [time]. The affected areas include [rooms or areas]. I’ve taken steps to stop further damage and started documenting the loss. I need to open a claim and get the claim number, the assigned adjuster’s contact information, and any immediate document requests.”
That script does two useful things. It shows prompt notice and responsible action. It also keeps you from wandering into guesses about what caused the loss before anyone has inspected it.
What not to say
The first call isn’t the place for theories, blame, or casual language that can later be read as an admission. Be careful with statements like:
- “It’s probably been leaking for a while.”
- “I think the roof has had issues for months.”
- “We noticed something odd before, but ignored it.”
- “It’s not that bad.”
Those phrases can create unnecessary problems. If you don’t know the cause yet, say that. If you haven’t opened the wall or moved the appliance, don’t pretend you know what failed.
A better alternative sounds like this:
- Say: “I discovered water damage in the laundry room and hallway.”
- Not: “The old pipe finally gave out because the house is aging.”
Information you should get before ending the call
Don’t hang up with only a general assurance that someone will call back. Get specific claim handling details while you have a representative on the line.
Ask for:
- Your claim number
- The adjuster’s name and contact information
- The best email or portal for uploads
- Any emergency mitigation instructions
- Whether they want an inspection scheduled before permanent repairs begin
Then write it all down. If the carrier uses a portal, upload your first set of photos and receipts there as soon as practical.
One good habit that prevents later confusion
After the call, send a brief email summarizing the report if you have an address for the adjuster or claims department. Keep it short. Include the date of loss, affected areas, and the fact that mitigation has started to prevent further damage.
If you’re unsure what your policy generally covers before you make that call, this homeowner guide to whether home insurance covers water damage helps frame the usual distinctions without forcing you to guess on the phone.
Working with the Insurance Adjuster in Florida
The adjuster is important, but homeowners often give that meeting too much mystery. The job is straightforward. The adjuster inspects damage, evaluates the reported cause, and prepares an estimate or recommendation for the carrier. Your job is to make sure the inspection reflects the actual scope of loss, not just what is easiest to see in a quick walk-through.
Prepare for the inspection like a project meeting
Don’t treat the adjuster visit as a casual look around. Have your file ready. That means photos, videos, inventory, receipts, emergency invoices, and any contractor observations about wet materials or concealed damage.
Walk the adjuster through the loss in the order the water affected the property. Start at the source if known, then move through each area the water reached. This helps prevent a fragmented inspection where one wet room gets documented and the connected damage gets missed.
Bring these items to the meeting:
- A printed or digital photo set: Organized by room
- A damage inventory: Personal property and structural materials
- All receipts and invoices: Especially mitigation and emergency work
- Your notes: Discovery time, actions taken, names of people involved
- Any contractor scope or moisture findings: If available
Why homeowners should not do this alone
Adjusters see property damage every day. Most homeowners don’t. That gap matters. A homeowner may point out the wet ceiling and warped floor. A restoration professional is more likely to point out affected base cabinets, trapped moisture behind toe kicks, wet insulation, underlayment concerns, or the need for containment and drying beyond the visible stain.
That doesn’t make the meeting adversarial. It makes it complete. The best inspections are collaborative and specific.
When the adjuster and the restoration contractor look at the same area together, disagreements get smaller because the scope gets clearer.
For that reason, it helps to have your mitigation or restoration team present during the site visit if possible. This overview of insurance restoration services for homeowners explains how contractors and carriers typically interact during that process.
Expect limits in a first-pass estimate
An adjuster’s first estimate is often based on what was visible that day. Water losses don’t always stay that simple. Once wet drywall is removed or cabinets are detached, additional affected materials may appear. That’s normal.
What works:
- Showing room-by-room documentation
- Asking where the adjuster believes the covered damage starts and stops
- Requesting written clarification if something is omitted
- Submitting updated findings when concealed damage is uncovered
What doesn’t work:
- Arguing emotionally without documents
- Approving a quick settlement before understanding the repair scope
- Assuming a missed item is final and can’t be supplemented
Ask direct questions during the visit
You don’t need to perform expertise. You need clarity. A few direct questions can reveal whether the inspection is thorough enough:
| Question | Why ask it |
|---|---|
| Which materials are included in your scope? | Identifies omissions early |
| Are you allowing for moisture beyond the visible stain? | Tests whether hidden spread is considered |
| How should supplemental damage be submitted? | Prepares you for discoveries after demo |
| Do you need any additional documents from me today? | Reduces avoidable delay |
Stay professional, not passive
A fair claim usually comes from organized pressure, not confrontation. If the adjuster misses something, point to the photo, the invoice, or the moisture reading. If the scope looks thin, ask for explanation in writing. If permanent repairs require more than the initial allowance, support that position with a contractor estimate and a line-by-line comparison.
Florida claims get complicated when weather, humidity, and prior wear all sit in the same property. The way you avoid a weak outcome is simple. Show the damage clearly, document mitigation, and keep the adjuster focused on evidence rather than assumptions.
Common Florida Claim Pitfalls and How to Avoid Them
The biggest mistake Florida homeowners make is assuming all water is the same in the eyes of the policy. It isn't. Coverage often turns on where the water came from, how fast it happened, and whether the insurer believes the condition was sudden or had been developing over time.
Sudden damage and gradual damage are not treated the same
A washing machine supply line that fails and floods a room is usually argued very differently from a slow leak under a sink that has been steadily affecting cabinets and drywall. If the insurer sees staining, rot, corrosion, or long-term deterioration, the claim can shift from covered event to maintenance dispute quickly.
That is one reason field documentation matters so much. The physical condition at the source area often drives the coverage position.
Flood damage is not the same as interior water damage
This catches Suncoast homeowners after storms. Water entering from rising outside water is a different issue from water released by a burst pipe, failed appliance, or sudden plumbing event. Generic internet advice blurs those categories. Your carrier usually won't.
In Florida, water damage claim denials rose 15% after recent hurricanes because of confusion between flood and sudden water damage, and insurers often deny claims tied to gradual damage from slow leaks or poor maintenance, according to Wallace Insurance Law's water damage claim guide. That is exactly why cause documentation matters so much in Bradenton, Sarasota, and coastal communities around Tampa Bay.
If the cause is unclear, the claim gets harder. If the cause is documented early, the discussion gets narrower.
Four claim errors that create avoidable trouble
- Late reporting: Waiting while you "see if it dries out" gives the carrier room to question timing and mitigation.
- Incomplete source evidence: If no one documents the failed line, appliance connection, or entry point, the claim loses clarity.
- Over-cleaning before inspection: You can erase the very conditions that prove scope.
- Assuming flood is covered under the same policy: Many homeowners discover the distinction after the fact.
What works on the Suncoast
Florida properties deal with high humidity, storm exposure, and plenty of hidden moisture paths. The practical answer is to document cause early, dry aggressively, and avoid casual statements that make the event sound old, neglected, or uncertain.
A concise comparison helps:
| Situation | Typical claim problem | Better approach |
|---|---|---|
| Slow stain under sink discovered late | Carrier argues long-term leak | Document hidden area immediately and avoid guessing about timeline |
| Storm followed by indoor water | Carrier questions flood vs interior entry | Preserve photos of entry path and damaged areas before cleanup |
| Wet drywall but no visible standing water | Homeowner assumes it’s minor | Use moisture-focused inspection and keep records of mitigation |
| Early low estimate | Homeowner accepts too soon | Compare with contractor scope and request supplements where needed |
Restore Your Property and Peace of Mind with AMPM Restoration
A good water claim isn't built on one perfect phone call. It comes from a chain of smart decisions. Stop the source. Protect the structure. Document thoroughly. Report promptly. Meet the adjuster with a clean file and a clear scope.
That approach matters on the Gulf Coast because conditions change fast. Wet materials in a Bradenton or Sarasota home don't sit still, and odors can linger after drying if porous materials were affected. For homeowners trying to understand one piece of that problem, Rubber Ducky's odor removal guide gives a useful consumer-level look at why smell alone isn't the whole story after water exposure.

If you're learning how to file an insurance claim for water damage, the key takeaway is simple. Don't separate the claim from the cleanup. They are part of the same response. The stronger your mitigation and documentation, the smoother your claim usually moves.
Frequently Asked Questions About Water Damage Claims
1. Will filing a water damage claim make my insurance premium go up
It can, but there isn't one universal outcome. Carriers look at claim history, property condition, and overall risk. What matters for most homeowners is the trade-off. Large water losses are expensive to absorb out of pocket, so avoiding a legitimate claim just to avoid a possible rate change often doesn't make financial sense.
2. How long does a water damage insurance claim take to resolve
It depends on the size of the loss, how quickly documents are submitted, and whether the scope is disputed. A straightforward claim may move relatively quickly. A claim involving hidden damage, mold concerns, or multiple inspections will usually take longer. The best way to avoid delay is to keep your file organized and respond to document requests right away.
3. What if my insurer's settlement offer is too low
You don't have to accept the first number. Ask for the estimate in writing, compare it to your contractor's scope, and identify what is missing. Then submit the supporting documentation and request a review. If the disagreement continues, escalate within the carrier and keep every communication documented.
4. Is damage from a slow leak covered
Often, claims are disputed. Many policies treat long-term leaks and maintenance issues differently from sudden and accidental events. If the leak was hidden and the damage was only discovered later, the facts matter. The condition of the materials, the source area, and the inspection record often shape the decision.
5. Can I start repairs before the adjuster has seen the damage
You should start mitigation, not permanent reconstruction. Drying, extraction, and temporary protective measures are part of preventing further damage. Full rebuild work should usually wait until the damage has been documented and the insurer has had a chance to inspect, unless conditions require immediate protective action.
6. What if the water damage leads to mold
Coverage depends on the policy and the cause of loss. From a practical standpoint, your strongest position is to act quickly, document everything, and begin proper drying immediately. If you wait and conditions worsen, the insurer may argue that the additional damage could have been reduced.
If you want more answers relevant to real property-loss situations, these water damage claim FAQs cover common homeowner concerns in more detail.
If you need help with how to file an insurance claim for water damage, call AMPM Restoration Services at 941-946-7807 for a free inspection and estimate. We serve Bradenton, Sarasota, Tampa Bay, Saint Petersburg, Lakewood Ranch, and nearby Gulf Coast communities. We can assist with insurance claim documentation, coordinate with your carrier during the restoration process, and discuss financing options if your project needs immediate work.