


Thermal Imaging Leak Detection
A faint ceiling stain can feel harmless, especially when Florida’s humidity already leaves rooms feeling damp. But a Bradenton homeowner who notices a musty odor, warped baseboard, unexplained water bill change, or cool patch on a wall may be seeing the final sign of a leak that has been spreading behind the surface.
Thermal imaging leak detection helps locate hidden temperature patterns without immediately opening drywall, flooring, stucco, or ceilings. It’s useful, but it isn’t a magic camera. The most reliable inspection combines infrared imaging with moisture readings, pressure testing, and acoustic methods, depending on the suspected leak.
Why Florida Homes Need Thermal Imaging Leak Detection
A Bradenton homeowner notices a pale water stain on the ceiling after several weeks of unexplained indoor humidity. The paint looks slightly discolored, but there’s no active dripping. A visual inspection might identify the stain and suggest a general area. It usually can’t show where the water entered, how far it traveled, or whether the moisture is still active.
Florida homes create plenty of opportunities for hidden water movement. A slab plumbing leak can spread beneath porcelain tile and concrete. An air-conditioning condensate line may sweat or overflow inside a closet. Summer storms can damage tile-roof underlayment, allowing wind-driven rain to travel along framing before it reaches the ceiling. Coastal salt air can also contribute to deterioration around window flashing, allowing water to enter behind stucco and insulation.
Traditional checks often miss these problems because water doesn’t always move straight down. It can migrate laterally through masonry, insulation, framing, and ceiling materials before appearing as a stain far from the original entry point. A wall may look dry while the cavity behind it holds moisture.
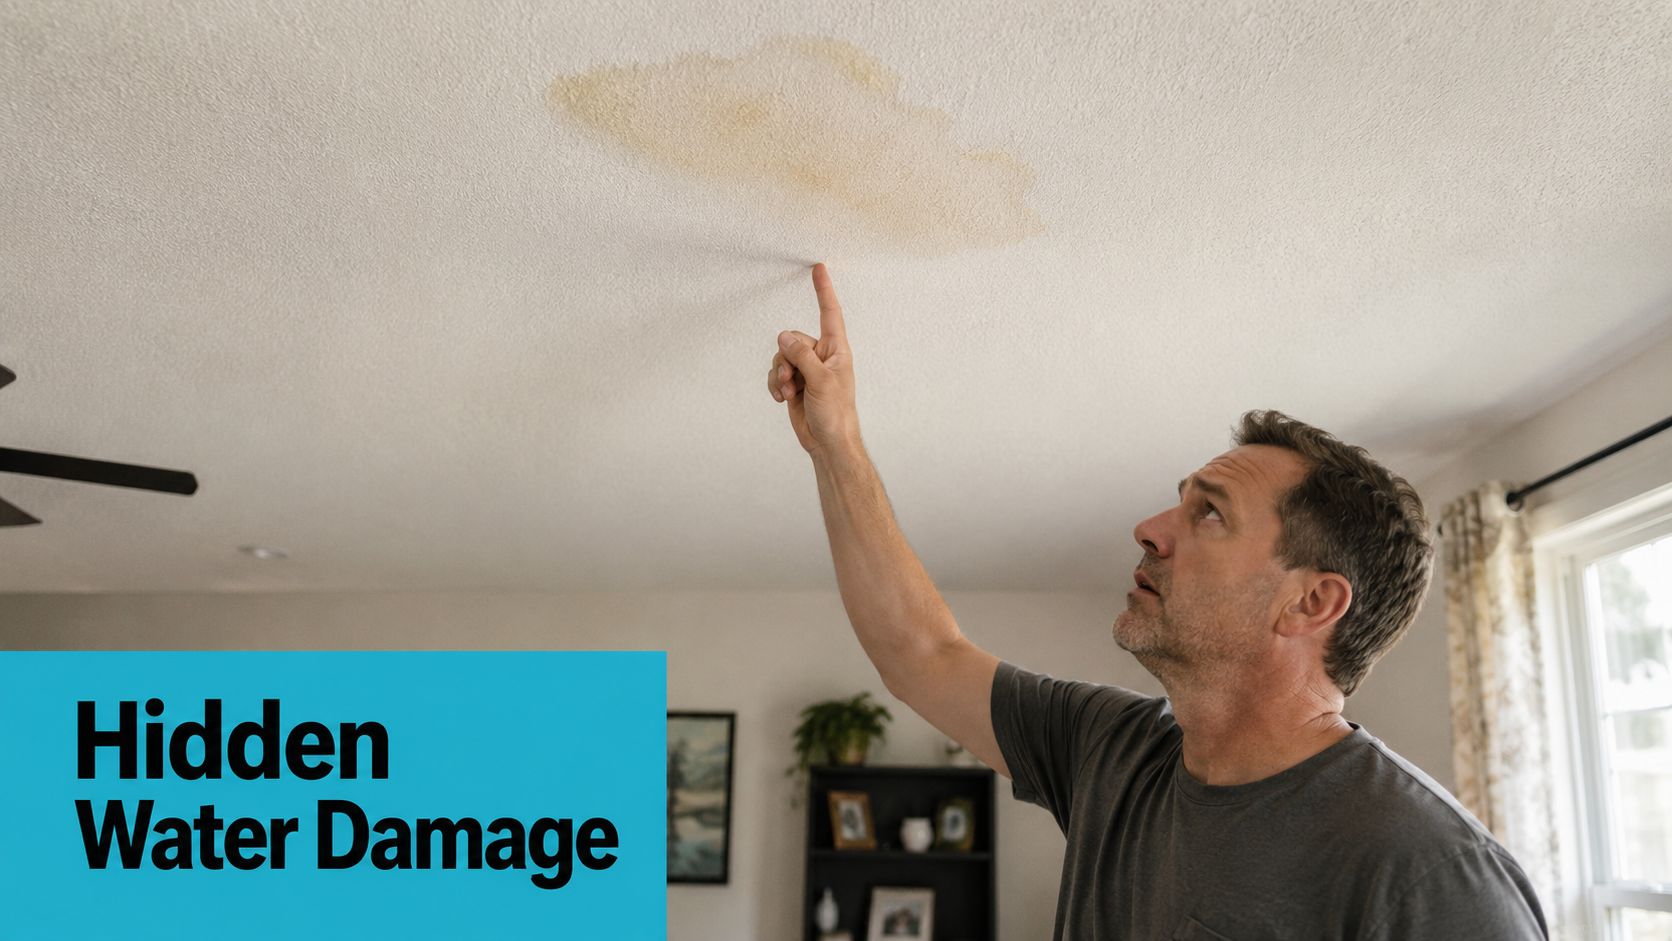
Why the Florida climate changes the inspection
Heat and humidity can keep materials damp for longer, while dense stucco, tile, and concrete can hide the path water takes. That combination makes early, non-invasive investigation especially useful. Homeowners dealing with persistent indoor moisture can also review this guide on how humidity causes mold in Florida homes to understand why a small leak shouldn’t be ignored.
Thermal imaging detects the surface temperature pattern associated with moisture. Water can cool a material through evaporation, creating a cooler area compared with nearby dry material. The camera doesn’t see water directly. It reveals a thermal anomaly that tells the technician where to investigate next.
Practical rule: Treat a thermal image as a map of suspicion, not proof of a leak.
A canal-monitoring field test shows why this method became useful beyond buildings. Investigators evaluated 11 of 45 suspected sites and confirmed leakage problems at 10 locations, producing a 91% success rate for thermal image analysis in that test. The report also identified two severe leaks, showing how thermal screening can help prioritize locations when every site can’t receive the same level of attention. The United Irrigation District canal-monitoring study provides that documented historical example.
For Florida homeowners, the practical value is straightforward. Thermal imaging can narrow a hidden leak to a manageable area before someone removes cabinets, tile, drywall, or insulation.
How Thermal Imaging Leak Detection Actually Works
Every surface emits infrared radiation related to its temperature. A thermal camera captures that radiation and converts it into a colorized image, allowing a technician to compare one area with the surrounding surface.
The simplest analogy is pavement after a hot Bradenton afternoon. Dry pavement absorbs heat and feels hot. A wet patch beneath a leaking hose feels cooler because evaporation removes heat from the surface. A damp wall, ceiling, or floor can create a similar pattern, although the result depends on the material, airflow, moisture level, temperature, and timing.

What the technician looks for
A professional scan usually follows a simple logic:
- Establish a useful temperature contrast. The technician looks for a meaningful difference between the suspected wet area and adjacent material.
- Scan slowly and consistently. Moving too quickly or changing the viewing angle can make subtle patterns harder to interpret.
- Trace the pattern. A streak, plume, mottled patch, or cool boundary can suggest how moisture moved through the assembly.
- Confirm the finding. A moisture meter or another diagnostic method determines whether the thermal anomaly represents actual moisture.
Published building-inspection work has visualized leaks with temperature gradients of approximately 0.4°C to 1.5°C when wet material was cooler because of water’s thermal inertia. The field research on infrared thermography and building leaks describes this effect and also reports controlled roof-intrusion discovery with a FLIR ThermaCAM E4 during continuous ceiling scanning.
Why standards and surface type matter
The camera’s sensitivity isn’t the only factor. Emissivity, which describes how effectively a surface emits infrared energy, affects the reading. Glass, mirrors, stainless steel, and glossy finishes can reflect surrounding temperatures back toward the sensor. A trained thermographer adjusts the angle, compares nearby surfaces, and avoids treating reflected patterns as moisture.
Industry guidance commonly uses a 10°C temperature difference across a building enclosure for energy-loss inspections. The Infraspection Institute infrared inspection standard identifies that threshold for envelope work, while the Snell Group’s summary of infrared inspection standards explains how ASTM C1060, ISO 6781, and RESNET address the same minimum differential.
Air conditioning can also change the baseline. A technician may compare conditions before and after normal HVAC operation so cold air, insulation gaps, or duct effects don’t get mistaken for a plumbing leak. For a broader approach to hidden water leak detection, remember the central point: the camera shows temperature patterns, not moisture itself.
Thermal Imaging vs Moisture Meters and Acoustic Methods
A Florida leak can leave several clues, and each tool reads a different one. Thermal imaging surveys a broad ceiling, wall, floor, stucco surface, or HVAC area quickly. It displays temperature patterns, helping outline a suspected path without touching or opening the surface.
A moisture meter checks the material itself. Is this specific point wet? Pin meters make contact through small probes, while pinless meters scan without puncturing drywall, wood, or flooring. Their coverage is narrower than a thermal camera’s, but they help confirm whether a cool area contains moisture instead of an insulation gap, reflected temperature, or airflow effect.
Acoustic equipment listens for sound from pressurized water escaping a pipe. That makes it useful for slab plumbing beneath tile or concrete and for irrigation lines, especially when the leak produces little surface cooling. Pressure testing and acoustic listening can narrow the source after thermal imaging identifies the likely zone.
| Tool | Best Use Case | Limitation |
|---|---|---|
| Thermal imaging | Mapping suspected moisture across walls, ceilings, floors, stucco, and HVAC areas | Shows temperature anomalies, not water directly |
| Moisture meters | Confirming moisture at specific points in drywall, wood, flooring, or other materials | Limited coverage and affected by material type |
| Acoustic leak detection | Locating pressurized plumbing, slab, or irrigation leaks by listening for escaping water | Less useful when the line isn’t pressurized or the leak is quiet |
Matching the tool to the Florida problem
Suppose an AC condensation line is leaking behind a closet wall. Thermal imaging can trace the cool path across the surface, then a moisture meter can check the drywall at selected points. With a roof intrusion, infrared scanning may reveal a ceiling or roof-assembly pattern, while a visual roof inspection helps identify the entry point. For a slab leak under tile, acoustic testing and pressure gauges may provide stronger confirmation once the thermal scan has narrowed the search.
Homeowners comparing stains, odors, and other symptoms can review this practical interior leak detection guide to see how the visible location may differ from the hidden source.
AMPM Restoration Services commonly uses thermal imaging to localize a concern, then checks the area with moisture meters before recommending demolition. That sequence also supports informed water leak detection and repair. A camera can reduce unnecessary opening of a property, while confirmation testing supports each decision to cut into a wall, ceiling, floor, or other finish.
What Happens During a Professional Thermal Imaging Inspection
A professional visit should feel like a diagnostic process, not someone pointing a camera at a stain and guessing. The technician gathers symptoms, establishes site conditions, scans likely pathways, confirms findings, and turns the results into a repair or restoration scope.
On the Suncoast, a residential thermal imaging visit may typically cost $250 to $600, while a visit paired with moisture mapping and a slab-leak pressure test may cost $400 to $900. Those ranges vary by property size, access, urgency, and the number of confirmation tests required.

Seven stages of the visit
- Scheduling and intake: You describe the stain, odor, warped trim, humidity, water bill concern, or recent storm exposure. Have recent water bills available if you suspect a plumbing leak.
- On-site walkthrough: The technician checks visible damage, plumbing fixtures, HVAC closets, ceilings, exterior walls, windows, and likely water paths.
- Pre-conditioning: The inspector considers normal air-conditioning operation, indoor and outdoor temperatures, sunlight, airflow, and other conditions that could affect the image.
- Thermal scan: A FLIR Exx-series camera or similar professional imager scans suspected zones from a consistent distance and angle.
- Confirmation: Moisture meters, pressure gauges, hygrometers, or acoustic equipment help distinguish an active leak from a harmless temperature difference.
- Documentation: The technician records visible conditions, thermal images, moisture readings, and relevant access points.
- Written report: You receive findings that identify suspected sources, confirmed moisture areas, recommended mitigation, and the next repair steps.
A typical on-site visit lasts about two hours, depending on access and testing needs. Before arrival, clear furniture and stored items away from suspicious walls, set the AC to its normal setting, and make utility areas accessible. The inspection should produce more than a collection of colored images. It should explain what needs to be dried, repaired, removed, monitored, or referred to a plumber or roofer.
For local service details, homeowners can review leak detection in Bradenton before scheduling.
Florida Case Examples Where Thermal Imaging Made the Difference
A Bradenton ranch home had a warm patch near the living room, yet no visible water source. The house dated to the 1990s, and porcelain tile covered the floor, making broad exploratory removal an unattractive first step. Thermal scanning showed a cool plume spreading from a concentrated point across the tile. That pattern narrowed the suspected slab plumbing break to within inches of the location a plumber later confirmed.
The camera guided the investigation rather than replacing it. Pressure testing and acoustic listening verified the problem, while the thermal image showed where those tests should begin. The homeowner avoided treating the entire room as a possible leak area.
Wind-driven rain above a Sarasota bonus room
A two-story Sarasota home developed a roof leak during wind-driven rain. Water entered near the roof, traveled 12 feet along a truss, and reached the ceiling area before a clear stain appeared. A scan traced a cold path inside the wall cavity, giving the technician a likely route to investigate.
A visual roof inspection and moisture-meter readings confirmed the affected area. The early finding directed drying and roof repairs before the ceiling stain expanded. Timing still mattered, because active surface moisture and solar heating can change the thermal pattern, as explained in The research on infrared leak detection and seepage mapping.
AC condensate overflow in a coastal condo
At a Longboat Key condo, a blocked AC condensate pathway overflowed behind drywall. The resulting cool streak extended approximately 30 feet from the mechanical area, showing how far the moisture had traveled. A moisture meter confirmed wet drywall, and an HVAC technician corrected the blocked line.
This case also shows why thermal imaging fits Florida's AC problems particularly well. The camera located the travel path, while the meter confirmed the material condition and the HVAC technician addressed the source. Early action kept the restoration area from growing, although a representative example cannot support a dollar estimate without invoices, material quantities, and documented repair costs.
Good records should identify the source, affected materials, confirmation method, and recommended action. Commercial inspection checklist templates can serve as a reminder of those documentation points.
Across these examples, thermal imaging mattered because it changed the next decision. It showed where to test, where limited opening might be justified, and whether a plumber, roofer, or HVAC technician should respond.
Where Thermal Imaging Falls Short and Why That Matters
Thermal cameras can mislead homeowners who expect them to see through walls or identify every leak instantly. They don't see water directly, and they can't determine moisture quantity from a color pattern alone. Independent technical guidance on thermal-image leak detection notes that cameras can't see through walls, may miss temperature-equalized leaks, and can produce false alarms without corroborating tools.
Florida conditions create additional challenges:
- Daytime solar loading: Sun-heated roofs, stucco, windows, and exterior walls can mask or imitate moisture patterns. Research indicates infrared seepage detection can be less effective during daytime than at night, and drone altitude can materially change detection performance.
- High surrounding moisture: As soil moisture rises to approximately 10%, infrared leak detection can become inconclusive, with performance dropping sharply once moisture reaches 5% or higher under the conditions studied. The published seepage-mapping research documents this limitation.
- Dried materials: A leak that stopped long ago may no longer produce enough thermal contrast to appear clearly.
- Reflective surfaces: Stainless steel, glass, mirrors, and glossy finishes can reflect nearby temperatures rather than show the surface condition accurately.
- New leaks: A leak less than 30 minutes old may not yet have created a stable thermal footprint.
Humidity can flatten the difference between wet and dry materials. Air movement from an AC vent can create a cool stripe that resembles moisture. Missing insulation, thermal bridges, and plumbing temperature changes can also create anomalies.
A qualified thermographer doesn't stop at the image. They compare conditions, verify readings, and explain uncertainty.
A responsible protocol combines the thermal scan with calibrated moisture meters, hygrometers, pressure testing, or acoustic confirmation. Before any demolition, the technician should document why the suspected area is wet and how the proposed opening supports the repair plan. That approach protects the homeowner from unnecessary damage while still allowing fast action when the evidence is strong.
Get a Free Thermal Imaging Inspection on the Suncoast
AMPM Restoration offers a no-cost thermal imaging inspection for properties in Bradenton, Sarasota, Lakewood Ranch, Palmetto, Ellenton, Longboat Key, Siesta Key, Venice, Parrish, and surrounding Gulf Coast communities. The first call starts with a short intake about symptoms such as a musty smell, warped baseboards, ceiling discoloration, unexplained humidity, or a water bill spike.
The inspection is scheduled in a two-hour window with a licensed technician. The visit includes thermal scanning of suspected areas and appropriate confirmation testing. Homeowners receive a same-day digital report with annotated thermograms and moisture-map findings when the inspection identifies a concern.
What happens after the scan
The report should support a clear decision:
- No confirmed moisture: You may need monitoring, HVAC evaluation, insulation review, or another specialist.
- Localized moisture: The technician can outline drying, access, and repair needs.
- Active water intrusion: The restoration plan can address extraction, containment, drying, sanitization, and reconstruction.
- Plumbing or roof source: AMPM can document the affected area while coordinating the appropriate trade response.
You can also review the free water leak detection service before calling if you're unsure whether your symptoms justify an inspection.
AMPM Restoration supports covered insurance claims through direct billing to carriers such as Citizens, Universal, and Florida Peninsula when applicable. The company also prepares detailed Xactimate-formatted estimates for adjuster review and offers financing through Enhancify for out-of-pocket restoration work over $1,000.
Florida's humid environment gives hidden moisture more opportunity to affect drywall, subflooring, insulation, and contents. The longer a leak remains undiagnosed, the more likely the restoration scope will expand. One call can begin the inspection, documentation, mitigation plan, and insurance coordination process.
If you're seeing a stain, smelling mustiness, or noticing unexplained moisture, don't wait for the surface evidence to become severe. Call 941-946-7807 to schedule your free thermal imaging inspection and estimate.
AMPM Restoration Services provides thermal imaging leak detection, water damage restoration, mold inspection and removal, storm cleanup, and reconstruction across Florida's Suncoast. Visit AMPM Restoration Services to request help, insurance claim assistance, financing options, and a free inspection and estimate.