


A single inch of water in your ceiling can cause up to $25,000 in structural damage, so the first hour after a roof leak can determine whether you face a contained repair or a much larger replacement. The safest response is to control the water indoors, protect people and belongings, and get professional moisture assessment and extraction underway before saturation spreads.
You're standing under a brown ceiling stain after a Florida storm. Maybe the paint is bubbling, the drywall feels soft, or water is running toward a light fixture. The roof may look like the obvious problem, but the visible mark is only where the water finally surfaced. Above it, insulation, framing, and ceiling cavities may already be absorbing moisture.
Act quickly, but don't climb onto a wet roof or reach toward electrical equipment. Temporary containment can limit migration, but it can't replace source repair, moisture mapping, extraction, and structural drying.
The Hidden Spread of Water Damage from a Roof Leak
Water rarely travels in a straight line from a damaged shingle to the ceiling stain. It enters through a roof penetration, flashing failure, membrane crack, or wind-driven opening, then moves across roof decking and insulation. Gravity pulls it downward, while porous materials draw it sideways through capillary action. A ceiling stain may therefore sit several feet away from the actual entry point.
In a Florida home, warm, humid conditions make concealed wet materials especially troublesome. Insulation can hold moisture against the underside of the roof deck. Drywall absorbs water along its paper facing and gypsum core, while wall cavities allow moisture to move behind the surface. Wood framing may remain wet even after the ceiling appears dry.

Why a small leak becomes a major restoration event
Industry summaries identify water damage and freezing as one of the most common homeowners' insurance loss categories in the United States. Those losses accounted for 22.6% of homeowners losses in 2023, and the average claim over the 2019–2023 period was about $15,400, according to water damage statistics compiled by This Old House.
The same industry summary notes that one inch of water can cause up to $25,000 in damage to a home. That figure makes sense when water reaches ceilings, insulation, drywall, flooring, electrical components, and framing instead of remaining on a cleanable surface.
Roof leaks represent a substantial part of the broader intrusion problem. One industry compilation reports that roof leaks cause roughly 40% of water intrusion complaints in the U.S., while another summary attributes 14% of property water damage to roof leaks linked to poor maintenance or aging roofs. The same roof-leak water-damage analysis reports that wind, hail, water, and freezing perils together made up 68.3% of homeowners property claims in 2022.
Practical rule: Treat the stain as a map marker, not a damage boundary.
For a deeper explanation of how moisture moves after a leak, see how fast water damage spreads in walls. Homeowners also benefit from prevention guidance such as San Antonio roof protection, even though roof materials and weather exposure differ by market.
Identifying Entry Points Before the Stain Appears
The safest inspection starts inside and at ground level. During or after rain, walk the attic only if it has a stable, safe access route and adequate lighting. Don't step between ceiling joists, and don't touch wet insulation, exposed wiring, or metal components near electrical equipment.
Look for a damp smell, dark trails on roof decking, wet insulation, rusted fasteners, or droplets beneath penetrations. Use a flashlight to inspect around plumbing vents, chimneys, skylights, roof valleys, and areas where roof planes meet walls. A roof leak can travel along decking before dropping into the room below.

Safe clues from inside the home
Weather timing helps narrow the cause. If the stain grows during or shortly after rain, suspect an exterior entry point. If moisture appears without precipitation, condensation or an interior plumbing issue may be involved. Warm, moist indoor air can enter the attic through gaps around light fixtures, pipes, ductwork, and exhaust fans, then condense on cooler roof surfaces.
The pattern matters too. A concentrated trail near one penetration points toward a roof opening. Widespread dampness, droplets across roof decking, or rust on many fasteners suggests an attic moisture or ventilation problem rather than one isolated breach.
What you can document
Take clear photographs of the ceiling, attic path, wet belongings, and any visible roof debris from the ground. Record when you first noticed the water and whether it followed a storm. Don't paint over the stain, remove damaged materials, or discard belongings before documenting them.
If the source remains unclear, hidden water leak detection can help identify concealed moisture without relying on the stain alone. A professional inspection is safer than guessing from the roofline or cutting open multiple areas without a drying plan.
Immediate Interior Containment and Safety Steps
The first hour is about limiting spread, not completing repairs. If water is actively entering, place a bucket or clean container directly beneath the drip. Put a towel around the container to catch splash, but don't place containers beneath a sagging ceiling if collapse appears possible.
Move furniture, electronics, rugs, artwork, and boxes out of the affected area. If an item is too heavy to move, raise it on blocks or plastic barriers only when doing so is safe. Remove wet cushions and textiles from the room so they don't continue releasing moisture into the air.
Protect people first: A wet ceiling near a light fixture, outlet, smoke detector, or electrical panel is an electrical hazard.
If water is near electrical equipment, don't touch switches or appliances while standing on a wet surface. Leave the area and contact an electrician or emergency responder when necessary. A sagging ceiling should also be treated as unstable. Keep people and pets away rather than pushing, puncturing, or pressing the bulge.
Short-term actions that help
- Control the drip: Empty containers before they overflow, and protect floors with absorbent towels or a plastic sheet beneath them.
- Separate contents: Move wet belongings into a dry, ventilated area when possible, keeping salvageable items off the floor.
- Limit air movement at first: Don't aim fans into a visibly wet ceiling cavity before the source and electrical risks are assessed.
- Record conditions: Photograph damage, note the time, and keep receipts for emergency materials or temporary lodging.
- Avoid improvised roof work: A tarp or exterior repair should be handled by someone equipped to work safely at height.
Opening windows may help only when outside air is drier than the indoor air. Florida's outdoor humidity can be high, so indiscriminate ventilation may add moisture instead of removing it. Fans can also spread contaminated water or move moisture into adjacent cavities if used before extraction and assessment.
Standing water needs prompt removal. Restoration guidance emphasizes that extraction must happen before evaporation can work efficiently, because removing liquid water is the biggest way to reduce drying time. The first 24 hours of emergency water damage repair should focus on safety, source control, extraction, and documentation.
These measures buy time. They don't establish whether insulation, wall bottoms, ceiling cavities, or framing are wet, and they don't verify that materials have reached a safe drying target.
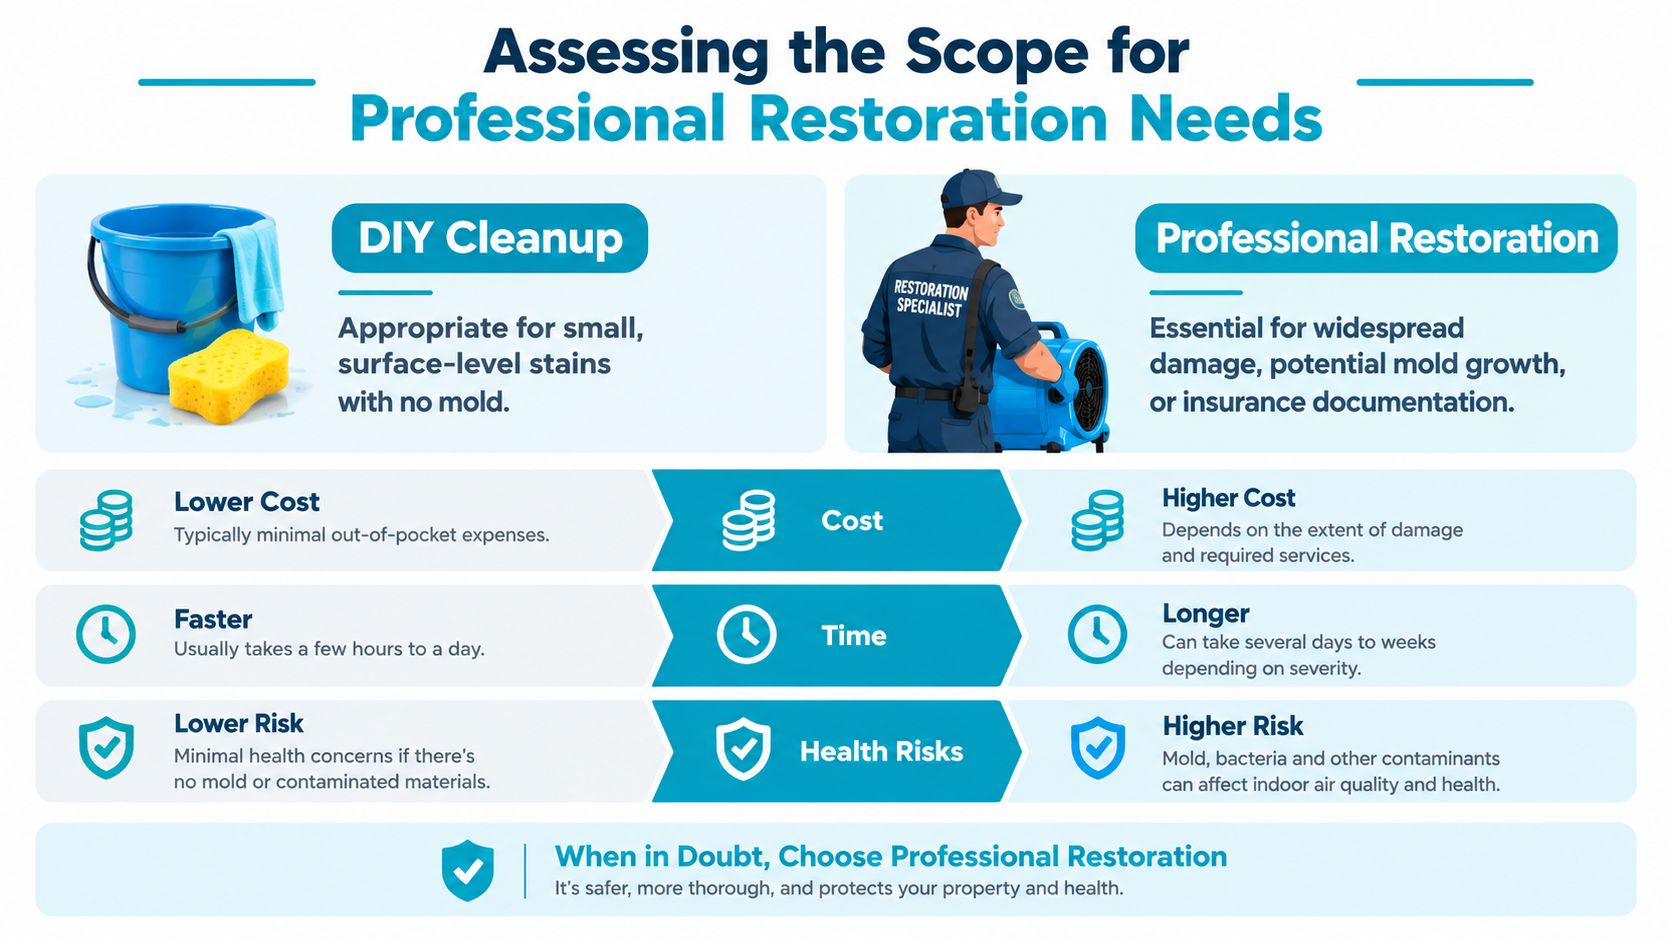
Assessing the Scope for Professional Restoration Needs
DIY cleanup can be reasonable when the issue is limited to a small, surface-level area with no standing water, no soft drywall, no wet insulation, and no uncertainty about the source. A towel, household fan, and careful monitoring may help with a minor surface mark. That approach stops being appropriate when water has entered a cavity or spread beyond what you can see.
A household wet vacuum has limited capacity and reach compared with professional extraction equipment. It may remove water from a floor surface, but it won't pull saturation from a ceiling cavity, wall insulation, or the backside of drywall. Drying the face of a wall also doesn't prove the interior is dry.
A practical decision matrix
| Condition | DIY response | Professional response |
|---|---|---|
| Small surface stain, dry surroundings, no odor | Document and monitor | Optional inspection if the cause is uncertain |
| Active dripping or standing water | Contain only if safe | Source control and extraction |
| Soft, swollen, or sagging drywall | Keep people away | Moisture mapping and controlled opening |
| Wet insulation or wall cavity | Don't disturb unnecessarily | Extraction, drying, and material evaluation |
| Musty odor or visible mold | Avoid cleaning by trial and error | Mold inspection and appropriate remediation |
| Insurance claim or disputed cause | Photograph and preserve records | Detailed assessment and drying documentation |
What professional assessment actually measures
Technicians should combine thermal imaging with pin and pinless moisture meters to define the lateral spread of saturation before drying begins. Thermal cameras identify temperature patterns that may indicate hidden moisture, while meters confirm moisture conditions in specific materials. The water-damage inspection guidance explains why a visual check alone can miss the wettest areas.
A proper workflow starts with source control, followed by moisture mapping, extraction, structural drying, and dehumidification. Technicians may need to open saturated ceiling cavities, wall bottoms, or wet insulation so air can reach trapped materials. Equipment often needs to be checked and reset over several days because moisture redistributes as drying progresses.
Drying shouldn't be based on an arbitrary number of hours. Industry guidance recommends using equilibrium moisture content and material-specific targets, supported by readings from affected, unaffected, and ambient areas. Daily documentation can include temperature, relative humidity, grains per pound, equipment placement, and moisture-content measurements.
When mold risk changes the decision
The EPA recommends drying wet or damp areas within 24 to 48 hours after a leak or spill, because mold usually won't grow if materials dry within that window. The EPA mold and moisture guidance says that if drying takes longer, mold growth should be assumed on affected materials.
The CDC also advises homeowners to clean and dry flood-damaged areas fully and quickly within 24 to 48 hours, as explained in its mold cleanup guidance. FEMA guidance states that mold colonies can start on a damp surface within 24 to 48 hours and identifies roof leaks as a common trigger, as summarized in mold-after-water-damage guidance.
For commercial properties, a roof specialist may also be needed. A resource on commercial roof leak repair can help property managers understand the separate roofing scope, while a restoration team addresses interior moisture and documentation.
Choosing the Right Restoration Partner in Bradenton
A restoration company should do more than place fans in a room. Ask how the team will locate the source, measure moisture, protect unaffected areas, document drying, and coordinate reconstruction. The response plan should distinguish roof repair from interior restoration, because fixing the roof doesn't remove water already trapped inside the building.
For homeowners in Bradenton, Sarasota, Lakewood Ranch, Saint Petersburg, Tampa Bay, and surrounding Gulf Coast communities, local response matters. A nearby team understands storm-driven rain, humid drying conditions, attic construction, and the practical problems that appear when a property stays wet during a busy weather event.
Questions that reveal the quality of the process
Ask whether technicians use thermal imaging, pin and pinless meters, commercial extractors, dehumidifiers, and daily psychrometric readings. Ask what records you'll receive, including moisture readings, equipment placement, affected-material notes, photographs, and recommendations for removal or reconstruction.
You should also ask how the company handles insurance communication. Roof-leak claims can be difficult to classify because insurers don't maintain one dedicated roof-leak category. Losses may be recorded under perils such as wind and hail or water damage and freezing, so the documented cause, timing, and policy language matter.
Ask for proof of drying: Surface feel isn't a clearance test. Request material-specific readings before equipment is removed or rebuilding begins.
AMPM Restoration Services is a locally owned, licensed, bonded, and insured company based at 4301 32nd St W b18, Bradenton, FL 34205. Its IICRC-certified team provides emergency water damage restoration, mold inspection and removal, fire and smoke restoration, storm and flood cleanup, commercial restoration, leak detection, and reconstruction support across the Suncoast. The company also coordinates with insurance carriers and offers free inspections, estimates, and financing options.

Why documentation protects the repair
A complete file connects the first report to the final dry standard. It should show when the leak was found, what emergency steps were taken, which materials were affected, how equipment was placed, and when readings supported removal. This record helps separate sudden storm-related damage from long-term maintenance issues.
For local availability, review 24/7 emergency restoration in Bradenton. The right partner will explain what can be stabilized immediately, what needs opening or removal, and which roof specialist or builder should handle the exterior and reconstruction work.
If you're dealing with water damage from a roof leak in Bradenton or along Florida's Gulf Coast, call AMPM Restoration at 941-946-7807 for a free inspection and estimate. AMPM provides emergency extraction, moisture mapping, drying, mold-related services, reconstruction support, insurance claim assistance, and financing options, so you can act before hidden moisture turns a ceiling stain into a larger repair.
Frequently asked questions
How quickly can water damage from a roof leak cause mold?
Damp materials can support mold growth within 24 to 48 hours, according to EPA guidance on mold and moisture. Drying should begin immediately, especially when insulation, drywall, or wall cavities are involved.
Should I poke a hole in a bulging ceiling?
No. A bulging ceiling may be unstable, and water may be near electrical components. Keep people away, document the condition from a safe position, and wait for qualified help unless an emergency professional gives you specific instructions.
Can I dry roof-leak damage with household fans?
Fans may help with limited, safe surface moisture, but they can't verify or dry concealed saturation. Professional drying uses moisture meters, thermal imaging, extraction, dehumidification, and material-specific readings.
Does homeowners insurance cover water damage from a roof leak?
Coverage depends on the cause of the loss, policy language, exclusions, timing, and whether the damage resulted from a sudden event or gradual maintenance issue. Document the storm, leak path, damage, and emergency actions, then contact your insurer and restoration provider.
Do I need to replace drywall after a roof leak?
Not always. The decision depends on the extent of saturation, contamination, swelling, delamination, drying results, and whether moisture is trapped behind the surface. A professional assessment can identify materials that can be dried and those that require removal.
Who handles the roof and the interior damage?
A roofer addresses the exterior source, while a restoration contractor handles interior extraction, drying, sanitation, and damaged-material evaluation. AMPM Restoration can assess the interior water damage, document conditions for an insurance claim, and coordinate the restoration process with the appropriate trades.