

AMPM Restoration: Water Damage Drying Equipment
A flooded hallway in Bradenton doesn’t give you much time to think. The carpet feels wet underfoot, the baseboards are starting to swell, and the room already has that heavy, musty Florida humidity that makes everything slower to dry. If the water came from a burst pipe, storm intrusion, or an AC leak, water damage drying equipment is what decides whether the job stays manageable or turns into a bigger structural and mold problem.
In Florida, that urgency isn’t drama, it’s physics. Industry guidance notes that mold can begin within 24 to 48 hours after water exposure, which is why professional crews move fast with extraction, air movement, and dehumidification instead of waiting for surfaces to “air out” on their own. For a broader homeowner checklist after the initial shock, it also helps to review what to do after water damage in a Florida home.
When Water Damage Strikes Your Florida Property
A property manager walks into a condo off the Suncoast and hears that familiar sound, dripping from a ceiling after an upstairs supply line failed. A homeowner in Palmetto may see a warped vanity cabinet after an AC condensation issue, while a Sarasota tenant might come home to a soaked living room after stormwater pushed in under a door. The water source changes, but the response has the same pressure point, get the moisture out before it moves deeper into the structure.
That’s where water damage drying equipment becomes the difference between cleanup and compounding damage. Once water sits in carpet, drywall, framing, or cavities, the materials don’t just stay wet, they begin to weaken, and the hidden spaces behind walls become better conditions for mold. If you need a plumbing reference point for a suspected slab leak, trusted slab leak plumbers can help isolate the source before drying starts.
Why time matters in Florida
Florida humidity makes delay expensive. Air that already feels saturated does a poor job of pulling moisture out of materials, so a room that seems “not that bad” can still stay damp long enough for odors, swelling, and microbial growth to appear. That’s why crews don’t wait for visible damage to spread before setting equipment.
Fraunhofer IBP reported that mains-water damage in Germany averaged about €3,000 per claim in 2020, with roughly 1.1 million claims per year totaling €3.3 billion in losses, and more than €1 billion annually spent on technical drying, plus €200 million to €400 million in electricity costs for drying equipment. Those figures show that drying isn’t a side task, it’s a major cost center in restoration, and efficient drying directly affects downtime and loss severity. The benchmark is useful here because it shows why experienced restorers treat drying as a core process, not an afterthought.
Practical rule: if the water reached carpet, drywall, or wall cavities, assume it needs more than fans and patience.
Structural drying also works as a sequence, not a guess. Water extraction comes first, then targeted drying, then continuous moisture verification. If you try to skip steps, you usually don’t save time, you just hide the problem.
Essential Water Damage Drying Equipment Explained

A drying job works like a small system, not a single machine humming in the corner. Air movers push wet air off surfaces, dehumidifiers remove that moisture from the room, and moisture meters prove whether the materials are drying. The result is coordinated evaporation, vapor removal, and verification.
The machines that do the real work
Air movers are the workhorses for evaporation. Axial units move a high volume of air across open areas, while centrifugal units create more focused pressure for tighter spaces, corners, and under cabinets. The point is not to “blow air around,” the point is to sweep moisture off carpet, drywall, subfloor, and trim so the dehumidifier can capture it.
Dehumidifiers pull that water vapor back out of the air. Standard refrigerant units are common, but restoration crews often use low-grain refrigerant, or LGR, dehumidifiers for stronger moisture removal in warm, humid conditions. Desiccant dehumidifiers use a different drying method and are useful in cooler or more demanding environments, especially when the air needs to get very dry.
Tools that confirm the job is actually drying
Moisture meters tell you what the eye can’t. Pin meters check inside materials, while pinless meters scan surfaces without leaving marks. Thermal imaging cameras help locate cooler, damp zones behind walls or under flooring so technicians can target the next reading.
For wall cavities, floor systems, and concealed spaces, specialty setups matter too. Hoses and vented systems can move dry air into hidden areas without tearing out everything right away, and floor mat systems help on hardwood or similar finishes where the surface needs controlled drying. For a step-by-step look at how crews stage this work, see drying out a flooded home step by step.
Practical takeaway: if the equipment list doesn’t include monitoring tools, the plan is incomplete.
Understanding Psychrometrics and Florida Humidity Challenges

Psychrometrics is just the relationship between air, heat, and moisture, but it explains why one drying setup works in Tampa and another stalls in a cooler, wetter room. In simple terms, warm air can carry more moisture than cold air, and humidity shows how full that air already is. When ambient air is already loaded with moisture, drying gets harder, not easier.
Florida properties make this especially noticeable. A hot, humid summer day can leave a room feeling sticky even after extraction, and that means the air itself resists taking on more water from wet materials. Technicians look at those conditions before choosing equipment, because square footage alone doesn’t tell the whole story.
Why the room environment changes the machine choice
The UK flood-drying guidance notes that refrigerant units work best at about 15–28°C and 60–98% RH, while desiccant units operate over a wider range, roughly 0–25°C and 40–90% RH. That matters because a cooler, damp loss can slow standard refrigerant drying, while a desiccant system can keep producing very dry air in conditions where conventional equipment struggles. The same guidance also notes that pumps are used first to remove standing water before dehumidification begins.
That sequence matters in Florida, too. Bulk water has to come out before vapor can be handled efficiently, otherwise the equipment spends its time fighting a puddle instead of drying the structure. For a deeper look at the way humidity drives indoor mold risk in Florida homes, how humidity causes mold in Florida homes is worth reviewing.
When a crew asks about indoor temperature, outdoor conditions, or whether the AC has been running, they’re not being fussy. They’re matching the drying plan to the psychrometric profile of the loss. That’s the difference between a machine that looks powerful and a setup that dries.
Drying equipment only performs as intended when the air around it can accept the moisture it’s pulling off the structure.
LGR vs Desiccant Dehumidifiers for Different Conditions
The two main dehumidifier choices are LGR and desiccant, and the right answer depends on the conditions in the room. In Florida, LGR units handle a lot of residential losses well because they’re built for warm, humid spaces. Desiccant units make more sense when the environment is cooler, when a cavity is hard to reach, or when the loss needs especially dry output.
| Feature | LGR Dehumidifier | Desiccant Dehumidifier |
|---|---|---|
| Best environment | Warm, humid conditions | Cooler or more demanding conditions |
| Drying style | Refrigerant-based moisture removal | Moisture-absorbing drying method |
| Common use | Most residential water losses | Wall cavities, dense materials, low-temperature jobs |
| Strength | Strong everyday drying performance | Produces very dry air across a wider range |
| Limitation | Can be less effective when conditions are less favorable | Usually a more specialized setup |
LGR is the common field choice because it fits everyday restoration work well. It’s a practical match for many houses and condos across Bradenton, Sarasota, and Tampa Bay, especially when humidity is high and the crew needs a dependable machine that can run for days while the structure comes back down to dry standard.
Where desiccant earns its keep
Desiccant units come into play when the room conditions make refrigerant drying less efficient. They’re useful in colder settings and in jobs where very dry air helps with hidden spaces or difficult materials. If the loss includes wall cavities or dense assemblies, a desiccant setup can keep momentum when standard refrigerant equipment starts to level off.
A restoration team also looks at the whole structure, not just the machine label. The structural drying methods used on a job determine whether dehumidification should be paired with cavity drying, floor drying, or targeted airflow. That combination is usually what saves material, not any single box on its own.
Sizing and Placement for Effective Drying Systems

Drying works when the setup matches the room. A big living room with soaked carpet needs a different layout than a narrow bathroom with tile and wet baseboards, and wall cavities need a different approach again. The most common mistake is treating every loss like a fan rental problem.
The layout matters as much as the machine count
Professional guidance on restoration equipment points to roughly 7 to 8 air movers per XL dehumidifier, or 10 air movers per large dehumidifier, and other professional setups commonly show air movers around 2,000 to 3,000 CFM with daisy-chain electrical design for multi-unit deployment. Industry catalogs also show commercial dehumidifiers in the 125 to 203 pints per day range, with airflow around 235 to 540 CFM, operating ranges from 33°F to 100°F, and current draws around 7.3 to 8 amps. Those figures matter because the drying system has to balance airflow, moisture removal, and circuit load.
Placement is not random. Air movers should be aimed across the wet surface so they strip moisture off material instead of blasting empty space, and dehumidifiers belong where they can pull from the room efficiently without short-cycling. For a practical look at how pros set up air movement on site, air movers for water damage fits this topic well.
Common Florida scenarios
A flooded living room usually calls for concentrated airflow across carpet and baseboards, plus dehumidification in the same space. A wet bathroom with tile may need smaller, tighter airflow patterns, especially if water moved under cabinets or into grout lines. If walls are wet, crews often pair air movement with cavity-focused drying so the hidden moisture doesn’t sit behind finished surfaces.
Field note: if the equipment is all in one corner, the drying plan is probably weak.
The easiest way to judge the setup is simple. Ask what surfaces are wet, how the air will move across them, and how the team will verify the materials are drying each day. If they can’t answer that clearly, the plan probably isn’t sized correctly.
Why Household Fans Fall Short for Water Damage
A box fan feels like it should help, and on a hot day it does make the room feel less stagnant. That’s not the same thing as drying structural materials. Household fans move a broad sheet of air, but they don’t create the focused airflow needed to strip moisture from carpet, drywall, or framing.
Professional air movers are built differently. They’re designed to push concentrated air at the wet surface so evaporation happens faster and more consistently, especially when the airflow angle is set correctly. That’s why a fan in the middle of the room can leave a pad wet underneath while a properly placed air mover dries the same area more effectively.
Fans move air, they don’t finish the drying job
Even professional air movement isn’t enough by itself. Once moisture leaves the material, it has to go somewhere, and that’s the dehumidifier’s role. Without moisture removal, the room just stays damp and the water can settle back into the structure.
That’s where DIY setups often go wrong. A homeowner may see the surface dry, shut the equipment off, and later find hidden moisture, lingering odor, or mold in the materials that never got enough airflow. In Florida, that risk is worse because the air already carries a heavy moisture load.
Household fans can help with comfort or mild surface drying, but they’re not a substitute for restoration gear. If the loss reached porous materials, wall cavities, or subflooring, the equipment choice has to match the job, not the appliance aisle.
Rental vs Professional Restoration Services
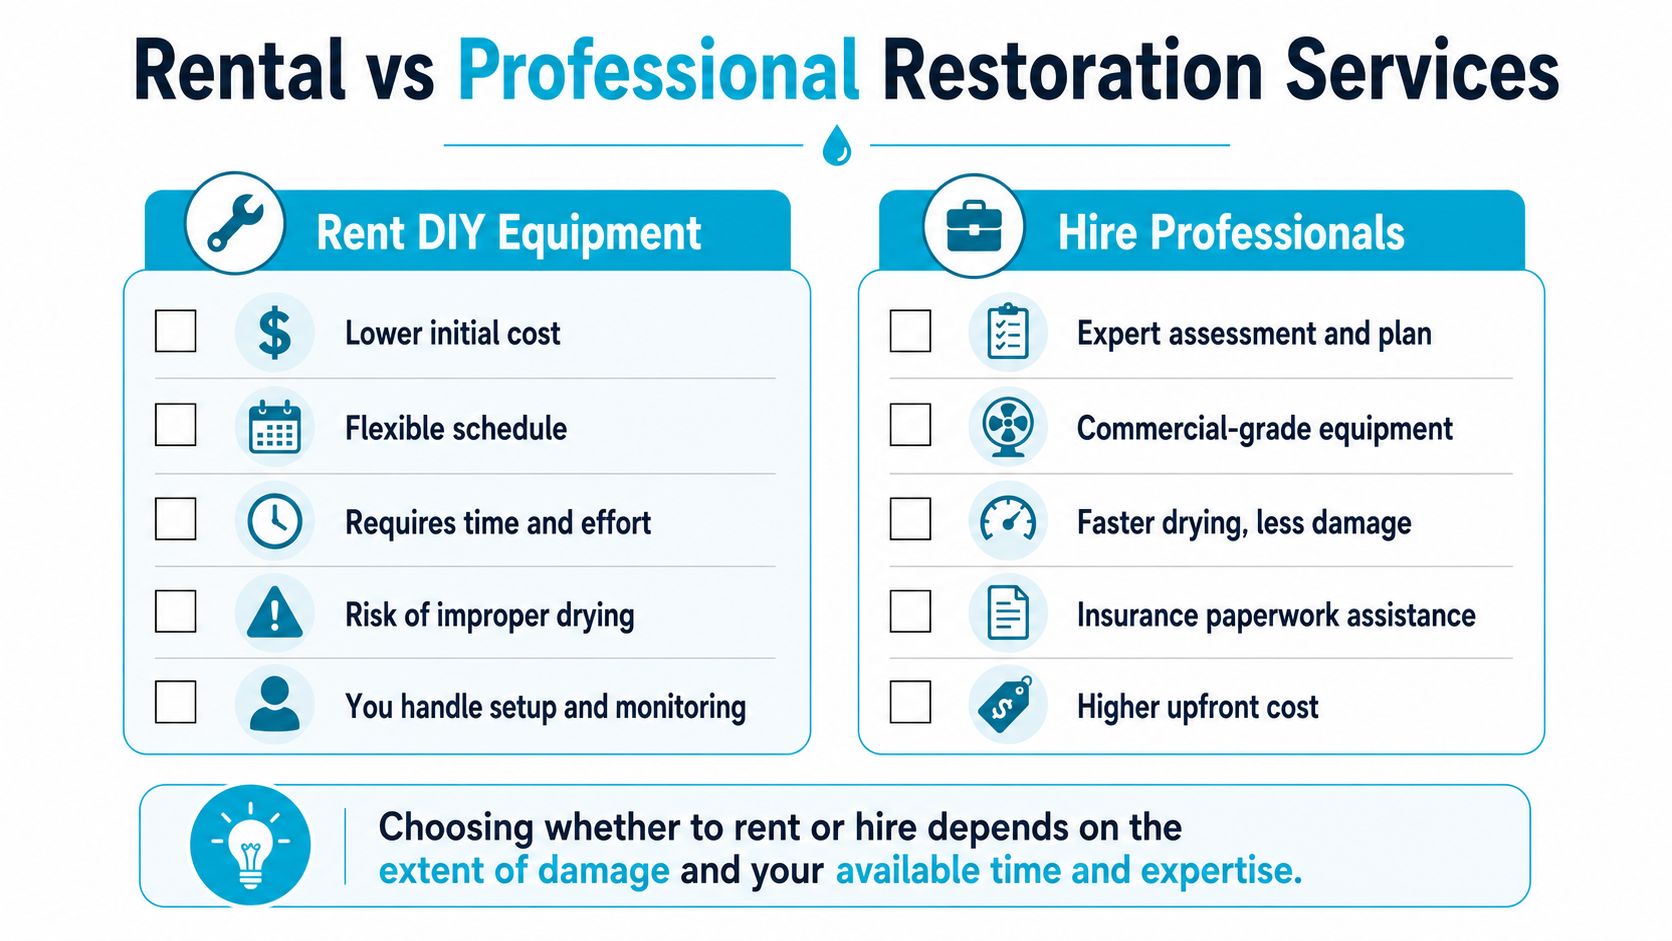
Some water losses are small enough that rental gear can make sense. A clean-water issue caught immediately in one room, with no hidden cavities and no signs of contamination, may be manageable if the owner is disciplined about monitoring the setup. But once the damage spreads, or the source isn’t clean, the math changes quickly.
What rental gets right, and what it misses
Renting can lower the upfront hit and give you flexibility if the loss is limited. The trade-off is time, effort, and the risk that the structure doesn’t dry evenly. A rented dehumidifier and a few fans also won’t tell you whether the wall cavity or subfloor is still holding water.
Professional restoration adds equipment, documentation, and accountability. The crew can assess the moisture pattern, set the layout, and keep a record for insurance files. If you want a related look at contractor coverage and risk management, the contractor insurance guide from My Policy Quote is a useful background read.
When a professional is the safer call
If the water is gray or black, if multiple rooms are involved, or if moisture has reached hidden spaces, DIY drying usually gets expensive in a different way. The hidden cost is incomplete drying, and incomplete drying often becomes mold remediation. That’s especially frustrating in Florida, where delays happen fast and humidity doesn’t help you recover.
AMPM Restoration Services is one option for that kind of response, since the company provides drying, dehumidification, and restoration work as part of a broader water damage process. A property manager juggling tenants, claims, and repairs often needs more than equipment, they need a team that can document the job properly and keep the process moving.
Decision point: if you can’t confirm the water source, the contamination level, and the hidden moisture, rent with caution or call a professional.
Your Water Damage Response Checklist
The first move is simple, stop the water source if it’s safe to do so. After that, check whether the water is clean or potentially contaminated, then look at how far it spread and whether it reached walls, baseboards, or floors that trap moisture. If you’re unsure, that uncertainty alone is a sign to get help.
A quick checklist keeps the stress down:
- Confirm the source: burst pipe, supply line, storm entry, or appliance leak.
- Identify the water type: clean, gray, or worse.
- Check hidden areas: under cabinets, behind baseboards, and into wall cavities.
- Document everything: photos, video, and notes before moving equipment or furniture.
- Ask about monitoring: a real drying plan includes moisture readings, not just running machines.
- Verify insurance support: ask whether the company helps with claim documentation.
The right restoration team should be able to explain the equipment choice, the expected drying sequence, and how they’ll know the materials are dry. If they can’t answer those questions clearly, keep looking. For Florida homes and commercial spaces, speed matters, but correct drying matters more.
Call 941-946-7807 for a free inspection and estimate from AMPM Restoration, and ask about insurance claim assistance and financing options if the loss is stretching your budget.
AMPM Restoration Services handles water damage drying equipment setup, moisture removal, and full restoration across Florida’s Suncoast, including Bradenton, Sarasota, and Tampa Bay. If your property needs fast drying, documentation for insurance, and a clear plan for what comes next, visit AMPM Restoration Services and get help before hidden moisture turns into a bigger repair.