


You open the cabinet under your Bradenton kitchen sink and catch a musty smell. There are dark specks on the cabinet floor, and the toe-kick feels soft, even though the door still looks fine. Mold in cabinets calls for a material-by-material decision, not just a stronger cleaner. The response depends on where the water went, how long it stayed, and which components can still be cleaned and dried.
Why Mold in Cabinets Shows Up Fast
A slow supply-line drip can wet the sink base without leaving a puddle on the kitchen floor. Bottles hide the stain, the closed door limits drying, and water reaches unfinished edges before anyone notices. By the time you smell something, the finished face and the cabinet's hidden components may be in very different condition.
Cabinets combine porous organic materials, including solid wood, plywood, particleboard, paper-based laminates, and wood by-products. EPA guidance identifies wood and paper as materials that can support mold when moisture and oxygen are present. Interiors, undersides, toe-kicks, joints, and plumbing cutouts therefore deserve attention after a leak.

The leak clock matters more than cabinet age
A recently installed cabinet isn't protected if its absorbent core stays wet. An older solid-wood door may remain salvageable when its finish is intact and the water is removed promptly.
EPA advises drying wet materials within 24–48 hours, and FEMA's mold guidance notes that colonies can begin growing on damp surfaces within that same window. That's a response window, not a guarantee that waiting until its end is safe.
In Gulf Coast kitchens, check these common moisture sources:
- Under-sink traps and fittings: Small drips can disappear into stored items or unfinished seams.
- Dishwasher and ice-maker lines: Water may travel behind adjoining cabinets.
- Storm humidity: Damp indoor air can make enclosed materials harder to dry.
- Closed, wet compartments: A dry kitchen doesn't prove the sink base has dried.
The CDC describes possible mold-related symptoms including stuffy nose, sore throat, coughing, wheezing, burning eyes, and skin rash, with stronger reactions possible in people with asthma or mold allergies. That warrants a calm, prompt response, not a diagnosis based on a stain.
Practical rule: Judge the wet cabinet by its least visible absorbent parts, not its best-looking door.
The useful question is which individual parts remain sound enough to save.
Which Cabinet Parts You Can Save
Cabinet parts to clean or replace
| Cabinet part | How it holds water | Usual call | Do not rely on |
|---|---|---|---|
| Sealed solid-wood door or face | Finished, low absorption if coating is intact | Clean with detergent and water after prompt drying, if sound | Paint or caulk over stains |
| Plywood box with tight veneer | Edges and plies can wick water | Save only if not soft and moisture returns to a dry baseline | A dry-looking veneer alone |
| Particleboard shelf | Swells and traps water in the core | Replace if swollen, soft, or still musty after drying | Surface wiping |
| MDF or fiberboard | Very absorbent and hard to dry inside | Replace when the core was wet | Bleach or a new coat of paint |
| Laminate with open seams | Water sits behind the skin | Replace the panel if seams failed or it bubbled | Gluing loose laminate down |
| Unfinished back panel | Thin and against the wall | Replace if water-stained, soft, or odorous | Cleaning only the room side |
| Toe-kick | Often particleboard and out of sight | Inspect; replace if wet or moldy | Assuming the kick is cosmetic only |
| Metal or glass hardware | Nonporous | Clean and dry | Soaking porous wood around the screws |
The homeowner question isn't whether mold can be wiped off. It's which parts can be cleaned without leaving wet or contaminated material behind. The EPA's mold and moisture guidance distinguishes cleanable hard surfaces from absorbent materials that may require replacement and says drying within 24–48 hours prevents growth in most cases.
A recent splash isn't chronic dampness
Say a supply connection leaks while you're using the sink, and you catch it immediately. The sealed door gets splashed, but its edges stay firm, its finish remains intact, and it dries completely. Cleaning and retaining that door may be reasonable.
Now consider a sink base that's smelled musty for weeks. The door looks unchanged, but a particleboard shelf has a raised edge and the back panel feels soft. Those parts shouldn't receive the same decision just because they belong to the same cabinet.
Plywood falls between these examples. Tight veneers and a firm core support a possible save, but separated layers, softness, or persistent moisture argue against it. Don't press loose plies together and assume adhesive will solve water damage.
Our guide to water-damaged kitchen cabinets explains the distinction between repairing a finish and replacing a damaged cabinet component.
Document before separating materials
Photograph the stains, seams, underside, and surrounding floor. Note when you first noticed the leak and whether there was an earlier odor or repair. A reliable timeline helps distinguish a recent event from a recurring moisture problem.
Check concealed edges and the adjoining wall without tearing into suspect materials. Gulf Coast humidity and condensation can cause recurring dampness without a major flood, so an attractive door over a wet cabinet back isn't a successful save.
- Keep candidates: Sound, cleanable components that can be fully accessed and dried.
- Set replacement candidates aside: Swollen cores, failed laminate, soft backs, and damaged toe-kicks.
- Include adjoining materials: Heavily infested drywall or insulation can't be ignored because it's behind the cabinet.
During mold removal, we remove and dispose of materials too damaged to clean, including heavily infested drywall or insulation. Don't paint over suspect surfaces or leave ruined material inside an otherwise repaired assembly.
How to Take Safe First Steps
Use this routine only for a recent, contained spot on a sound finished or hard surface after the water source is stopped. Skip homeowner cleanup if a component needs replacement, the extent is uncertain, or anyone in the home has asthma or another condition that makes exposure a concern.
Before starting, confirm the affected area is below Florida's regulated remediation threshold described under the licensed-pro criteria. If hidden growth prevents you from establishing the extent, don't assume the visible patch is the whole job.
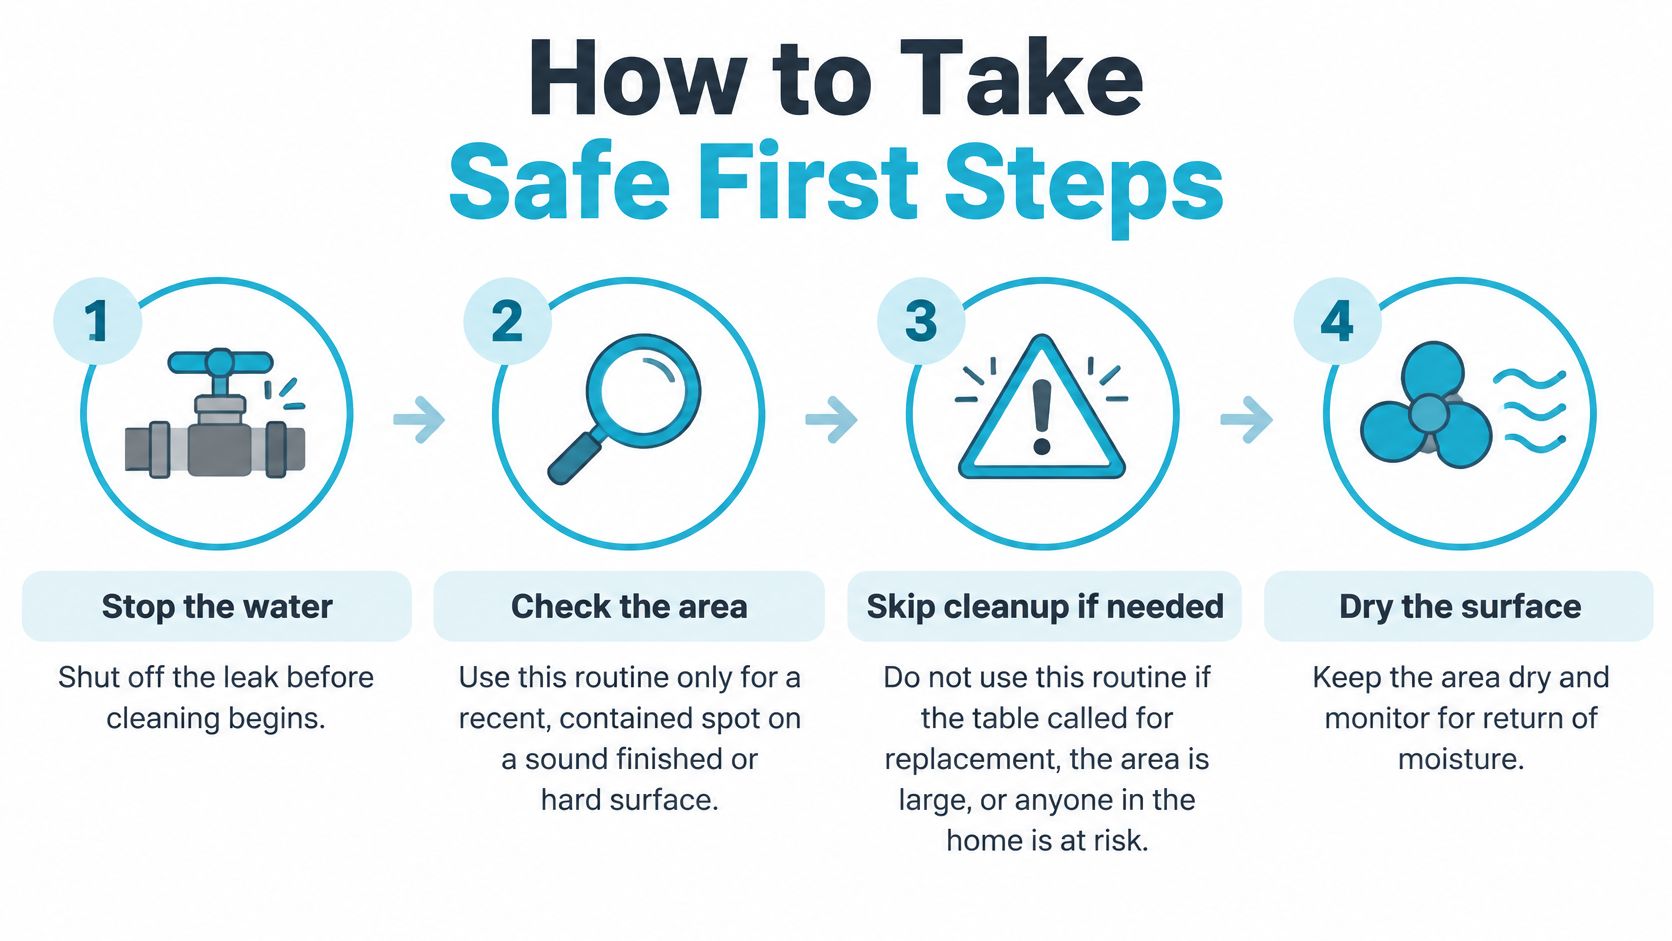
Follow a moisture-first cleanup routine
Protect people before disturbing the spot. Keep children, pets, and people with asthma or mold allergies out of the room. Wear gloves, goggles, and an N95 respirator, and don't use an ordinary household vacuum on mold. Its exhaust can redistribute particles rather than contain them.
Stop and verify the water source. Check the supply connection, trap, dishwasher hose, ice-maker line, and condensation-prone plumbing. Look at the adjoining wall and floor, not just the cabinet box. If water is near electrical equipment or wiring, stay clear and arrange appropriate help before proceeding.
Expose accessible surfaces carefully. Remove stored contents without shaking contaminated items through the kitchen. Open doors and drawers, and access removable toe-kicks only when doing so won't disturb hidden growth or damaged material. A clear shelf doesn't help if a saturated back remains enclosed.
Remove standing water and establish controlled drying. Use suitable water extraction, dehumidification, and gentle air movement after checking for contamination. Don't aim a fan directly at mold or blow air from the affected cabinet into occupied rooms. The EPA's mold prevention guidance recommends drying wet materials within 24–48 hours and keeping indoor relative humidity below 60%, ideally 30–50%.
Clean sound finished wood with mild detergent and clean water. Use a damp cloth rather than saturating seams, then dry the surface completely. Don't paint, caulk, or seal moldy material first, and don't treat bleach as a replacement for physically removing contamination. Our guidance on treating mold on wood helps distinguish surface cleaning from deeper material damage.
Measure drying instead of judging by appearance. Use a moisture meter appropriate for the material and record readings at the exterior, interior, adjoining wall, flooring, and plumbing penetrations. Compare with unaffected, similar material and the instrument's normal dry baseline. Keep drying until readings stabilize appropriately, rather than stopping when the cabinet face looks dry.
Know when the routine has failed
A moisture meter isn't a mold detector, and a single reading doesn't establish that the whole assembly is dry. Different materials and meter settings produce different readings, so record where and how you measured.
A dry door over wet MDF, particleboard, or a concealed wall cavity is still an unresolved water-damage problem.
Stop if readings stay high, materials swell, odor persists, or accessing the wet area requires demolition. Mold can begin growing quickly after water exposure, so prompt drying matters more than a later cosmetic wipe. If the work extends beyond a small, accessible hard-surface patch, use professional assessment rather than intensifying your cleaning chemicals.
When Cabinet Mold Needs a Licensed Pro
Under Florida Statute 468.8411, mold remediation includes removing, cleaning, sanitizing, demolishing, or otherwise treating mold or mold-contaminated matter greater than 10 square feet, including preventive activities. The statute also requires work needing a Chapter 489 construction license to be performed by a properly licensed person or otherwise comply with that chapter.
That definition concerns the affected project, not merely the spot visible through an open door. Growth behind the cabinet, across shelving, or into connected drywall can change the scope. A smaller visible area also doesn't automatically make homeowner cleanup appropriate.
When to stop and call a remediator
| Situation | Homeowner limit | Next move |
|---|---|---|
| Recent spot on a sound finished surface, source stopped, below the statutory area threshold | Detergent cleaning and complete, prompt drying only | Recheck moisture and odor after drying |
| Visible mold plus hidden growth exceeding the statutory threshold | Don't keep scraping or demolishing | Licensed mold remediation |
| Wet wall, toe-kick cavity, or cabinet back you can't dry | Don't seal it shut | Inspect concealed dampness and remove ruined material |
| Swollen particleboard or failed laminate | Don't paint or glue it | Replace the component; get help if connected areas are involved |
| Growth returns after a thorough clean | Stop repeat wiping | Find the leak, ventilation, or humidity cause |
| Asthma, mold allergy, rental, or commercial kitchen | Limit disturbance and coordinate access | Professional assessment and appropriate containment |
| Sewage, storm flood, or unknown water in the box | Don't treat it as a soap-and-water job | Emergency restoration and remediation |

What controlled remediation involves
Our remediation process follows a defined sequence:
- Inspection: We use detection tools to identify affected areas and moisture sources, including concealed hotspots.
- Containment: We isolate the work area with physical barriers and negative air pressure systems to help prevent spread.
- Removal: We use specialized equipment to clean salvageable surfaces and remove materials that can't be cleaned.
- Prevention: We address moisture issues and apply antimicrobial treatment as part of the work, not as a substitute for removal and drying.
Our certified technicians perform mold removal, and we hold a Mold Remediation License and certification MRSR4840. In Suncoast conditions, controlled dehumidification and access to concealed cavities matter as much as cleaning the exposed shelf.
For a closer decision guide, review when to remove mold yourself or hire a professional. Rentals and commercial kitchens also require coordination so occupants and staff don't enter an active work area.
What completion should look like
The EPA's cleanup completion criteria call for no visible mold, no mold-damaged materials left in place, no moldy odor, and a return check showing no renewed water damage or growth. A single air sample doesn't replace those conditions.
Document the moisture readings, removed components, cleaning, and final observations. Don't accept fragrance, fresh paint, or a reassuring air result as proof that an inaccessible wet cabinet back has been corrected.
How to Keep Cabinets from Growing Mold Again
A cabinet is a stack of different materials, and each one handles water differently. A sealed laminate door sheds a splash. Raw particleboard wicks the same splash into its core and swells. Prevention works when it matches the material, so the goal is to keep every surface dry on its own terms.
Keep indoor humidity at the target established earlier for safe cleanup, and run air-conditioning or a dehumidifier to hold it when outdoor air stays wet. A hygrometer tells you more than comfort does: a room can feel cool while enclosed cabinet materials slowly take on moisture, particularly during mild stretches when the air conditioner cycles less often.

Build prevention around everyday moisture
- Repair the drip and check what it soaked: A towel under a leaking trap hides the evidence while the cabinet keeps getting wet. Fix the connection, then check the shelf and wall behind it, because swollen or crumbly particleboard won't dry back to full strength.
- Ventilate bathrooms and cooking areas: Use exhaust ventilation that discharges outdoors. Run the bath fan during showers and keep it going until lingering moisture clears.
- Leave clean, damp compartments open temporarily: After a minor spill or condensation event, let accessible surfaces dry before closing the cabinet. Don't use this approach to ventilate an actively moldy cabinet into the house.
- Keep wet storage out: Hang damp rags and towels elsewhere. Check cleaner bottles for leaking caps, and avoid packing the sink base so tightly that you can't inspect it.
- Watch plumbing penetrations: Look where pipes pass through the back or floor. Water follows a pipe run and can wet the wall interface before the shelf shows a broad stain.
Inspect the hidden edges
After a storm, open the sink base and check the cabinet back first. Wind-driven rain and brief leaks often show up on that panel before anywhere else, because it sits against a wall or cavity with less airflow. During seasonal maintenance, sweep a flashlight across the toe-kick, sink wall, underside of each shelf, and the back panel, looking for fresh discoloration, lifting laminate, or softness that stored items would otherwise hide.
If the cabinet has already been remediated, keep the completion photographs and moisture records, and log new readings after any fresh leak so you can compare the two events. Don't cover a questionable area with shelf liner before you've confirmed that it's dry and sound. If growth returns after cleaning and verified drying, use those readings to trace the moisture path. A patch that keeps creeping toward the 10-square-foot threshold where licensed remediation applies is a moisture problem that hasn't been found yet.
During mold work, we address the causes behind the growth, which can include repairing leaks, improving ventilation, or adjusting humidity levels, and we share guidance on preventing mold and maintaining a healthy home atmosphere.
These habits apply beyond the sink base. Bathroom vanities, laundry storage, exterior-wall closets, and cabinets near appliances deserve the same attention to leaks and drying. For a broader maintenance approach, use our guidance on stopping mold from coming back.
Call for a Free Cabinet Mold Inspection
A dark stain does not automatically mean the whole cabinet is lost, and an intact door does not mean the box behind it is dry. Because a cabinet is mixed materials, the right call depends on which parts are affected: a finished door front and a swollen particleboard shelf are very different situations. An inspection separates them before you pay for work you did not need, or skip work you did.
AMPM Restoration Services is a 24/7 emergency restoration company serving Florida's Suncoast, including Bradenton, Sarasota, Palmetto, St. Petersburg, and the greater Tampa Bay area. Our free mold damage inspection establishes the affected scope. Assessment includes moisture checks at the cabinet, adjoining wall, and plumbing penetrations, with attention to accessible toe-kicks, cabinet backs, and concealed-growth indicators. Areas requiring additional access should be identified rather than assumed clear.
What affects the scope and estimate
The written scope should distinguish salvageable components from replacements and explain access limitations. Cost drivers include affected area, the components requiring removal, cavity access, containment needs, and whether the water source was clean or contaminated. A cabinet-only repair and a project involving the wall behind it aren't equivalent jobs.
Scope also affects who can legally do the work. Once growth crosses the size threshold where Florida expects licensed remediation rather than a handyman wipe-down, the estimate should reflect containment, certified technicians, and a licensed mold remediator on the job.
We provide mold inspection, testing, and remediation alongside water damage restoration, fire and smoke damage restoration, storm and flood cleanup, and full reconstruction. We also help coordinate insurance claims, and financing options are available.
Cabinet mold FAQs
Does insurance cover cabinet mold after a sudden leak?
Coverage depends on your policy, endorsements, exclusions, and the cause of damage. Sudden water damage and long-term neglected dampness may be treated differently, so document the discovery and repairs without assuming coverage.
Will we need to move out during remediation?
Not every project requires leaving the home. The decision depends on containment, access, affected rooms, and occupant health concerns; establish those arrangements before work starts.
Can a dehumidifier alone fix cabinet mold?
No. It can support drying, but it doesn't remove existing contamination or restore a swollen cabinet core.
How long does the free inspection take?
Timing depends on cabinet access, the suspected extent, and whether adjoining areas need assessment. When scheduling, describe the leak, odor, and visible damage so the visit can be planned appropriately.
Should the cabinet door stay closed until the visit?
If you suspect established growth, avoid repeated opening, brushing, or directing fans into it. Stop active water if safe, keep people away, and request instructions for your specific situation.
Can a Suncoast crew come the same day, including at night?
We accept emergency calls around the clock, including nights. Call to confirm dispatch availability and access details rather than assuming a particular arrival time.
AMPM Restoration Services offers inspection, moisture-source assessment, and remediation for mold in cabinets, with insurance claim assistance and financing options available. Call 941-946-7807 for a free inspection and estimate, or visit AMPM Restoration Services to arrange help for your Suncoast property.