

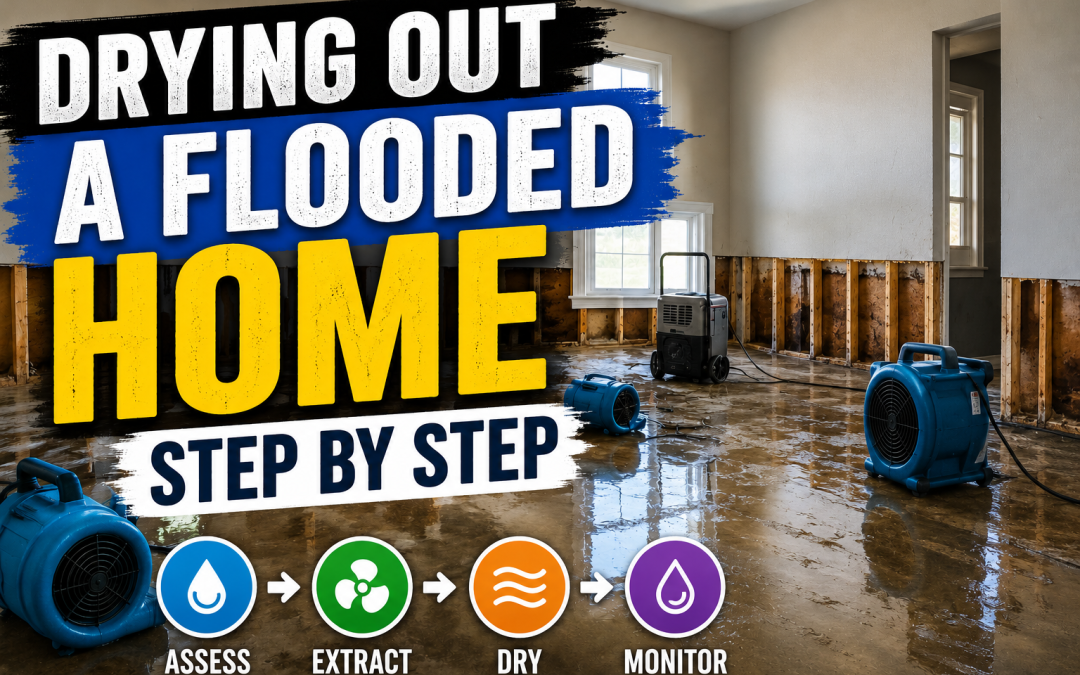
When you’re standing in a wet hallway, hearing fans in your head before you’ve even found one, the hardest part is knowing what to do first. Drying out a flooded home step by step isn’t just about removing water you can see. In Florida, the main problem is often the moisture that stays behind in drywall, subfloors, wall cavities, and crawlspaces after the floor looks “fine.”
The first decisions you make affect safety, mold risk, structural damage, and your insurance claim. A fast, organized response gives you the best chance of drying the property correctly before hidden moisture turns a water loss into a mold and reconstruction job.
Your First Hour Safety and Initial Assessment
The first hour is about control. Don’t start dragging out furniture or tearing up flooring until you know the space is safe to enter and you’ve preserved the evidence your insurance carrier may ask for later.
Shut off hazards before you touch anything
If water has reached outlets, appliances, or baseboards, electric shock is the first risk. If you can reach the breaker panel without stepping into standing water, shut off power to the affected area. If you can’t, stay out and wait for qualified help.
Then stop the source if it’s internal. A burst supply line, failed appliance hose, or overflowing fixture keeps feeding the loss until the main water supply is shut down. If the flooding came from outside, your focus shifts from stopping the source to protecting people, avoiding contaminated areas, and documenting the damage.
Practical rule: If you don’t know whether the water is clean or contaminated, treat it as contaminated until proven otherwise.
Look at ceilings, walls, and floors before walking deeper into the house. Sagging drywall, swollen baseboards, buckled flooring, and doors that suddenly won’t close can all point to movement, swelling, or trapped water behind finishes. If the house took on heavy floodwater, don’t assume the structure is stable just because it’s still standing.
Document everything before cleanup changes the scene
Take wide photos first. Then take close-ups of water lines, damaged cabinets, warped flooring, soaked furniture, appliances, electronics, and any visible staining. Video helps capture the full condition of the property before items are moved.
Use one notepad or phone note for a running room-by-room log. List what was affected, when you found it, and what emergency steps you took. If you need help organizing belongings and recording losses, this guide to securing belongings with inventory is a practical way to start.
A simple sequence works well here:
- Start outside the room: Photograph hallways, doors, and entry points.
- Move inward: Capture floors, walls, cabinets, and contents.
- Record water lines: Those marks help establish the extent of exposure.
- Save damaged samples if needed: Flooring pieces, padding, or drywall cutouts can help support the claim.
For homeowners who need a quick local reference after a flood, AMPM also has a post-flood emergency action guide that walks through the first response priorities.
Decide whether you should stay or leave
Leave the home if the water may be sewage-backed, if electrical systems were affected, if there’s visible structural movement, or if vulnerable family members could be exposed to contaminated air and surfaces. That includes children, older adults, and anyone with respiratory issues.
If the water is limited and the home remains safe, isolate the wet area and keep unnecessary foot traffic out. Flood cleanup gets harder when contaminated water or soaked debris is tracked into dry rooms.
Water Extraction and Removing Ruined Materials
Get the standing water out before you start sorting belongings or pulling equipment. In Florida, warm air and high humidity slow natural evaporation, so every extra hour of water sitting on the floor gives it more time to wick into base plates, cabinets, drywall, and wall cavities.

Remove bulk water first
Match the tool to the amount of water. A wet/dry vacuum can pick up shallow surface water in a small room. Once water is deeper, spread across multiple rooms, or keeps seeping out from under flooring, homeowners usually hit the limits of DIY equipment fast. A submersible pump or truck-mounted extraction setup removes far more water, far faster.
That speed matters because extraction does more than clear the floor. It reduces how much moisture gets driven into wood framing, under cabinets, and behind baseboards where you cannot see it. In Florida homes, hidden moisture is often the problem that turns a manageable cleanup into warped materials, trapped odor, and mold growth inside the walls a few days later.
If water is still actively spreading or you need stronger extraction equipment right away, AMPM’s emergency water removal and flooding response service shows what a rapid-response setup involves.
Remove materials that will not dry cleanly
Homeowners often try to save everything at first. I understand why. But some materials are poor candidates for recovery, and waiting too long to remove them usually increases the tear-out later.
Pay close attention to these:
- Carpet padding: It holds water deep inside and dries unevenly.
- Wet insulation: It traps moisture in wall cavities and loses its insulating value.
- Baseboards and trim: Swelling and trapped moisture behind them can keep drywall wet.
- Saturated drywall: Soft, crumbly, stained, or heavily soaked drywall usually needs to be cut out.
- Particleboard vanities, cabinets, and furniture: These swell, delaminate, and lose strength quickly after flooding.
Porous materials exposed to contaminated water should be treated even more cautiously. Carpet, pad, insulation, upholstered furniture, mattresses, and low drywall are often discarded because cleaning the surface does not remove what was absorbed inside.
A simple field rule helps here. If a material is swollen, soft, separating, foul-smelling, or still wet after extraction, stop trying to save it with airflow alone.
Separate salvage from debris fast
Set up a dry staging area and sort contents into three groups: save, evaluate, discard. That keeps wet debris from spreading contamination back into areas you are trying to protect.
Solid wood furniture, metal items, and some hard goods can often be cleaned and dried if they are handled early. Cardboard boxes, laminate furniture, cheap pressed-wood pieces, and waterlogged fabric contents are much less forgiving. In Florida humidity, those items can stay damp longer than they look, which is why homeowners often miss the start of mold growth inside stacked debris piles or closed rooms.
Keep discarded materials moving out of the house. Piles of soaked drywall, pad, and cabinetry block extraction paths, restrict airflow, and hold moisture in the work area. If debris volume exceeds what curbside pickup can handle, some homeowners use local junk removal options to clear non-salvageable material and keep access open for the drying work.
Setting Up for Effective Structural Drying
Florida homes do not dry just because the standing water is gone. After extraction, the job shifts to controlling evaporation inside a house that is already surrounded by humid air. If that moisture is not managed correctly, it lingers in subfloors, wall cavities, base plates, and cabinets long after surfaces start to look normal.

Build a controlled drying environment
Effective structural drying depends on three things working together. Directed airflow, dehumidification, and steady temperature control. If one is missing, drying slows down and moisture can migrate deeper into materials instead of leaving them.
Air movers should be aimed across wet surfaces, not into the middle of the room. That air movement strips away the layer of damp air sitting on flooring, drywall, and framing so evaporation can continue. Dehumidifiers then remove the released moisture from the air before those materials absorb it again. Temperature matters too. Warm, stable conditions usually help, but aggressive heat without enough dehumidification can warp finishes, stress hardwood, and push moisture into hidden cavities.
A practical setup looks like this:
| Equipment | How it’s used | Why it matters |
|---|---|---|
| Air movers | Position them to move air across wet floors, walls, and exposed structural materials | Keeps evaporation active at the material surface |
| Commercial dehumidifiers | Size and place them based on the affected area and the amount of moisture being released | Pulls water vapor out of the air so it does not cycle back into the structure |
| Temperature control | Maintain a consistent indoor drying range instead of dropping the thermostat too low | Supports evaporation and helps equipment work more efficiently |
Household airflow is rarely enough in Florida
Box fans and ceiling fans can make a room feel drier than it is. They do little for a damp wall cavity, a wet sill plate, or moisture trapped under flooring. In Florida, an open window can make matters worse because outdoor air often carries so much humidity that the house keeps taking on moisture while you are trying to dry it.
That is why closed doors, packed closets, vanity bases, and cabinet interiors cause trouble. They hold damp air in place. Open every affected compartment where water traveled, and keep the drying system running continuously. Shutting equipment off overnight often gives moisture time to rebound into materials that were finally starting to release it.
Watch the hidden zones
The areas homeowners miss are usually the ones that create the expensive repairs later. Toe-kick voids under cabinets, insulation behind drywall, layered subfloors, and crawl spaces can stay wet while the main room feels comfortable.
If floodwater reached low framing or traveled under the house, crawl space moisture needs special attention. This guide on how to fix moisture in crawl space helps explain why damp soil, trapped humidity, and limited airflow keep structural elements wet longer than expected.
What professional drying changes
A professional crew adjusts the setup as the building changes. Early in the job, the goal is to move a large moisture load out fast. Later, equipment placement often shifts because the remaining moisture is harder to reach and slower to release. Drywall, framing lumber, tile assemblies, and wood flooring all dry at different rates.
That process matters if you want to avoid hidden structural damage. AMPM's structural drying approach for protecting a home's integrity outlines the same core field methods restoration contractors use every day. Controlled airflow, dehumidification, heat when appropriate, and adjustments based on actual moisture conditions instead of appearance.
Mistakes that keep a house wet longer
A few setup errors show up on almost every failed DIY drying job:
- Fans pointed into open space: Air needs to skim wet materials.
- Windows opened during humid weather: Outdoor moisture can overpower your drying effort.
- Cabinets, closets, and vanities left closed: Damp air gets trapped in the places mold likes best.
- Equipment cycled on and off: Drying works best as a continuous process.
- Thermostat set too cold: Cooler air can slow evaporation from wet materials.
The goal is simple. Keep moisture leaving the structure faster than the Florida air can feed it back in. If that balance is not controlled, the house can look dry while moisture remains inside the walls and under the floors.
Tracking Progress and Preventing Mold Growth
A wall can feel dry and still be wet inside. That's the most expensive misunderstanding in flood cleanup. Visual dryness isn't the standard. Measured dryness is.
Use tools, not guesswork
According to the EPA, mold can begin growing within 24 to 48 hours of water exposure, and professional restorers use moisture meters to bring drywall down from a wet 30 to 40% moisture content to a safer level of under 15% before calling it dry (EPA-linked drying and moisture target guidance).

A moisture meter tells you what's happening inside drywall, trim, studs, and subfloors. A hygrometer tells you what the air is doing. You need both if you want to know whether drying is progressing.
The target is controlled humidity, not just elapsed time
Xpert Restoration's technical guidance on structural drying describes a moisture-mapping approach that tracks wet materials and drying goals over time. It notes that professional teams often target 40 to 50% relative humidity indoors, and that keeping RH below 50% for 72 hours reduces the likelihood of mold colonization compared with rooms held above 60% RH. That same guidance also notes that hidden moisture can remain in materials and that visual checks alone are unreliable (moisture mapping and drying targets).
That matters even more in Florida because moisture doesn't have to be visible to create trouble. Wall cavities, subfloors, and framing members can stay damp while the room smells only slightly “musty” or seems normal during the day.
A good monitoring routine includes:
- Daily meter checks: Test the same wall sections, flooring zones, and trim areas.
- Humidity logging: Watch the room, not just the equipment.
- Hidden area checks: Behind vanities, inside closets, under stairs, and around exterior walls.
- Material comparison: Compare affected areas to unaffected dry materials nearby when possible.
Dry to the meter, not to the touch.
Don't ignore crawlspaces and low structure
Many DIY jobs fail in these areas without notice. Interior rooms may improve while crawlspaces, sill plates, lower wall cavities, and foundation-adjacent framing stay damp. If your home has a crawlspace or low framing, moisture control below the living area matters as much as what's happening in the room above it.
If you're dealing with damp framing or lingering moisture under the home, this resource on how to fix moisture in crawl space gives useful context on why substructure drying can't be treated as an afterthought.
For mold-specific prevention steps after the initial dry-down, AMPM has a local guide to preventing mold after a flood that focuses on what to watch for once standing water is gone.
The Florida Factor DIY Limits and Professional Help
Drying advice that works in a dry inland climate often falls apart on the Gulf Coast. In Bradenton, Sarasota, St. Petersburg, and nearby communities, the air outside can work against your cleanup all day.
For Florida's Suncoast, ambient humidity is often 70 to 80%, and relative humidity above 60% actively stimulates mold growth. The same guidance notes that a flood that might dry in 4 to 5 days in a dry climate can take 7 to 10 days or longer on a humid Florida day without professional intervention (Florida humidity and flood drying conditions).
What DIY can handle and where it stops
There are situations where a homeowner can start the job responsibly. A small clean-water loss caught early, limited to a hard surface area, may allow for immediate extraction, removal of small affected materials, and controlled drying.
DIY usually stops being reasonable when any of these apply:
| Situation | Why DIY gets risky |
|---|---|
| Water affected multiple rooms | Moisture spreads beyond what you can see |
| Drywall, insulation, or cabinets are saturated | Hidden cavities need controlled drying and likely selective demolition |
| The home has a crawlspace or wall cavities that took water | Structural moisture can linger after surfaces seem normal |
| The water may be contaminated | Cleanup becomes a health issue, not just a drying issue |
| You can’t measure moisture and humidity | You can’t verify that drying is complete |
Why professional help changes the outcome
Professional drying in Florida is less about “working harder” and more about controlling conditions that your home naturally fights. Restoration crews use commercial dehumidification, directed airflow, temperature management, moisture mapping, and documentation that supports the insurance claim.
That documentation matters. Carriers often want photos, scope notes, damaged-material records, and moisture documentation that ties demolition and drying decisions to actual conditions. If the job is under-documented, homeowners can end up arguing over what was wet, what had to be removed, and whether damage was secondary.
If you're weighing whether to keep going alone, this local article on why DIY water damage restoration can backfire is worth reading before you spend more days drying the wrong areas.
Frequently Asked Questions About Flood Restoration
How much does professional drying cost?
The cost depends on the size of the affected area, how long the water sat, whether the water was contaminated, how many materials must be removed, and whether hidden structural spaces need drying. The most accurate way to get a real number is an on-site inspection with a moisture-based scope, not a phone estimate.
Can furniture be saved after flooding?
Sometimes. Solid wood, metal, and some hard-surface furniture can often be cleaned and dried if they're addressed early. Upholstered furniture, pressed-wood pieces, and items exposed to contaminated floodwater are much less predictable and may need to be discarded for safety.
How long will I be out of my home?
It depends on what was affected. Some homeowners can stay in unaffected portions of the property while a contained drying setup runs. Others need to leave if the water was contaminated, major demolition is required, or indoor air conditions aren't safe for occupancy.
Will my insurance cover flood or water damage cleanup?
Coverage depends on the cause of loss and your policy terms. Sudden internal water losses are often handled differently from external flooding. What helps most is early documentation, a clear record of mitigation steps, and a restoration team that can communicate directly with the adjuster and support the claim with photos, notes, and drying records.
What's the difference between clean water and contaminated floodwater?
Clean water usually starts from a broken supply line or similar source. Contaminated water includes sewage backups, storm-driven floodwater, and water that has moved through dirty materials and sitting debris. If there's any doubt, the safe move is to treat it as contaminated until a qualified professional evaluates it.
What if I find mold after the drying seems done?
That usually means moisture was left behind, or humidity stayed too high long enough for growth to begin. Don't paint over it or spray household products and assume it's resolved. Mold after a flood calls for inspection, source correction, and proper remediation so the contamination doesn't keep spreading through the property.
If you need help drying out a flooded home step by step in Bradenton, Sarasota, Tampa Bay, Saint Petersburg, Lakewood Ranch, or nearby Gulf Coast communities, contact AMPM Restoration Services. Call 941-946-7807 for a free inspection and estimate. We provide emergency restoration, insurance claim assistance, and financing options so you can move from crisis response to a safe, fully documented recovery.