


You open the cabinet under the sink for a trash bag or dish soap, and something feels off. The floor of the cabinet looks a little darker than usual. The toe-kick at the bottom seems swollen. Maybe there's a stale, musty smell that wasn't there last week. That's how water damage kitchen cabinets usually starts. Without fanfare, and where you don't look every day.
On Florida's Suncoast, that hidden moisture often comes from a slow supply-line drip, a leaking drain, a dishwasher connection, or storm-driven humidity working into enclosed spaces. The hard part is that cabinets can look mostly fine on the outside while the material underneath is already taking on water. If you're trying to figure out whether you can dry them, repair them, or need to replace them, timing matters more than most homeowners realize.
What Happens When Water Hits Your Kitchen Cabinets
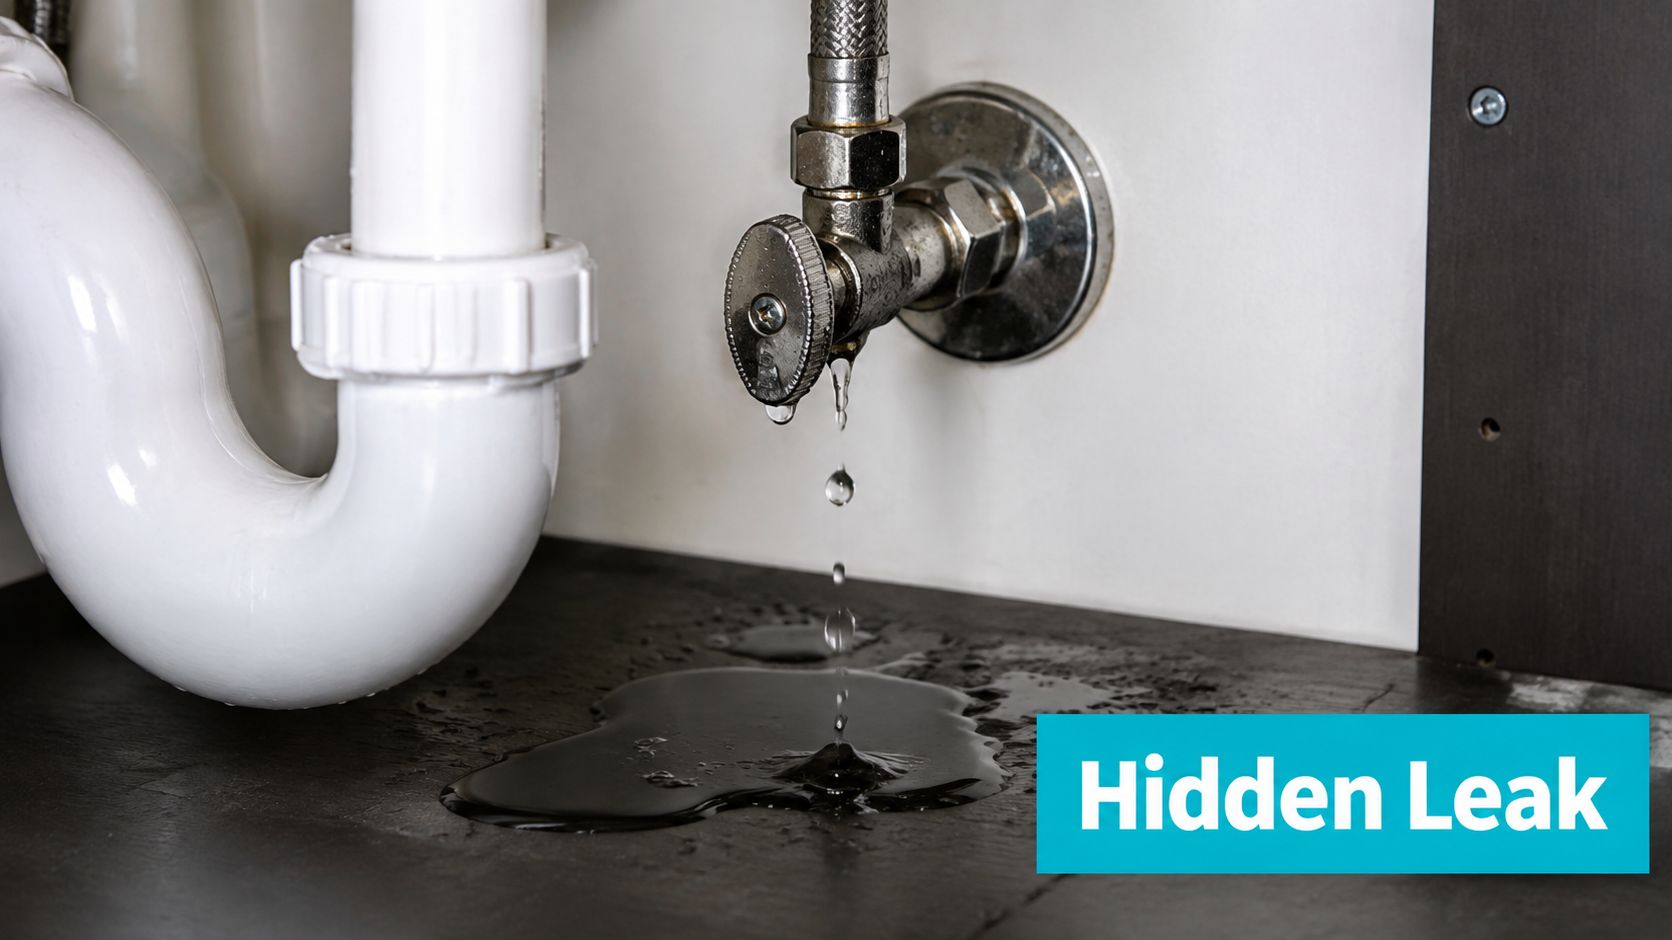
A lot of cabinet damage starts with a leak that doesn't look serious. A few drops under the sink. A small puddle after someone runs the dishwasher. Water that sneaks along the floor during a heavy Florida rain. You wipe it up, shut the door, and move on. Then days later, the cabinet base starts to puff up, the bottom shelf feels soft, or the odor inside the cabinet changes.
Why base cabinets get hit so hard
Kitchen base cabinets are vulnerable for simple reasons. They sit low, they're close to plumbing, and many are built with particleboard, MDF, or thin plywood components that don't tolerate prolonged moisture well. Cabinet cavities also trap air. That means the wettest area is often the one you can't see, such as behind the toe-kick, under the cabinet floor, or against the back panel near the wall.
Particleboard is the material that causes the most trouble in many kitchens. It's made from compressed wood particles and adhesive. When water gets into it, the board absorbs moisture, swells, and gradually loses strength. A controlled cabinet-damage study found that faced and unfaced particleboard cabinet bases exposed to a low-volume leak of 200 milliliters per day needed a minimum of 64 days to collapse, which shows that failure often develops over weeks or months rather than all at once, according to U.S. Forensic's cabinet leak duration research.
That long timeline confuses homeowners. If the cabinet hasn't collapsed, they assume the damage isn't serious. In practice, a cabinet can keep standing while its substrate weakens underneath.
Early signs homeowners miss
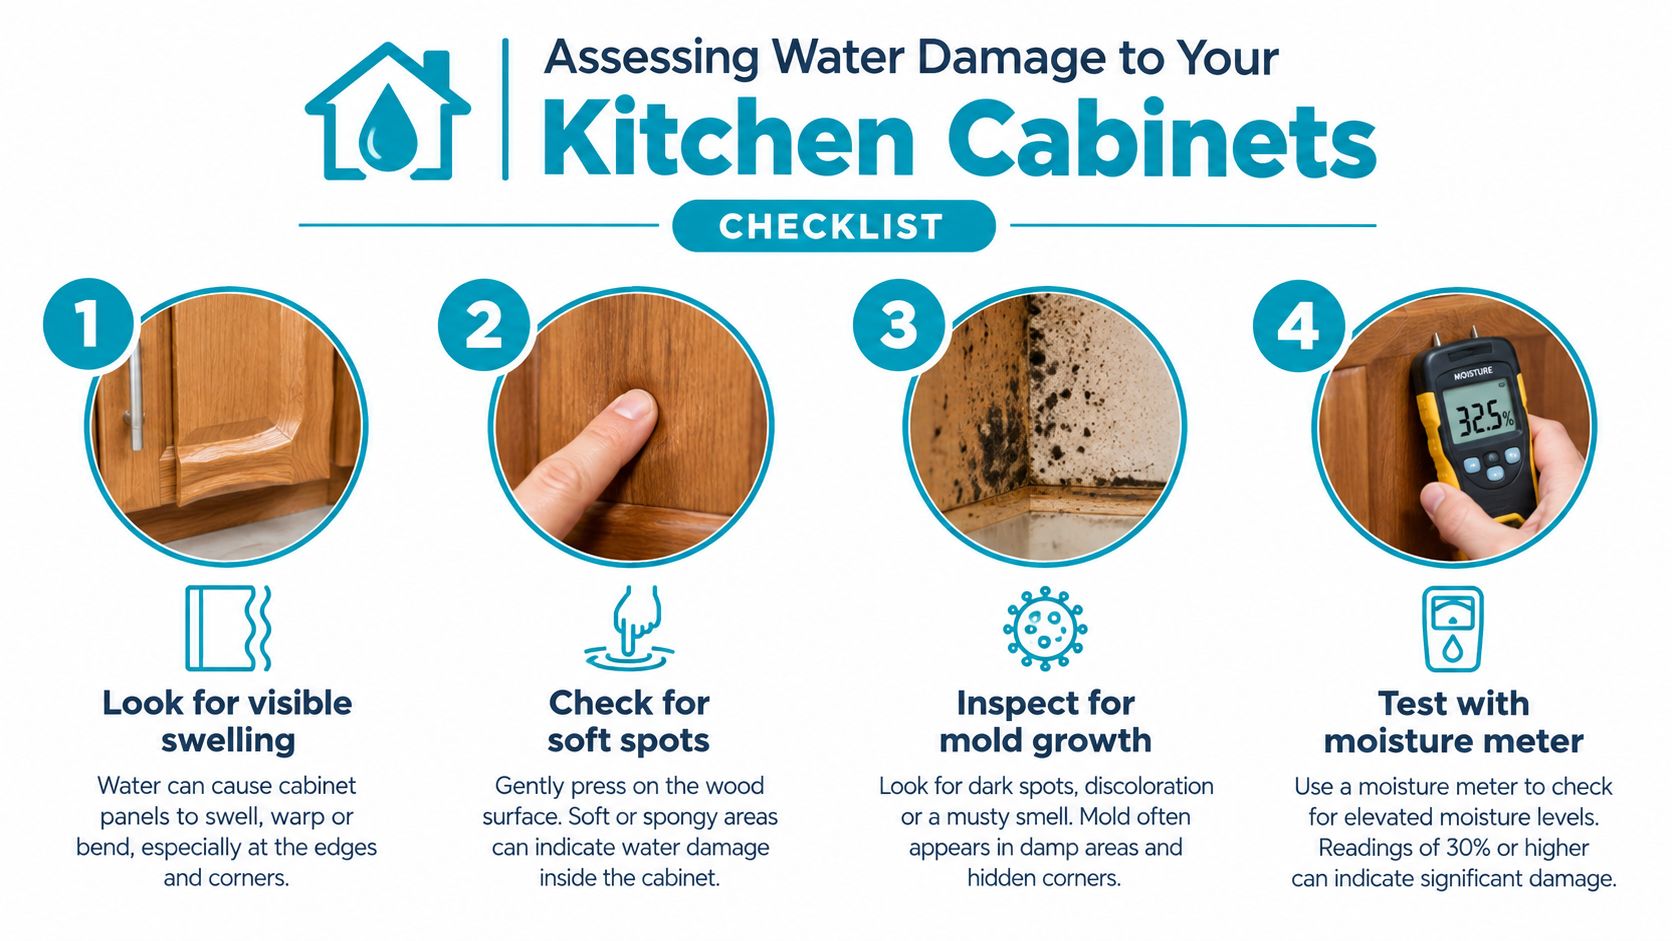
The first signs of water damage kitchen cabinets are usually subtle:
- Swollen edges where the bottom panel or toe-kick starts to expand
- Soft spots when you press on the cabinet floor
- Peeling veneer or laminate along lower edges
- A musty smell inside the cabinet even after wiping surfaces
- Discoloration near plumbing penetrations or at the back corners
Wet cabinets rarely announce themselves with dramatic damage first. They usually give you a small warning, then get worse if moisture stays trapped.
In homes around Bradenton, Sarasota, Saint Petersburg, and the Tampa Bay area, I see people focus on the visible puddle and miss the cabinet cavity. That's the problem zone. When the enclosed parts stay damp, the question isn't just “Is it wet?” It's how long has it stayed wet, and how deep did the moisture go?
Assessing Water Damage to Your Kitchen Cabinets
The first inspection should be calm and methodical. Don't guess from the outside. A cabinet that looks fine can still be saturated at the base, while a cabinet with cosmetic swelling might still be partially salvageable if the moisture didn't travel far.
Start with safety and source control
Before you inspect anything closely:
- Stop the water source. Shut off the supply valve or main if needed.
- Check for standing water. If water is near outlets or appliances, shut power to that area before stepping in.
- Empty the cabinet. Remove everything so air can move and you can see the floor, walls, and corners clearly.
If you're unsure whether the damage is limited to the cabinet or may involve flooring, walls, or hidden moisture migration, a more detailed water damage inspection guide can help you think through what else to check.
What to inspect inside the cabinet
Open every affected door and pull out drawers. The CDC's homeowner cleanup guidance specifically tells homeowners to open kitchen cabinets, remove drawers, and wipe them clean, which reflects how easily cabinet interiors hold moisture in enclosed spaces.
Focus your inspection on these areas:
- Cabinet floor panel because water usually settles there first
- Back panel against the wall where moisture often lingers
- Toe-kick area where hidden wicking often shows up later
- Sidewalls near plumbing especially around supply and drain penetrations
- Shelf edges and seams where delamination starts
A moisture meter is one of the most useful tools here. Touch alone won't tell you whether the material underneath the surface is still wet.
Signs that point to deeper saturation
Some clues suggest the problem is more than a quick surface spill:
- Warping at seams or corners
- Laminate or veneer lifting away from the substrate
- A compressed, spongy feel in the cabinet floor
- Dark staining that returns after wiping
- Persistent odor deeper in the cabinet, not just on the surface
One benchmark matters here. Particleboard cabinets can show swelling after just 1 day of water exposure, and fungal growth can appear under cabinets after 14 days, as noted in the CLM cabinet leak article. That's why under-sink cabinet problems can move from “minor leak” to “restoration decision” faster than people expect.
Practical rule: Not all wet cabinets are equal. The cabinets most likely to be saved are the ones that dried quickly and never stayed damp deep in the substrate.
Recent leak or older hidden damage
A fresh leak usually leaves clean moisture lines, active dampness, and little structural breakdown. Older hidden damage often looks different. The cabinet may smell stronger than it looks. Edges may have a dry, swollen shape from earlier saturation. Fasteners may show corrosion. The cabinet floor may feel brittle or permanently raised even if it's no longer wet on top.
That difference matters because surface moisture can evaporate quickly, while saturation inside particleboard and hidden voids can stay behind long after the visible spill is gone.
Drying and Salvaging Water-Damaged Cabinets
This is the part where speed pays off. For water damage kitchen cabinets, the most important decision window is the first couple of days after the leak is discovered. The U.S. EPA says water-damaged areas and items should be dried within 24 to 48 hours to prevent mold growth, and the CDC advises that if materials couldn't be dried in that window, occupants should assume mold growth has begun, according to the EPA's mold and moisture guide.
The drying setup that actually works
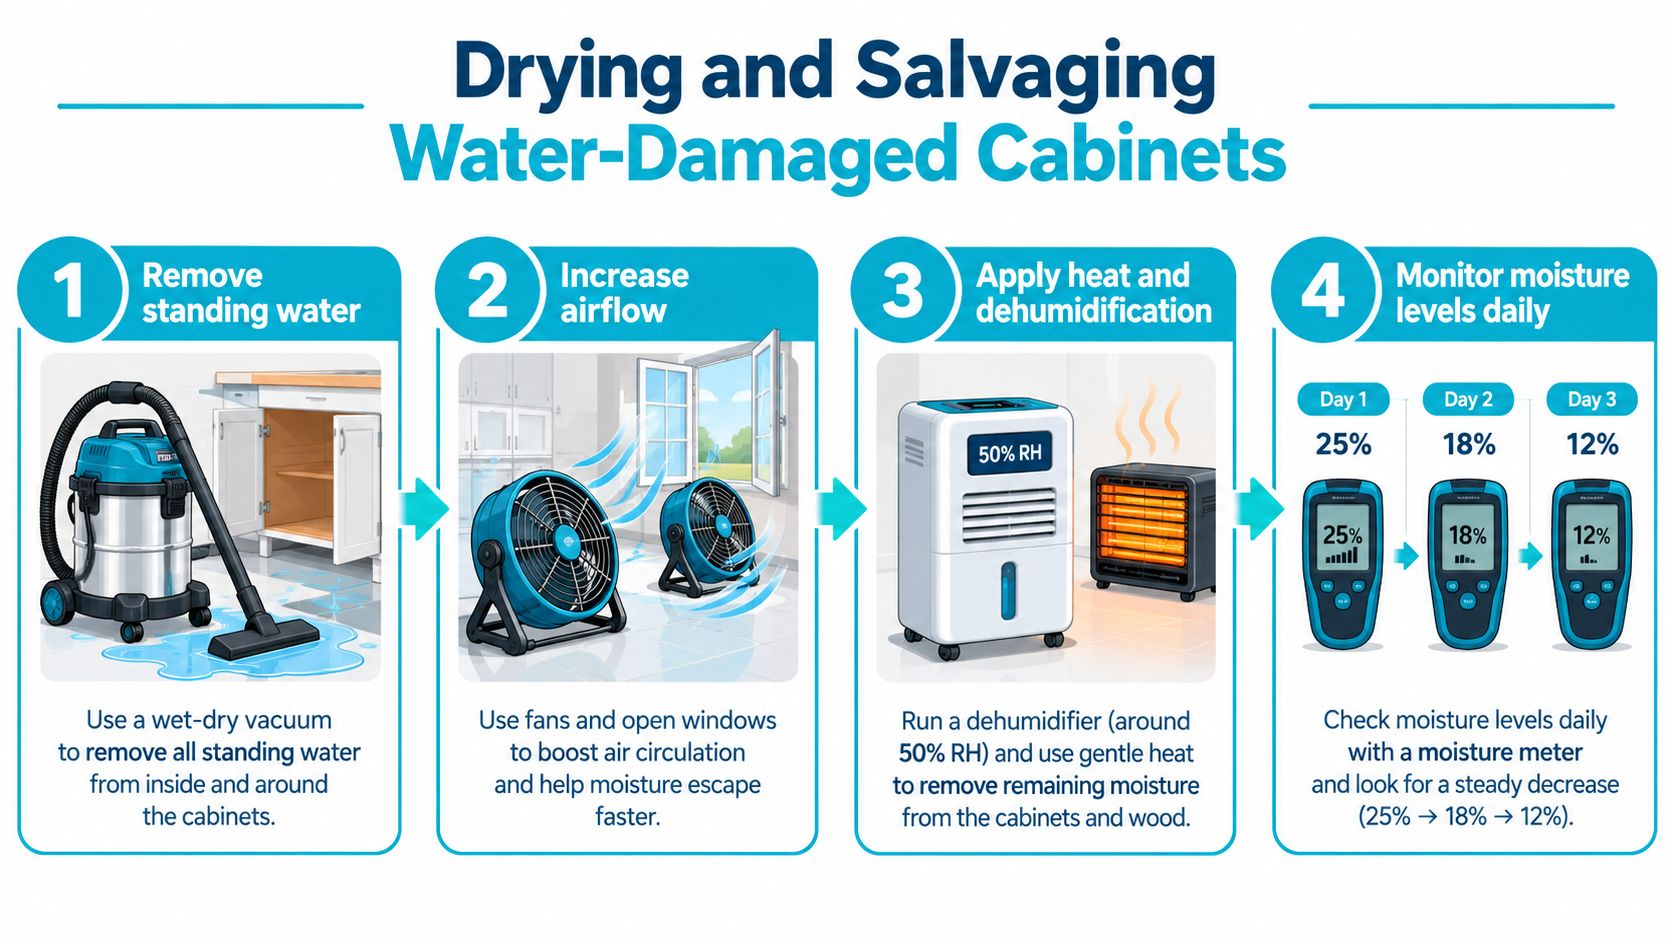
A proper cabinet dry-out is more than wiping surfaces and pointing a box fan across the kitchen. Cabinet interiors are enclosed, and the wettest spots are often trapped behind finished surfaces.
A practical workflow used in restoration references includes:
- Remove the toe-kick so trapped moisture under the cabinet has a way out
- Open all doors and drawers to break up enclosed pockets of humid air
- Use directed airflow into the cabinet cavity, not just across the room
- Run dehumidification to pull moisture out of the air while the cabinet releases it
- Log moisture readings daily instead of relying on appearance
If you want to understand the equipment side of that process, this overview of water damage drying equipment explains why professional air movers, dehumidifiers, and moisture meters matter.
Moisture targets that guide the next step
Many homeowners get tripped up. A cabinet can feel dry on the surface while still being too wet to sand, paint, or refinish.
One practical restoration benchmark says cabinets should generally dry to about 12% moisture content before sanding or refinishing, while readings above 20% mean the material is still too wet to repair and may need more drying time or replacement, based on cabinet drying and restoration guidance.
That same guidance stresses repeated meter checks because surface dryness can be misleading. It also notes that humidity should be driven below 50% during drying, and that thicker plywood or particleboard may need roughly 7 to 14 days of controlled drying to get below that threshold, according to the same cabinet restoration reference.
If you seal wet material, you don't fix the problem. You trap it.
Realistic drying time
A lot of people expect cabinets to dry in hours. That usually isn't realistic once water gets into the substrate or hidden base cavity.
A commonly cited restoration benchmark says average cabinet dry time is 3 to 5 days, while thicker plywood or particleboard cabinets may take 7 to 14 days of controlled drying to get moisture below 12%, as summarized in cabinet dry-time guidance.
Those aren't cosmetic waiting periods. They reflect how long it can take moisture to move from inside the material to the surface, then out into the air.
The mistake that ruins salvageable cabinets
The most common error is rushing into cosmetic repairs. Homeowners see a cabinet that looks better after a day or two and start sanding, painting, sealing, or reinstalling trim before the core has dried. That can lock moisture inside the material. Once that happens, swelling can return, the finish can fail, and odor problems can linger.
If the leak is recent and clean, fast drying can save more than many people think. If you need hands-on help, one option on the Gulf Coast is AMPM Restoration, which handles emergency extraction, structural drying, moisture mapping, and cabinet-area leak response in Bradenton, Sarasota, Tampa Bay, Lakewood Ranch, and Saint Petersburg.
Repair or Replace Deciding What to Save
This is the question almost every homeowner asks after the cabinet is dry enough to evaluate. The answer usually isn't all-or-nothing. Some parts may be worth saving, while others aren't.
The material matters more than the finish
Solid wood face frames and doors often tolerate brief wetting better than cabinet boxes made of particleboard or MDF. Plywood usually performs somewhere in between. The finish can fool you. A cabinet door might look rough but still be structurally usable after drying and refinishing. A cabinet floor can look only slightly swollen while the substrate underneath has already lost strength.
Recent guidance also points toward more evidence-based decisions, with moisture-meter checks and 24 to 72 hour verification periods used to confirm whether drying is holding or hidden moisture is returning, as described in Biosweep's discussion of water-damaged cabinet decisions.
Repair or Replace Decision Guide
| Condition | Recommended Action |
|---|---|
| Light surface staining, no softness, no delamination | Dry thoroughly, then consider sanding and refinishing |
| Minor edge swelling on a door or face frame | Dry first, then evaluate for cosmetic repair |
| Cabinet box mostly sound, but one shelf or back panel is damaged | Partial component replacement may make sense |
| Face frames and doors are stable, but the cabinet base is weakened | Save the usable components and replace damaged box sections if feasible |
| Particleboard or MDF is crumbling, spongy, or separating in layers | Replace the affected material |
| Visible mold inside porous cabinet material | Removal and replacement is usually the safer path |
| Cabinet floor or toe-kick has lost structural firmness | Replacement is often more reliable than patching |
Why some cabinets stand for a long time before failing
Homeowners sometimes hear “it hasn't collapsed, so maybe it's okay.” That's not a safe test. The earlier research on particleboard cabinet bases exposed to a low-volume leak showed they required a minimum of 64 days to collapse under 200 milliliters per day exposure, according to the U.S. Forensic study summary. A cabinet can stay in place while still being compromised.
That's why I look less at whether the cabinet is upright and more at these questions:
- Has the material swollen and stayed deformed?
- Are layers separating?
- Does the floor flex under light pressure?
- Did the moisture get into porous material for long enough to create a mold concern?
The best repair candidates are the cabinets that dried fully before the substrate broke down. Once layered material starts separating, replacement usually gives a better long-term result.
If you're weighing cosmetic repair against structural replacement, this breakdown of how to repair water damage is a useful companion for the next decision.
Preventing Future Water Damage in Your Kitchen
Most cabinet damage starts small. Under-sink supply lines drip slowly. Dishwasher connections loosen. Refrigerator ice-maker lines seep behind the appliance. A faucet or disposal leak can dampen the same cabinet base for weeks before anyone notices.
The checks worth doing regularly
A practical prevention routine includes:
- Inspect supply lines under the sink and behind the refrigerator for corrosion, bulging, or moisture
- Check the dishwasher connection for dampness after a cycle
- Look at the disposal and drain assembly for slow drips that only show up during use
- Open the under-sink cabinet and smell it because odor often appears before visible damage
- Watch the toe-kick and floor edges for subtle swelling
If you find corrosion on older lines or fittings, it helps to understand how to remove rust from plumbing pipes before buildup or deterioration contributes to a leak.
Small upgrades that reduce risk
Some preventive choices make a real difference:
- Braided stainless-steel supply lines tend to be more dependable than aging rubber lines
- Leak detection sensors inside sink bases can alert you before a small drip becomes cabinet damage
- Automatic shut-off devices can help limit loss when a line fails
- Moisture-resistant cabinet liners or mats can buy you time during a minor leak
- Better ventilation around enclosed plumbing areas helps moisture leave faster
In the worst cabinet losses, the leak usually wasn't dramatic. It was ignored because nobody opened that cabinet closely enough, often enough.
For homes in Bradenton, Sarasota, Lakewood Ranch, Tampa Bay, and nearby Gulf Coast communities, humidity adds another layer to the problem. Even a small leak dries more slowly when the room already holds moisture. If you suspect a hidden plumbing issue, scheduling free water leak detection can help catch trouble before cabinet materials start to break down.
When to Call a Professional and Next Steps
Some cabinet leaks are manageable with quick cleanup and careful drying. Others cross the line into hidden structural damage or mold risk, and that's where professional help becomes the smarter move.
Signs the job has gone beyond DIY
Call for a professional evaluation if you notice any of these:
- A musty odor that stays after drying attempts
- Visible mold inside the cabinet cavity or on porous materials
- Cabinet floors or toe-kicks that feel soft or unstable
- Moisture readings that stay high instead of dropping
- Water from a contaminated source, including storm flooding or sewage backup
- Damage that appears to involve the wall, flooring, or adjacent cabinets
The CDC's homeowner mold-cleanup guidance specifically tells people to open kitchen cabinets, remove drawers, and wipe them clean during cleanup, which reinforces that cabinet interiors are moisture-trapping zones, not just easy wipe-down surfaces, as explained in the CDC homeowner mold guide.
What a professional restoration process looks like
A proper response usually follows a sequence:
- Emergency contact and rapid inspection
- Moisture mapping of cabinets, nearby walls, and flooring
- Water extraction and controlled structural drying
- Cleaning and antimicrobial treatment where appropriate
- Repair or reconstruction planning once materials are confirmed dry
If you want a broader homeowner view of how restoration unfolds after a property emergency, this summary of the fire and water damage process gives useful context.
There's also a point where trying to save money with home equipment creates bigger repair costs later. This guide on why you shouldn't DIY water damage restoration explains the common failure points.
For homeowners in Bradenton, Sarasota, Tampa Bay, Saint Petersburg, and surrounding Florida Gulf Coast communities, local conditions matter. High humidity, slab-on-grade construction, storm exposure, and enclosed cabinet bases all make hidden moisture more stubborn. Calling a professional isn't giving up. It's often how you keep a cabinet issue from turning into a flooring, drywall, or mold-remediation project.
You don't need to guess your way through it. If the cabinet is soft, smells musty, or stayed wet too long, get it inspected while there's still a chance to limit the repair scope.
AMPM Restoration is a 24/7 emergency restoration company based at 4301 32nd St W b18, Bradenton, FL 34205, serving Bradenton, Sarasota, Tampa Bay, Saint Petersburg, Lakewood Ranch and surrounding Gulf Coast communities with professional water damage restoration, mold inspection and mold removal, fire and smoke damage restoration, storm and flood damage restoration, commercial restoration services, and full reconstruction solutions. If you're dealing with water damage kitchen cabinets, call 941-946-7807 for a free inspection and estimate and visit AMPM Restoration Services to get fast help, insurance claim assistance, and financing options that can make the next step easier.
FAQs
Can water-damaged kitchen cabinets be saved?
Yes, sometimes they can. The best candidates are cabinets that were dried quickly and haven't developed deep swelling, delamination, structural softness, or visible mold inside porous material. Cabinets with cosmetic damage may be repairable, while cabinets with weakened particleboard bases often need partial or full replacement.
How fast do kitchen cabinets start to swell after a leak?
Particleboard cabinets can show swelling after 1 day of water exposure, according to the CLM cabinet leak article. That's why even a small under-sink leak shouldn't be left to “air out on its own.”
How long do water-damaged cabinets take to dry?
Controlled drying often takes 3 to 5 days, while thicker plywood or particleboard cabinets may need 7 to 14 days to dry below repair thresholds, based on cabinet dry-time guidance. Actual time depends on material type, how much water got in, and the room's humidity.
When should I worry about mold in kitchen cabinets?
You should worry when cabinets couldn't be dried promptly, when there's persistent odor, or when porous materials stayed damp in an enclosed cavity. The EPA says wet materials should be dried within 24 to 48 hours to prevent mold growth, and the CDC says if they couldn't be dried in that window, occupants should assume mold growth has begun, according to the EPA mold guidance.
Is painting over water-damaged cabinets a good fix?
Not until the cabinet is dry. Painting or sealing too early can trap hidden moisture and make swelling, odor, and material breakdown worse. Moisture readings matter more than surface appearance.
Should I repair the cabinet box or replace the whole run?
Not always the whole run. In many kitchens, doors, face frames, or some components are still salvageable even when one cabinet box or base section is not. The right decision depends on material type, moisture depth, visible damage, and whether the affected areas stayed damp long enough to create a mold or structural concern.