

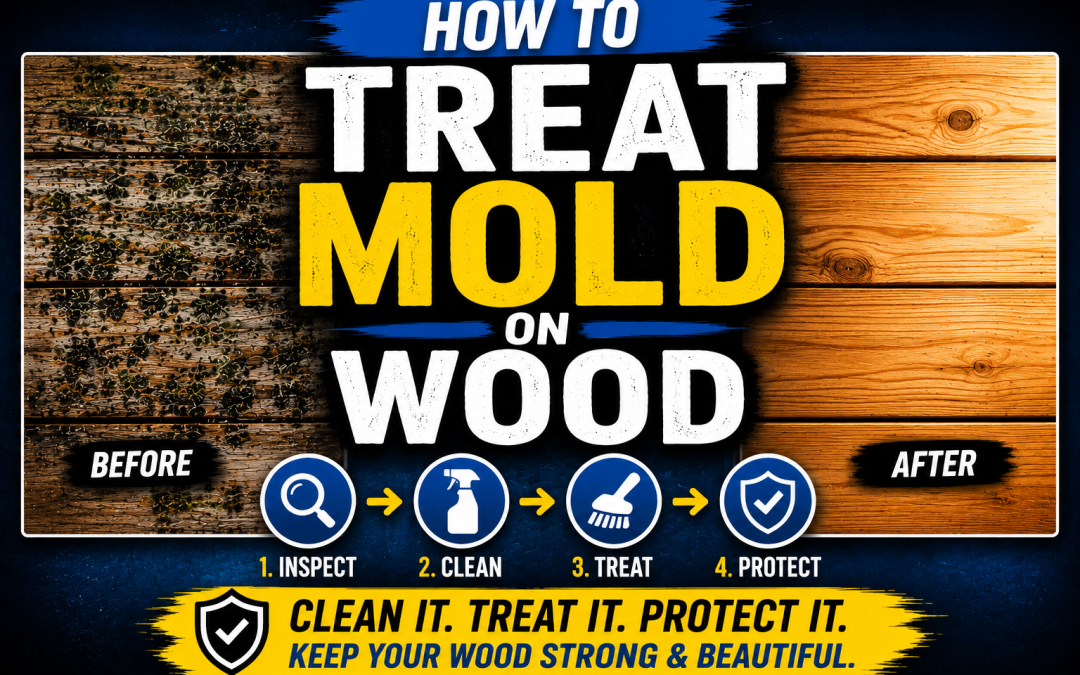
Dark spotting on a wooden windowsill after a summer storm is a familiar Florida problem. A little condensation, a small leak, or a room that stayed closed up too long can turn into visible growth fast. If you’re searching for how to treat mold on wood, you’re probably trying to answer two urgent questions at once: can I clean this safely, and is this a sign of a larger moisture problem in the house?
In Bradenton, Sarasota, St. Petersburg, and the rest of the Suncoast, mold on wood is rarely just a surface issue. Our humidity stays high, storms push moisture into older assemblies, and wood trim, framing, subfloors, cabinets, and window components all absorb moisture differently. That means the right treatment depends on the wood itself, the size of the affected area, and whether the material is sealed or porous.
A small spot on finished trim may be manageable. Mold on raw wood, repeated regrowth, or a strong musty odor behind walls is a different category entirely. The key is acting early, cleaning correctly, and controlling the moisture that allowed growth in the first place.
Discovering Mold on Wood in Your Florida Home
A common call starts the same way. A homeowner in Bradenton notices dark specks on a wood sill or closet baseboard a day or two after heavy rain. They wipe it off, it comes back, and now the room smells stale. By the time they start looking closer, they realize the wood feels a little damp or the paint line has begun to separate.
That concern is justified. Mold destroys more wood annually than fires and termites combined, according to industry data cited here: mold statistics and wood damage context. For Florida homeowners, that matters because mold on wood isn’t just about staining. It can become a structural preservation issue when moisture stays trapped in framing, trim, flooring, cabinetry, or roof decking.
What makes the Suncoast different is persistence. In an older Sarasota home, a failed window seal can feed the same growth cycle for months. In a St. Petersburg condo, HVAC condensation and poor air circulation can keep closet shelving damp enough for mold to keep returning. In Lakewood Ranch and Tampa Bay, storm-driven humidity often turns a small water event into a mold problem if drying is delayed.
If you’re still trying to confirm whether what you see is mold, AMPM has a practical resource on how to check a home for mold. That’s a good first step before deciding whether this is a limited cleaning job or a remediation project.
Small, visible growth on accessible finished wood may be a cleaning problem. Hidden growth, recurring growth, or mold tied to a leak is usually a moisture and remediation problem.
Identifying and Safely Assessing Mold on Wood
Before you scrub anything, identify what you’re looking at and protect yourself. Homeowners often mistake mold for a water stain, dirt, or old finish failure. The treatment is different, and aggressive cleaning without containment can spread spores into the room.

What mold on wood usually looks like
On wood, mold may appear as black, green, gray, or white spotting. It can look fuzzy, powdery, or blotchy. Mildew is often lighter and more superficial. A water stain usually follows the grain or the path of moisture and doesn’t have that dusty or patchy colony appearance.
Smell matters too. If the area has a musty odor, that’s a warning sign that the visible growth may not be the full problem. Mold behind baseboards, under flooring edges, or inside wall cavities often announces itself by odor before you see the main colony.
A quick field check helps:
- Surface pattern: Mold tends to form clustered spots or irregular patches. Water stains are flatter and more uniform.
- Texture: If a dry cloth smears a dusty residue, that leans toward microbial growth.
- Location: Wood near windows, under sinks, around AC handlers, exterior doors, and bathroom trim deserves extra scrutiny.
Safety comes before cleanup
IICRC-style remediation starts with personal protection for a reason. NIOSH-certified N95 masks, nitrile gloves, and eye protection are part of safe mold work, and surfaces should be pre-wet to suppress spore aerosolization before cleaning, as described in this guidance on mold remediation on wood and PPE protocols.
For a homeowner doing a limited inspection, the minimum safe approach is:
- Put on the right PPE. N95 mask, nitrile gloves, and eye protection.
- Don’t dry-brush mold. Dry brushing throws spores into the air.
- Lightly pre-wet the area. The goal is to reduce airborne spread, not soak the wood.
- Keep people out of the room. Especially children, older adults, and anyone with respiratory sensitivity.
- Stop if the issue seems bigger than it first looked.
The red lines for DIY
Some jobs shouldn’t be handled with household cleaning supplies. If you cross any of these lines, it’s time to shift from cleanup to remediation:
- The affected area is larger than 10 square feet.
- The mold seems to be inside a wall cavity, under flooring, or behind cabinets.
- The wood is raw, crumbly, or repeatedly regrowing mold.
- There’s a strong odor but only a little visible growth.
- The mold appeared after a leak, flooding, or storm intrusion.
If you’re weighing whether you’re dealing with simple cleanup or a true remediation project, this breakdown of mold assessment vs mold remediation helps clarify the difference.
Safety line: If you can’t inspect the full extent without opening materials, don’t guess. Hidden mold is where DIY work often goes wrong.
Effective DIY Methods to Clean Mold from Wood Surfaces
DIY cleaning has a place, but only for small, accessible, surface-level growth on wood you can safely reach and dry. The mistake most homeowners make is assuming every wood surface behaves the same. It doesn’t. The biggest dividing line is whether the wood is sealed or unsealed.
Sealed wood and unsealed wood are not the same job
On sealed hardwood, painted trim, polyurethane-coated shelving, or other finished surfaces, mold is more likely to remain near the surface. On unsealed wood, degraded finishes, or older porous material, growth can sink into the grain. That changes what will work.
The treatment difference is outlined in this practical guide to cleaning mold from a wood floor, which notes that sealed hardwood can often be wiped clean, while unsealed wood may require sanding and refinishing because mold penetrates the grain.
For older homes in Bradenton and Sarasota, this distinction is critical. What looks like a simple wipe-down on an old window stool or door casing may fail because the finish has worn away over time, even if the surface still looks “finished” at first glance.
What works best for limited DIY cleanup
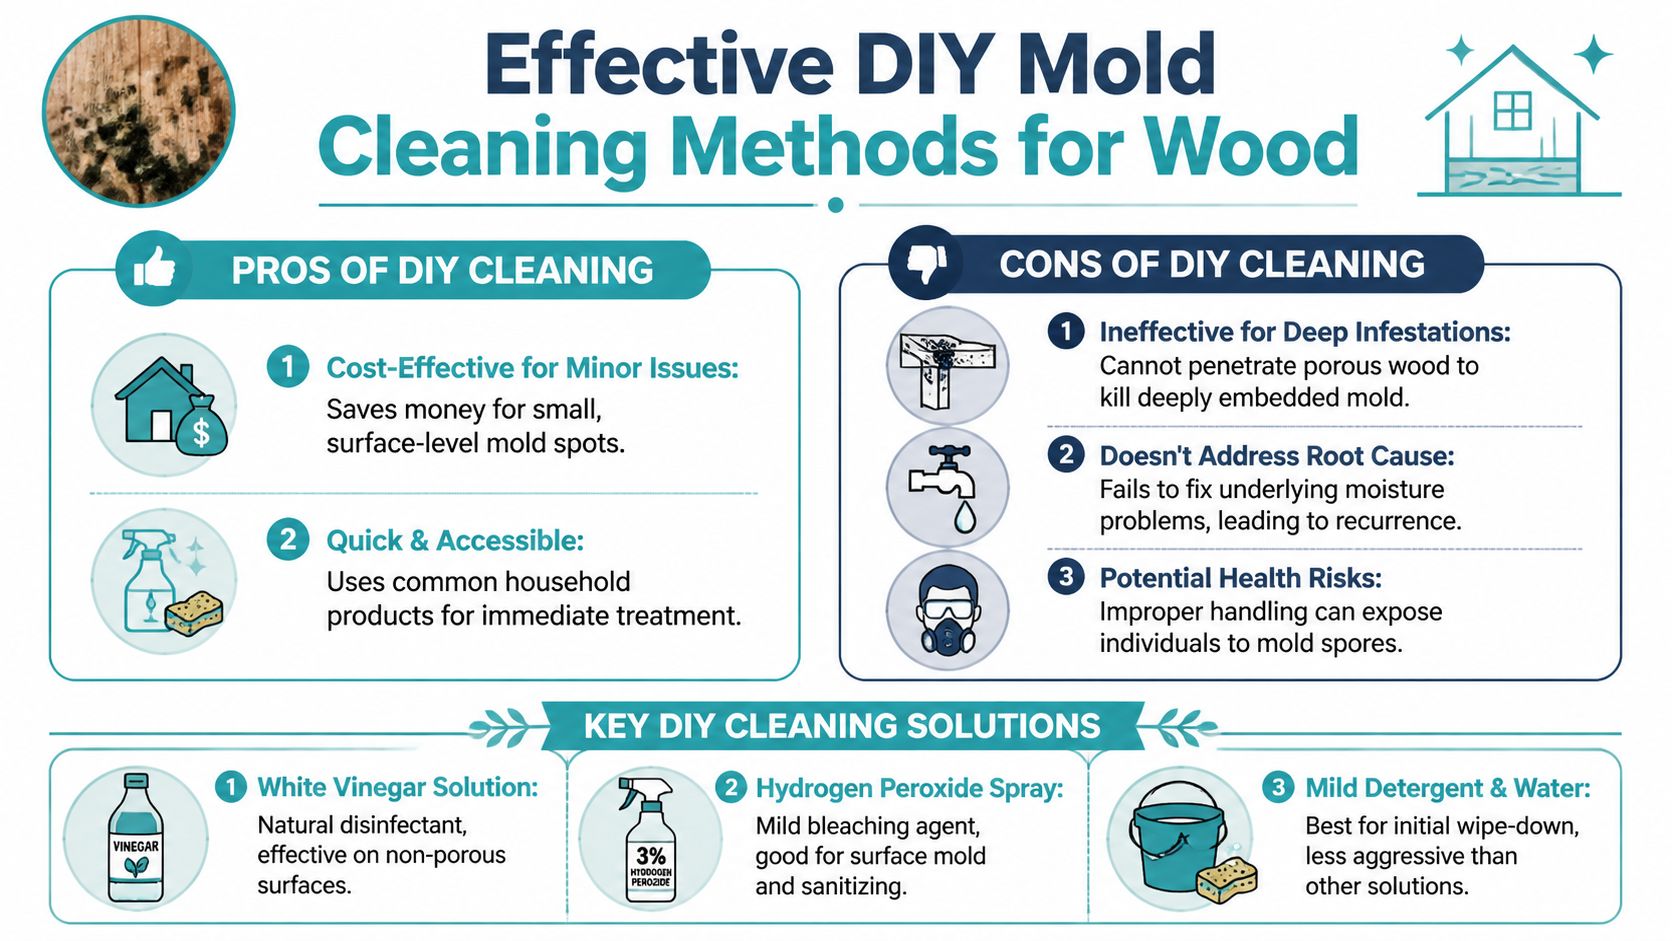
For early, small-area growth, the safest and most practical DIY options are usually white distilled vinegar, 3% hydrogen peroxide, and mild detergent with water. The right choice depends on the wood surface and the finish.
Here is a side-by-side reference:
| Solution | Best For | How to Use | Cautions |
|---|---|---|---|
| White distilled vinegar | Small areas on sealed wood and hard finished surfaces | Apply to a cloth or lightly mist, wipe the growth, allow contact time before wiping dry | Spot test first. Don’t oversaturate wood |
| 3% hydrogen peroxide | Light surface mold and sanitizing on small areas | Spray lightly, allow a 10-minute dwell time, then wipe clean and dry | May lighten some finishes, so test first |
| Mild detergent and water | Initial wipe-down of dirt, residue, and light surface contamination | Use a damp cloth with a small amount of detergent, scrub gently with the grain, then dry immediately | Too much water can worsen the problem |
| Dilute bleach mix | Limited use on certain sealed or stained surfaces only | Use carefully and only where appropriate for the finish, then dry thoroughly | Often a poor choice for porous wood and can damage finishes |
A practical DIY sequence
If the area is small and on sealed wood, this is the order that usually makes the most sense:
- Prepare the room: Open airflow if outdoor conditions allow, keep foot traffic out, and wear PPE.
- Pre-wet lightly: Mist or dampen just enough to reduce airborne spread.
- Wipe, don't blast: Use a microfiber cloth or soft brush. Work with the grain.
- Choose one cleaner: Vinegar, peroxide, or mild detergent. Don't mix chemicals.
- Dry immediately: Use clean cloths, then start active drying.
For peroxide, the allowed contact time here is specific. 3% hydrogen peroxide requires a 10-minute dwell time, based on the verified remediation guidance above.
Why bleach is often the wrong choice
Bleach can make homeowners feel like they've “killed” the problem because the stain lightens. On porous wood, that cosmetic result often hides the deeper issue instead of solving it.
Bleach has a narrow role. Some guidance allows dilute bleach formulations for certain sealed or stained surfaces, but that doesn't make bleach the default choice for wood. On porous, unsealed wood, surface-only treatment often misses mold embedded below the surface. That's why bleach-heavy DIY advice disappoints so many Florida homeowners.
If you're comparing methods and want a plain-language breakdown of what removes growth versus what only changes appearance, AMPM's article on how to kill mold and the truth about mold removal is useful context.
When sanding enters the picture
Sanding is not a beginner move unless the area is small, accessible, and fully dry. On unsealed wood, embedded growth may require removing the contaminated surface layer and then refinishing or sealing the wood afterward. That creates dust and can spread spores if the area isn't isolated.
If the wood is decorative trim, cabinetry, framing, or flooring that matters to the structure or finish quality, professional handling is usually the smarter call. DIY cleaning is best reserved for minor, surface-level issues where you can see the whole problem and dry the material completely afterward.
The Crucial Drying and Repair Process After Cleaning
Most failed mold cleanup jobs fail here, not during wiping. Homeowners clean the visible growth, the wood looks better, and then Florida air reloads the same moisture problem. If the material stays damp, the mold problem isn't resolved.

Drying is the real treatment
The EPA guidance is clear on the point that matters most here. Moisture control is the key to successful mold treatment, and failing to address the moisture source before treatment leads to 40 to 60 percent recurrence within 6 months because spores remain viable in damp conditions, as explained in the EPA's basic mold cleanup steps.
That is why air drying alone often isn't enough on the Suncoast. In this climate, a board, sill, baseboard, subfloor edge, or cabinet toe-kick can feel dry at the surface while moisture remains trapped inside the material or the assembly around it.
What proper drying usually involves
For wood after mold cleaning, the goal isn't “looks dry.” The goal is verified drying and moisture correction.
Use this checklist:
- Fix the source first: Window leak, plumbing drip, roof intrusion, AC condensate issue, or humidity imbalance.
- Lower room humidity: Dehumidification matters more than opening a window in muggy weather.
- Move air across the surface: Air movers help evaporation at the material face.
- Verify with a moisture meter: Wood has to reach an acceptable moisture condition before repair or sealing.
- Delay cosmetic work until drying is complete: Paint, caulk, stain, and sealers should wait.
If flooring is involved, the drying and repair sequence gets more technical. This outside guide to fixing water damaged floors is a useful reference for understanding how hardwood responds after a moisture event, especially when cupping, staining, or finish disruption is present.
Minor repair after successful drying
Once the wood is dry, minor restoration may include light sanding, refinishing, repainting, or resealing. On sealed trim or shelving, the main repair is often surface restoration. On porous wood, successful drying may reveal that the finish failed long before the mold showed up.
A practical rule is simple:
If the wood still smells musty after cleaning and drying, or a moisture meter shows it hasn't normalized, repair work is premature.
For homeowners dealing with leak-related damage beyond surface cleanup, this resource on how to repair water damage gives a broader view of what needs to happen before a room is put back together.
Why Professional Mold Remediation is Often Necessary
DIY advice tends to stop at “spray and wipe.” Professional remediation starts with a different assumption. The visible mold may be only part of the contaminated area, and the job isn't complete until the wood, the surrounding materials, and the air in the work zone are managed correctly.
What professionals do that homeowners usually can't
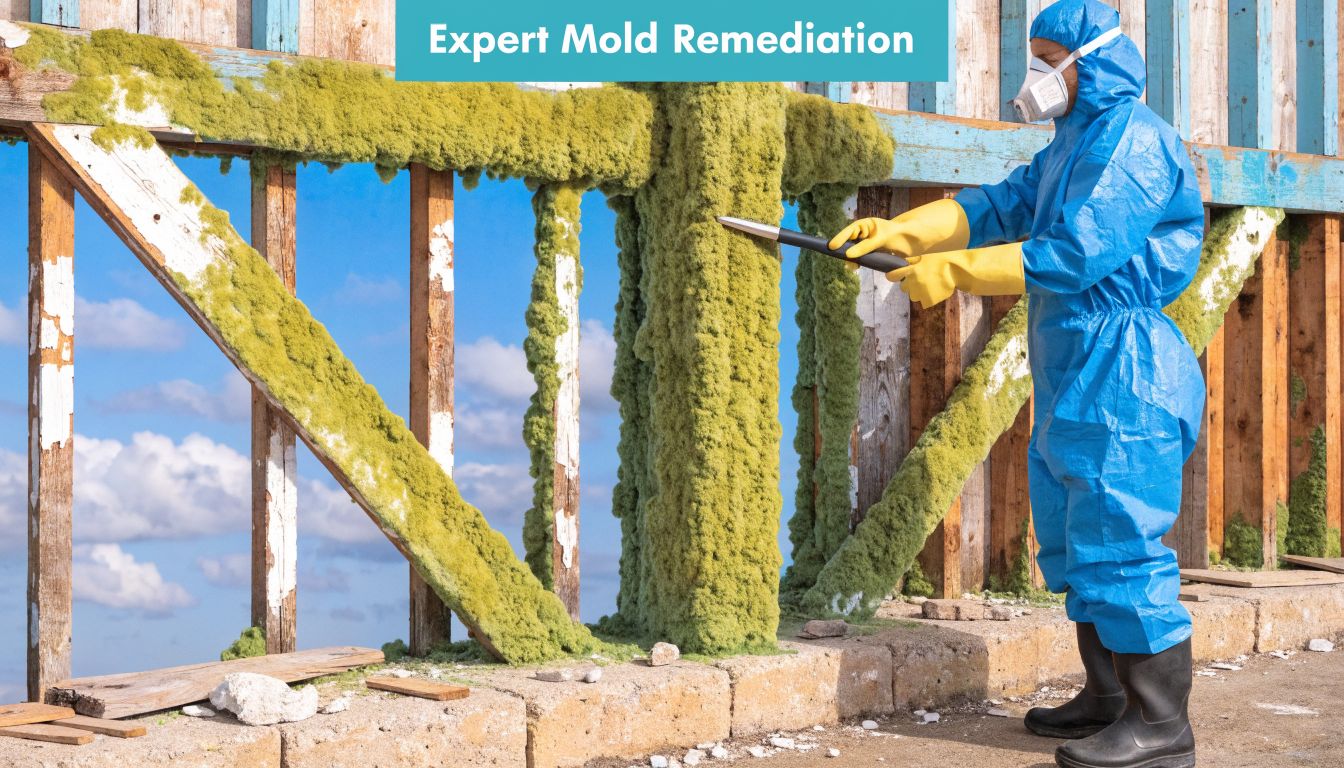
A remediation crew doesn't just clean the wood. They control spread. That matters when growth is inside framing cavities, under flooring, behind trim, or across raw structural members.
Professional remediation commonly involves:
- Containment: The work zone is isolated so spores don't move into clean rooms.
- HEPA vacuuming: Not a standard shop vacuum. HEPA equipment captures fine particulate that ordinary vacuums can redistribute.
- Controlled cleaning sequence: Pre-wetting, HEPA vacuuming, detergent cleaning, drying, then post-cleaning capture.
- Material decisions: Some wood can be cleaned and restored. Some porous materials around it may need removal.
- Moisture diagnostics: The team identifies what fed the growth in the first place.
Situations where professional help is non-negotiable
Some scenarios are straightforward calls for remediation:
- Mold in wall cavities or ceiling assemblies
- Growth on raw framing or roof decking
- Recurring mold after previous cleaning
- Large affected areas
- Mold tied to storm, flood, or leak damage
- Occupants with respiratory sensitivity
This is also where one professional option may include antimicrobial treatment after removal, depending on the material and extent of contamination. For example, AMPM Restoration Services handles mold-affected materials based on material type and applies antimicrobial treatments where appropriate after removal work.
Why the process costs more than DIY
The cost isn't just labor. It's the containment, filtration, safety equipment, moisture verification, selective demolition, cleaning sequence, and rebuild coordination that keep the problem from spreading or returning. Homeowners often underestimate how much contamination comes from a bad cleanup attempt, especially after sanding or vacuuming with the wrong equipment.
If you're trying to decide whether your situation has already crossed that line, this page on when you need professional mold removal lays out the common decision points.
Professional mold remediation protects two things at the same time. The wood structure itself and the indoor air in the rest of the home.
Long-Term Strategies for Mold Prevention in Florida Homes
The long-term answer to how to treat mold on wood is to make the wood a bad place for mold to live. In Florida, that means moisture control has to become part of normal home maintenance, not a one-time response after visible growth appears.
Most generic mold advice overfocuses on the cleaning product. In a high-humidity Gulf Coast home, the post-cleaning environment matters more. This guidance on cleaning mold on wood in humid conditions points to the same reality: without environmental controls such as dehumidifiers and improved ventilation, mold can return quickly in Florida's humidity.
The prevention system that actually works
Mold prevention on wood is a system, not a trick. These parts have to work together:
- Control indoor humidity: Keep indoor air managed through HVAC performance, dehumidification, and ventilation.
- Fix small leaks early: Window drips, supply line leaks, and AC drain issues often create chronic mold zones on wood trim and cabinetry.
- Seal vulnerable wood surfaces: Wood that's properly finished resists moisture better than exposed grain.
- Improve airflow in stagnant rooms: Closets, guest rooms, storage areas, and corners behind furniture often hold damp air.
- Inspect after storms: Wind-driven rain and minor roof or window leaks are easy to miss.
High-risk spots Florida homeowners should watch
In Bradenton, Sarasota, Lakewood Ranch, and St. Petersburg, the most common repeat locations are predictable:
- Windows and sliding doors: Condensation, failed seals, and storm intrusion.
- Bathroom trim and vanity bases: Steam plus weak ventilation.
- Kitchen sink cabinets: Slow leaks on raw cabinet interiors.
- Closets on exterior walls: Poor air movement and temperature imbalance.
- Garage-adjacent walls and utility rooms: Heat, humidity, and mechanical condensate.
If your concern includes hardwood movement and moisture behavior over time, this practical resource on wood floor humidity issues is helpful for understanding how wood responds when indoor conditions stay out of balance.
A realistic maintenance rhythm
You don't need to turn your home into a laboratory. You do need a repeatable routine.
A sensible approach is to check known moisture-prone wood areas during storm season, after plumbing issues, and whenever you notice a musty smell. If wood finishes are worn, reseal before the next moisture event, not after the next mold problem.
The homeowners who avoid repeat mold problems usually don't clean more aggressively. They control humidity sooner, find leaks faster, and keep wood surfaces properly sealed.
Your Local Experts for Treating Mold on Wood
If you're dealing with visible growth, a musty odor, or repeat moisture problems, how to treat mold on wood comes down to three things: identify the source, clean the material correctly, and dry the structure fully. If any part of that feels uncertain, don't guess.
AMPM Restoration serves Bradenton, Sarasota, Tampa Bay, Saint Petersburg, Lakewood Ranch, and nearby Gulf Coast communities with help for mold, water damage, and reconstruction. Call 941-946-7807 for a free inspection and estimate. The team is available 24/7, can assist with insurance claims, and offers financing options for qualified projects.
Frequently Asked Questions About Wood Mold
Homeowners usually ask the same practical questions once they realize mold on wood isn't just a stain issue. Here are concise answers based on field reality.
Common homeowner concerns
| Question | Answer |
|---|---|
| Can I clean mold off wood myself? | Yes, sometimes. Small, visible growth on sealed, accessible wood may be manageable with proper PPE, limited moisture, and careful drying. If the wood is porous, the area is large, or the odor suggests hidden contamination, DIY becomes risky and often ineffective. |
| Is bleach the best way to treat mold on wood? | Usually no. Bleach can have a limited role on certain finished surfaces, but it often performs poorly on porous wood because the problem may extend below the surface. For many small DIY situations, vinegar, peroxide, or detergent cleaning is more practical. |
| How do I know if the wood is sealed or unsealed? | Sealed wood usually has a clear finish, paint film, or a more resistant surface that doesn’t absorb water quickly. Unsealed or worn wood tends to darken quickly when dampened and feels more absorbent. In older homes, a surface may look sealed but the finish may already be compromised. |
| Why does mold keep coming back after I clean it? | Recurrence usually means the moisture source wasn’t fixed or the wood never dried fully. In Florida homes, that can be a leak, trapped humidity, poor ventilation, or an HVAC-related moisture issue. Cleaning without moisture control is usually temporary. |
| Does homeowners insurance cover mold on wood? | Sometimes, but it depends on the cause of loss and your policy language. Mold tied to a covered sudden water event may be treated differently than long-term neglect or unresolved humidity problems. Documentation matters. |
| When should I call a professional? | Call when the area is large, the wood is raw or structural, the growth has returned, the smell is stronger than the visible damage suggests, or the mold followed water intrusion. If you’re considering opening walls or sanding contaminated wood, it’s time for professional help. |
Short answers to issues that come up on site
Is wood mold dangerous to breathe
It can be. Mold work can expose you to spores and irritants, which is why proper PPE matters even for small assessments. If anyone in the home has asthma, allergies, or a compromised respiratory system, be more conservative and avoid DIY disturbance.
Can moldy wood be saved
Often, yes. Finished wood with surface growth can sometimes be cleaned and restored. Raw or severely affected wood may need sanding, refinishing, selective removal, or replacement depending on how far the contamination has gone and whether the wood remains structurally sound.
Should I paint over mold on wood
No. Paint can hide staining, but it doesn't solve contamination or moisture. Coating over active mold usually traps the problem and makes later correction harder.
What if the mold is on a subfloor or framing
That moves the problem into a more serious category. Structural wood, hidden cavities, and flooring assemblies often require professional containment, cleaning, drying, and moisture verification before repairs begin.
How quickly should I act
Quickly. Mold responds to moisture, and wood doesn't improve by waiting. Early action usually means less demolition, less finish damage, and a better chance of saving the material.
Do I need mold testing first
Not always. If visible mold is present, the practical first priority is often correcting the moisture problem and determining the extent of contamination. Testing can be useful in disputed, hidden, or health-sensitive situations, but it doesn't replace remediation planning.
If you need clear answers and fast help, contact AMPM Restoration Services for a free inspection and estimate. We help homeowners across Bradenton, Sarasota, St. Petersburg, Tampa Bay, and surrounding Gulf Coast communities with mold inspection, mold removal, water damage restoration, repairs, insurance claim assistance, and financing options. Call 941-946-7807 anytime, day or night.