


Mold Inspection Report: How to Read Your Results
You’re standing in a Bradenton kitchen with a damp cabinet, a musty odor, and a mold inspection report full of moisture readings and laboratory terms. The number that catches your eye may be a spore count, but that number rarely answers the question you need answered: where did the moisture come from, what materials are affected, and what should happen next?
In Florida’s humid Gulf Coast climate, a useful report connects evidence to action. It identifies visible or suspected growth, traces water intrusion, records areas that couldn’t be inspected, and gives restoration professionals a practical basis for drying, removal, containment, repair, and verification. The right way to read a mold inspection report is as a roadmap for correcting the building, not as a simple laboratory verdict.
Why Your Mold Inspection Report Is More Than a Pass or Fail
A homeowner in Lakewood Ranch recently described the common experience. The inspection was complete, the report arrived, and the first page contained a summary followed by photographs, moisture readings, and sample results. The family immediately searched for the highest number, assuming it would determine whether the home was safe.
That approach can miss the problem itself. A mold inspection report is an evidentiary record. It should show where the inspector looked, what was observed, which materials contained moisture, what odors or water damage were present, and whether cavities or building systems remained inaccessible. Neutral mold-report guidance emphasizes scope, inaccessible areas, moisture intrusion, visible growth, odors, sampling limits, and recommendations rather than a single pass or fail label (guidance on interpreting mold inspection documentation).
Read the building story, not just the laboratory page
Suppose an inspector finds staining beneath a window, high moisture in the drywall, and a musty odor inside an adjacent closet. Even if the laboratory page doesn’t show a dramatic result, those observations point toward a building defect that needs attention. Water may be entering around the window, moving through the wall assembly, or collecting beneath the flooring.
The report’s core questions are practical:
- Where did water enter? Look for roof leaks, plumbing failures, HVAC condensation, window leaks, flooding, or exterior drainage problems.
- Where is growth visible or suspected? Photographs and room-by-room descriptions help define the affected materials.
- What could be hidden? Wall cavities, flooring systems, insulation, ductwork, and cabinets can conceal moisture or microbial growth.
- What must happen first? Remediation should address the moisture source before cleaning or replacing damaged materials.
A legal resource such as The Law Office of Bryan Fagan on mold-related tenant and property concerns can help readers understand why clear documentation matters when habitability, responsibility, or insurance questions arise. The report won’t decide every legal issue, but a detailed record gives homeowners, landlords, contractors, and adjusters a shared factual basis.
Practical rule: If the report gives you a number but doesn’t explain the moisture source, affected materials, limitations, and corrective work, it hasn’t answered the most important question.
The strongest report turns scattered observations into priorities. It helps you separate a localized surface concern from a concealed moisture problem, compare contractor proposals, and preserve documentation for an insurance claim. That’s why visual evidence and moisture investigation deserve as much attention as any lab appendix.
The Regulatory Reality Behind Mold Testing Standards
Mold reporting grew out of public-health recommendations and building-science practice, rather than one nationwide compliance program. EPA remediation materials state that, as of December 2000, the agency had no indoor mold regulations. Later guidance likewise explained that federal mold-spore limits and airborne mold standards had not been established for ordinary indoor environments (EPA mold remediation guidance).
That regulatory history affects how an inspector supports a recommendation. The report should show how site conditions, building history, moisture readings, odors, visible growth, and targeted sampling shaped the conclusion. In a Bradenton home with a 2021 roof replacement, an inspector documenting 19% MC in ceiling drywall after a summer storm is recording evidence of an active leak path. The reading requires investigation of the roof and affected materials, not a comparison of spore counts with a federal limit.
Why moisture conditions receive priority
EPA guidance directs inspectors toward wet or damp areas, musty odors, leaks, and materials that have remained wet for more than 48 hours, because these conditions increase the likelihood of hidden growth and building damage (EPA’s mold course guidance). In a Florida home, the report may therefore focus on a roof penetration, condensate line, bathroom exhaust failure, or storm water intrusion.
A homeowner may prefer a simple laboratory number because it appears objective. The trade-off is that a number without a moisture source can point the repair in the wrong direction. Cleaning airborne particles while leaving wet drywall, a leaking exterior wall, or saturated insulation in place does not address the cause.
The report’s value lies in connecting field evidence to corrective work. It should identify the condition found, explain its likely significance, and state whether the next step is drying, removal, repair, or additional evaluation. That reasoning helps homeowners, contractors, adjusters, and property managers act on the same record.
Read the conclusion as a site-specific decision
Two buildings can support different recommendations because their moisture histories, materials, ventilation, construction details, and inaccessible areas differ. Read for the chain of evidence rather than a single label.
A useful conclusion connects an observation to an action. For example, a documented wet wall cavity may justify invasive evaluation, controlled drying, material removal, or repair. If the report labels a sample “high” without identifying its likely source, affected materials, or next step, ask the inspector to explain how that result changes the work plan.
Essential Elements of a Defensible Inspection Document
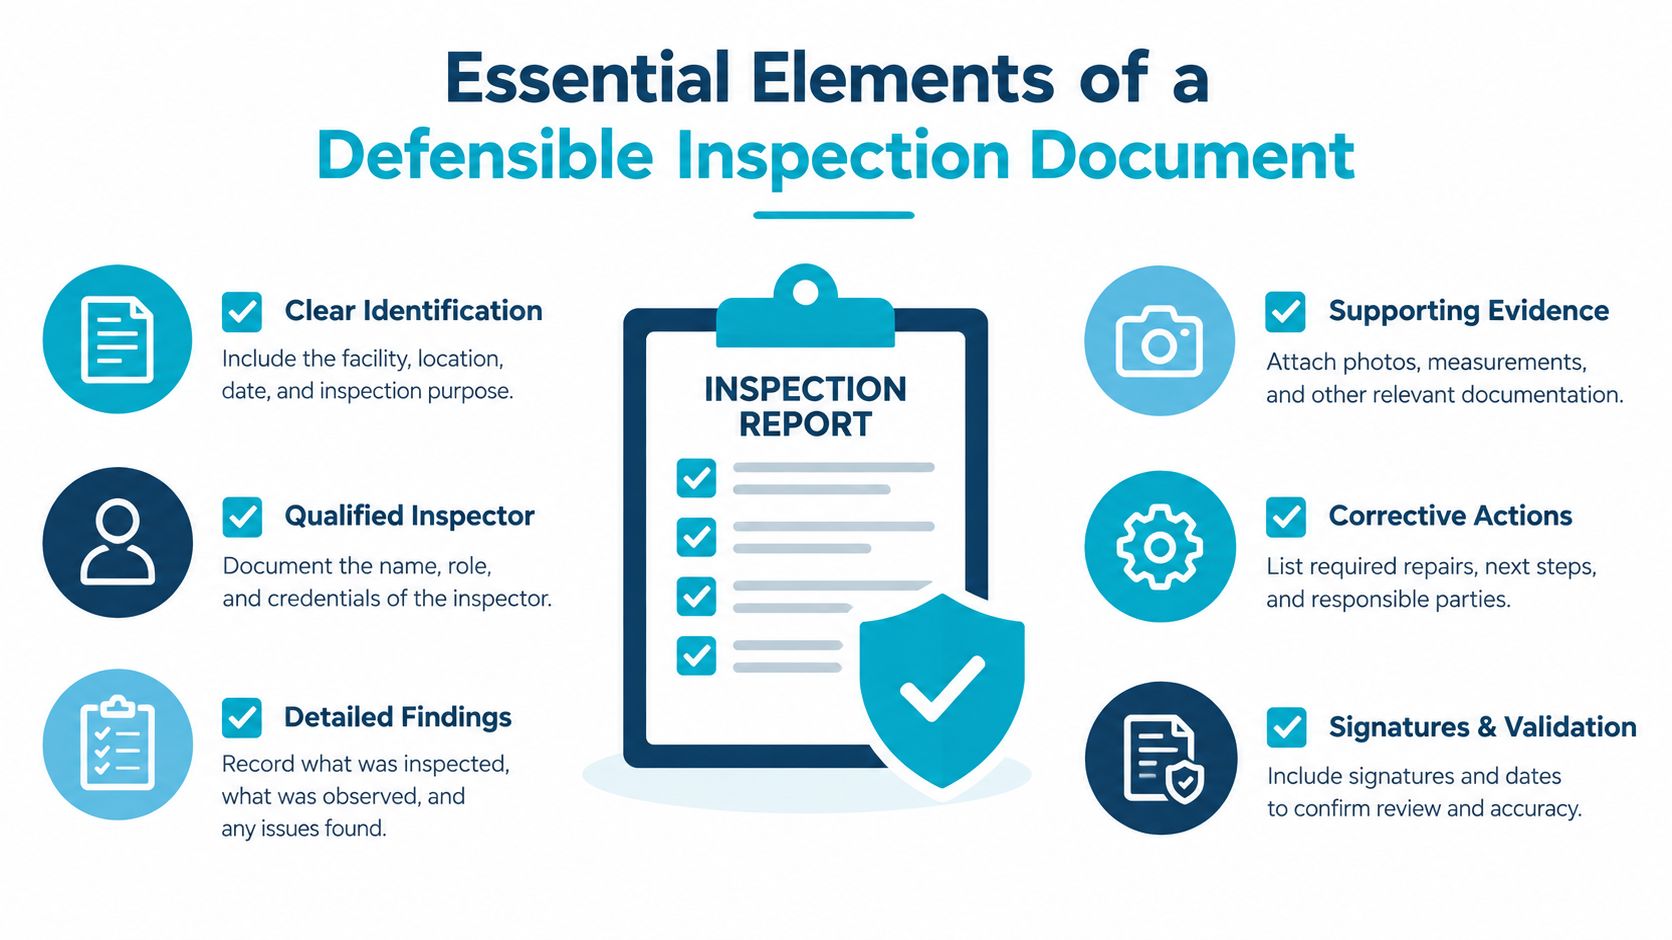
A defensible report should let another qualified professional understand what the inspector examined, what evidence was collected, what remained uncertain, and what work is justified. Independent standards-of-practice guidance says the document should explicitly record moisture intrusion, water damage, musty odors, apparent mold growth, conditions conducive to growth, laboratory results for collected samples, and uninspected systems or components with the reason for each omission (IAC2 mold inspection standards).
Check the scope before reviewing the findings
Start with the inspection scope. The report should identify the property, inspected rooms, methods used, visible limitations, and areas that weren’t entered or opened. An attic, crawl space, HVAC system, wall cavity, or locked room can materially affect the conclusion, so the reason for omission matters.
Then verify the evidence record:
- Moisture intrusion and water damage: Find descriptions of leaks, staining, wet materials, condensation, flooding, or previous repairs.
- Visible or suspected growth: Confirm that photographs identify location, material, approximate extent, and condition.
- Odors and conducive conditions: Musty smells, poor ventilation, recurring condensation, and damp building materials belong in the narrative.
- Measurements and samples: Review moisture readings and laboratory results when samples were collected.
- Limitations: Check whether inaccessible locations or untested systems could conceal additional damage.
- Recommendations: The report should connect findings to further evaluation, remediation, drying, removal, repair, or verification.
The report becomes more useful when every recommendation has a corresponding observation. A contractor can price work accurately when the document distinguishes wet drywall from stained but dry drywall, or visible growth from an area that merely warrants opening.
For a Florida property owner who needs a field assessment, AMPM Restoration’s professional mold inspection services include source identification and reporting that can support decisions about remediation and repairs. Regardless of which provider you choose, insist on a written record rather than a verbal impression.
A thorough report protects the decision-making process because it records both what the inspector found and what the inspector couldn’t confirm.
Finally, retain photographs, sample chains of custody when applicable, invoices, drying records, repair receipts, and the final verification document together. A complete file helps contractors work from the same facts and gives insurers clearer documentation during claim review.
Decoding Moisture Meter Readings and Thermal Imaging
Moisture readings often provide the clearest quantitative evidence in a mold inspection report. They don’t identify every organism, but they can show whether building materials remain wet and help an inspector trace the path of a leak.
One published inspection report treats 17% moisture content or greater in organic building materials as hazardous and worthy of further investigation, while moisture below 16% generally inhibits destructive and surface fungi (sample moisture-content guidance). These figures are useful decision points, not universal substitutes for professional judgment. Material type, temperature, meter calibration, depth, and the surrounding conditions all affect interpretation.
Use the number with its location
A reading only becomes actionable when the report tells you where it was taken and what material was measured. “High moisture in wall” is less useful than a documented reading tied to a specific room, wall section, cabinet, subfloor, or framing member.
| Moisture Content (MC) | Risk Level | Recommended Action |
|---|---|---|
| Below 16% | Generally inhibits destructive and surface fungi | Continue checking for hidden leaks, document the dry condition, and investigate any odor or visible damage |
| 16% to below 17% | Transitional and requires context | Compare with nearby materials, inspect for active intrusion, and monitor or dry as professional findings require |
| 17% or greater | Hazardous in organic building materials and worth further investigation | Trace the moisture source, begin appropriate drying, and evaluate for rot, microbial growth, or material removal |
Thermal imaging adds a different kind of information. A camera can reveal temperature patterns associated with leaks, missing insulation, condensation, or HVAC problems, but a cool color on the screen isn't proof of mold. The inspector should correlate the image with moisture-meter readings, visual observations, and the building's construction.
For leak tracing around ceilings, walls, floors, and mechanical systems, AMPM Restoration's thermal imaging leak detection service is one example of a targeted diagnostic option. The useful outcome isn't the colorful image itself. It's a defensible explanation of what the pattern suggests and what should be opened, dried, repaired, or monitored.
Don't compare readings from different materials as though they were identical. A wood-framing reading, a drywall reading, and a concrete reading have different meanings. Ask whether the inspector established a dry reference area, recorded the instrument and location, and explained why the measurement changes the remediation scope.
Visual Evidence Versus Air Sampling Limitations
A laboratory page can appear authoritative because it lists species names and spore counts. In a humid Florida home, however, the remediation decision usually depends more on where moisture entered, which materials were affected, and whether visible growth or damage is documented. Photographs, moisture mapping, leak paths, damaged finishes, and recorded musty odors show the building conditions that need correction.
Visible growth often makes routine sampling unnecessary, particularly when the inspector can document its extent and connect it to a moisture source. Air sampling has a narrower role. A post-remediation sample taken inside sealed containment with the HVAC off answers a different question than a sample collected in an occupied bedroom with ceiling fans running. The report should state which conditions applied.
What each method can and cannot tell you
| Evidence type | Useful for | Main limitation |
|---|---|---|
| Visual inspection | Locating visible growth, staining, damaged materials, and building conditions | Cannot confirm what lies inside every closed cavity |
| Musty odor documentation | Identifying areas that may need further investigation | Odor can suggest a problem but doesn’t define the source alone |
| Moisture measurement | Finding wet materials and tracking drying progress | Readings require material and location context |
| Thermal imaging | Locating temperature anomalies that may support leak investigation | A thermal pattern isn’t proof of mold |
| Air sampling | Characterizing airborne particles when targeted sampling is justified | A single result cannot establish the full building condition |
| Surface sampling | Supporting cleaning or remediation verification | It doesn’t replace source identification or visual assessment |
NIOSH guidance treats visual inspection and musty odors as more reliable indicators than air sampling alone (NIOSH mold guidance). That position fits field practice: a spore count may describe airborne particles at one moment, while it cannot identify a wet wall, failed flashing, or an unrepaired condensate leak.
Sampling still has practical uses. An inspector may recommend targeted air or surface collection when growth is suspected inside a concealed area, when visual evidence cannot answer a specific question, or when post-remediation verification is required. The report should connect each sample to a purpose rather than present laboratory results as the complete diagnosis.
Questions to ask about the sample page
Ask what question the sample was designed to answer. Confirm where it was collected, whether the HVAC system or fans were operating, what material or air volume it represents, and whether the location was occupied or contained. Then compare the result with photographs, moisture findings, odors, and the proposed scope of work.
For an additional assessment of indoor conditions, AMPM Restoration's air quality testing for mold can supplement visual inspection and moisture investigation. Testing should support a building decision. It should not replace source control, drying, removal of affected materials, or repairs that prevent recurrence.
How to Read the Executive Summary and Findings
The executive summary is where most homeowners begin, but it shouldn't be where they stop. A technically strong mold inspection report summarizes observational and measurable data, explains the reasoning used to interpret it, and reaches evidence-based conclusions that prioritize moisture and source identification over pass or fail laboratory thresholds (New Jersey mold guidelines).
Follow the evidence in five passes
First, identify the headline condition. Find the rooms, materials, and systems named in the summary. Note whether the conclusion describes active moisture, past damage, visible growth, suspected concealed growth, or conditions that could support recurrence.
Second, locate the cause. Look for the source identified by the inspector. In a Florida home, that might include plumbing, a roof or window assembly, storm entry, HVAC condensation, poor bathroom ventilation, or a foundation and drainage issue.
Third, check the measurements. Match the summary's claims with the moisture map, meter readings, thermal images, or other field data. A recommendation to remove material should make sense alongside the documented condition of that material.
Fourth, inspect the photographs. Photographs should identify the room and affected area, not merely show a close-up that removes context. Look for evidence of staining, swelling, deteriorated surfaces, visible growth, or the route water followed.
Fifth, read the limitations. An apparently reassuring summary deserves caution if portions of the property weren't accessible. The report should explain what wasn't inspected and why, then recommend further evaluation where necessary.
Separate findings from recommendations
A finding describes evidence. A recommendation describes action. For example, “moisture detected at the lower wall” is a finding, while “open the wall, identify the leak, dry affected materials, and evaluate for remediation” is a recommendation.
That distinction helps when comparing restoration proposals. A bid should address each documented source, affected material, containment need, cleaning or removal method, drying requirement, repair, and verification step. If a contractor offers a broad cleanup without addressing the leak described in the summary, the scope is incomplete.
If the executive summary conflicts with the detailed pages, request clarification before signing a remediation contract. A professional inspector should be able to explain how the conclusion follows from the observations and measurements.
Translating Findings into a Remediation Action Plan
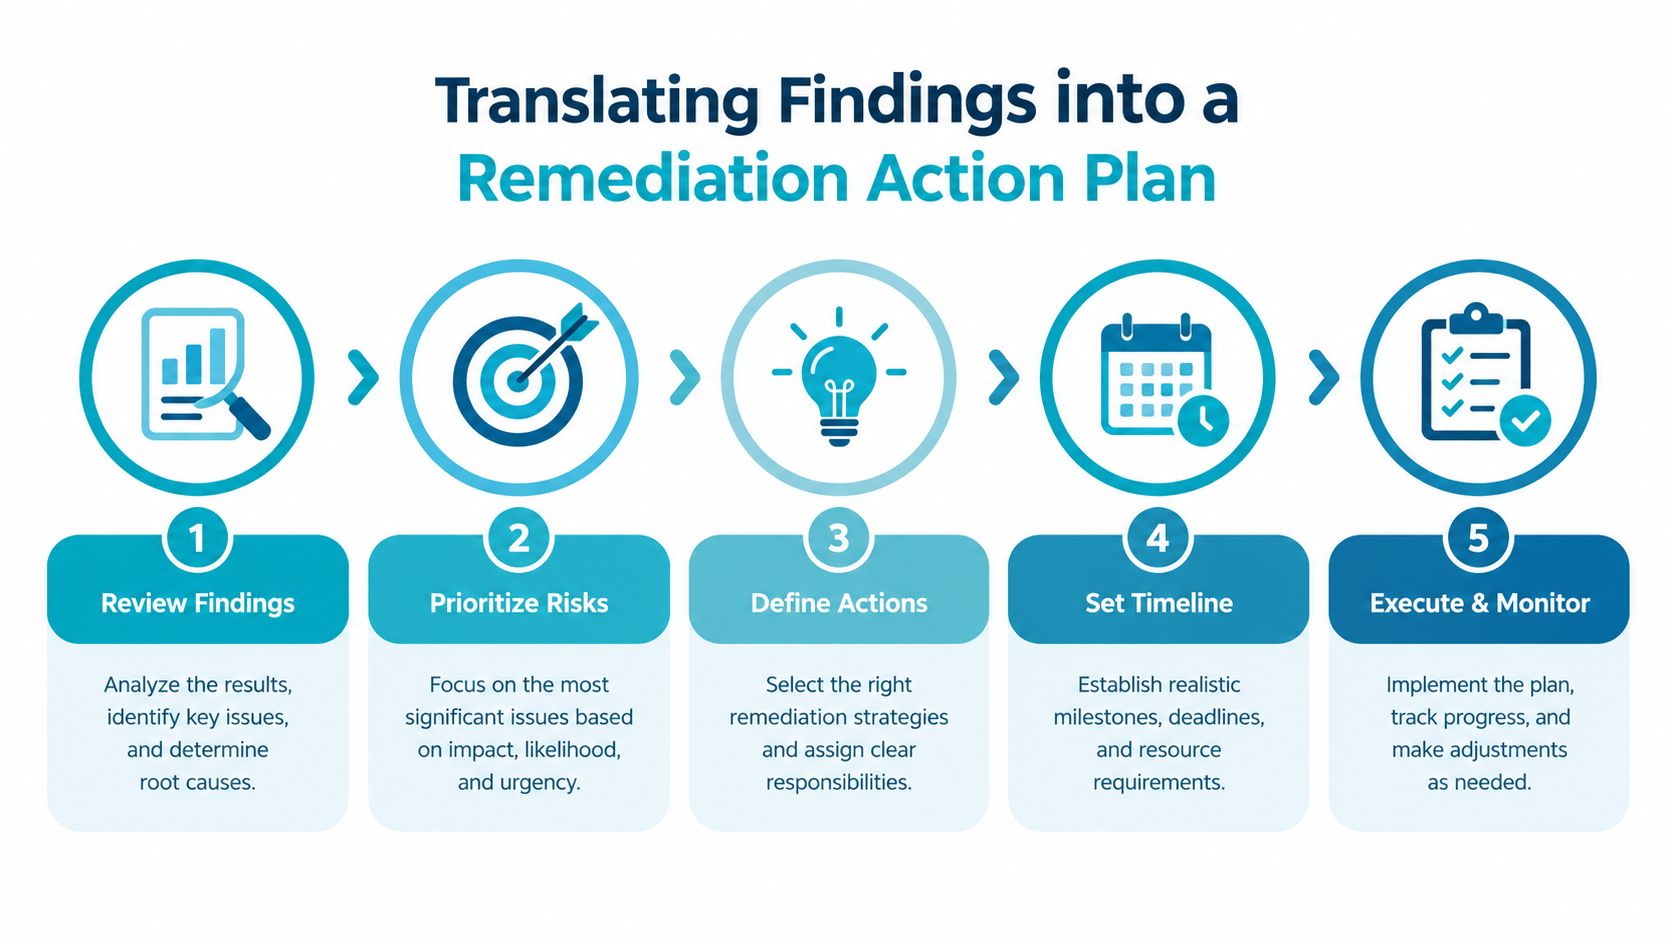
A report becomes valuable when it changes what people do next. The action plan should connect the moisture source, the affected materials, the size and location of growth, containment requirements, removal or cleaning methods, drying, repairs, and final verification.
EPA remediation guidance recommends full containment for contaminated areas greater than 100 square feet, while EPA cleanup guidance flags mold growth covering more than 10 square feet for more intensive attention (EPA mold remediation course). These thresholds help frame the response, but the building's layout, occupants, HVAC system, material condition, and risk of cross-contamination also matter.
Build the scope from cause to confirmation
Start with the moisture source. A remediation crew may remove damaged drywall, but the work won't hold if a leaking supply line, roof opening, or condensation problem remains active.
Then define the affected zone. The report should identify rooms, surfaces, materials, and whether contamination may extend behind finishes. The size of visible growth is important, but it isn't the only factor. Hidden wet materials and connected air pathways can expand the practical scope.
A strong work plan usually addresses:
- Source correction: Repair the leak, drainage defect, HVAC issue, or other moisture pathway.
- Containment: Isolate the work area when the size or location creates a cross-contamination risk.
- Air control: Use appropriate filtration and pressure-control methods for the selected protocol.
- Material decisions: Clean salvageable materials and remove porous materials that cannot be adequately restored.
- Drying: Confirm that affected assemblies have reached an appropriate dry condition.
- Reconstruction: Replace removed finishes only after the source and moisture condition are corrected.
- Verification: Compare final conditions with the original report and document the completed work.
Use the report to compare contractor bids
Two proposals may use the same label, “mold removal,” while offering very different scopes. One may include containment, source correction, removal, cleaning, drying, and verification. Another may only wipe visible surfaces.
Ask each contractor to identify the report page or photograph supporting each major task. Require the proposal to state what happens to cabinets, drywall, insulation, flooring, HVAC components, and personal contents. Also ask who handles repairs after remediation and how the final condition will be documented.
The goal isn't the cheapest cleanup. It's a scope that removes the affected materials, controls exposure during the work, and prevents the moisture problem from returning.
Post-Remediation Verification and Clearance Testing
The original mold inspection report establishes the baseline for checking completed work. After remediation, compare each initial finding with the contractor's documentation. The former leak should be repaired, wet materials should be dry or removed, visible growth should no longer be present, and previously inaccessible areas should be addressed or clearly identified as remaining limitations.
Independent mold-report guidance recommends that a thorough report include containment and post-remediation verification steps. It also explains that surface sampling is mainly used to confirm whether an area was adequately cleaned or remediated, rather than to replace the initial moisture investigation (mold evaluation and verification guidance).
A practical verification sequence
- Review the completed scope. Compare invoices, photographs, drying records, material-removal notes, and repair documents with the original recommendations.
- Confirm the source repair. Verify that plumbing, roofing, windows, drainage, ventilation, or HVAC defects were corrected rather than temporarily covered.
- Perform a visual review. The work area should be free of visible growth and debris associated with the remediation process.
- Recheck moisture. Moisture readings should support the conclusion that affected materials are dry or have been removed.
- Evaluate remaining limitations. Any cavity, system, or component that couldn't be inspected should be documented with the reason and any recommended follow-up.
- Use targeted sampling when justified. Surface sampling may help confirm cleaning, but the sampling question and location should be clear.
A clearance document shouldn't just announce that testing is complete. It should identify the areas reviewed, methods used, findings, limitations, and whether the original remediation objectives were met. If the first report identified a damp wall but the final report discusses only airborne results, ask how the wall was evaluated.
For homeowners who want help coordinating this stage, AMPM Restoration's mold remediation clearance testing is one available service option. Whether verification is performed by the original company or an independent professional, clarity matters more than the label.
Verification standard: The final review should answer the same questions as the first report, with evidence showing that the source, materials, moisture, and affected areas were addressed.
Keep the initial and final reports together. That record can support insurance communication, future property disclosures, maintenance planning, and any later investigation if odors or moisture return.
Frequently Asked Questions About Mold Inspection Reports
Is a mold inspection report required for an insurance claim?
Insurance requirements vary by policy, loss type, carrier, and circumstances. A report may not be legally required in every situation, but written documentation can help establish what happened, where moisture or damage was found, what areas were inaccessible, and why specific restoration work was recommended.
A defensible report should record suspected microbial growth, moisture intrusion, water damage, musty odors, conducive conditions, uninspected areas and reasons, and laboratory results when sampling occurs (mold inspection standard operating procedure). Contact your insurer promptly and ask what records they need before authorizing extensive work.
How long does a mold inspection take?
The duration depends on property size, accessibility, visible conditions, moisture history, and whether sampling is justified. A straightforward visual assessment may be completed faster than an investigation involving multiple rooms, concealed moisture, crawl spaces, HVAC components, or laboratory samples.
The report should make clear what was inspected and what wasn't. A short visit isn't automatically inadequate, and a long visit isn't automatically thorough. Scope and documented evidence matter more than elapsed time.
What should I do if an area couldn't be inspected?
Read the reason carefully. The area may have been locked, unsafe, obstructed, sealed, inaccessible without invasive work, or outside the agreed scope. Ask whether the limitation affects the conclusion and whether a follow-up inspection, opening, moisture scan, or specialist evaluation is recommended.
Don't treat an inaccessible wall or crawl space as a clean result. Treat it as an unresolved part of the building story.
Should I rely on the highest spore count in the report?
No. A single count doesn't provide a federal pass or fail answer, and the EPA says sampling is often unnecessary when visible growth is already present (EPA mold sampling guidance). Read the sample alongside the location, inspection photographs, moisture readings, odors, building history, and the inspector's reasoning.
The practical question is whether the result changes the remediation decision. If it doesn't identify a source or alter the recommended work, it shouldn't overshadow stronger physical evidence.
Does visible mold always require laboratory testing?
No. The EPA states that, in most cases, sampling is unnecessary when visible mold growth is present. Testing may still be appropriate when the inspector needs to answer a specific question, investigate concealed conditions, or verify cleaning after remediation.
Sampling should have a purpose. Ask what decision the sample will support before authorizing it.
Can I clean the mold myself?
Small, accessible areas may sometimes be addressed with appropriate precautions, but the decision depends on the material, source, extent, location, occupants, HVAC involvement, and whether hidden damage is likely. Porous materials that absorbed water may not be restorable through surface cleaning alone.
If the report identifies recurring moisture, concealed growth, extensive affected materials, or a containment concern, professional evaluation is the safer path. In Bradenton, Sarasota, Saint Petersburg, Lakewood Ranch, Tampa Bay, and nearby Gulf Coast communities, AMPM Restoration provides water damage restoration, mold inspection and removal, fire and smoke restoration, storm and flood cleanup, commercial restoration, and reconstruction support. The company is available 24/7, offers free inspections and estimates, assists with insurance claims, and has financing options for qualifying projects.
Call 941-946-7807 to arrange a free inspection and estimate for your mold inspection report findings, moisture intrusion, or related restoration needs. AMPM Restoration can help interpret the evidence, coordinate insurance claim assistance, provide financing options, and turn the recommended work into a clear plan for your Florida property. Visit AMPM Restoration Services to request help today.