


How to Kill Mold on Drywall
You walk into a bedroom after a humid Florida week, notice a dark spot creeping along the drywall, and your stomach drops. Maybe it showed up after a slow plumbing leak, a roof issue, or condensation near an exterior wall. Most homeowners searching how to kill mold on drywall are in exactly that moment, trying to figure out if they can wipe it away or if they’re looking at a larger problem inside the wall.
On the Gulf Coast, that concern is justified. Drywall is porous, Florida homes stay humid for long stretches, and visible growth often means moisture has been active longer than anyone realized. At AMPM Restoration, based in Bradenton and serving Bradenton, Sarasota, Tampa Bay, Saint Petersburg, Lakewood Ranch, and nearby communities, we see this pattern often. The right response depends on how much mold you have, where it’s growing, and whether it’s only on the surface or already inside the drywall system.
That Unsettling Spot on Your Wall What It Means for Florida Homes
A small patch on painted drywall can start as something easy to dismiss. Homeowners tell us they thought it was dirt, a scuff mark, or staining from an old leak. Then the room starts to smell musty, the spot spreads, or the paint bubbles slightly. In Florida, that sequence usually points back to one thing. Moisture stayed where it shouldn’t.
Why drywall is a problem material
Drywall doesn’t behave like tile or glass. Once moisture gets into the paper facing or the gypsum core, simple surface cleaning has limits. That’s why the search for how to kill mold on drywall often leads to frustrating advice. The internet is full of spray-and-wipe fixes that only address what you can see.
Practical rule: If mold is growing on drywall, think beyond the stain. Ask what fed it, how long the material stayed damp, and whether the wall cavity is involved.
Florida homes create ideal conditions for hidden spread. Air conditioning helps, but it doesn’t fix roof leaks, plumbing failures, window intrusion, or a wall cavity that never dried properly after a past event. Behind furniture, around supply vents, near exterior walls, and under windows are common trouble spots because airflow is limited and moisture lingers.
Why panic and denial both cause damage
Homeowners usually lean one of two ways. Some panic and start spraying every cleaner they own. Others ignore the spot because they don’t want to open the wall. Both reactions can make the situation worse. Aggressive scrubbing can damage drywall paper, and delay gives mold more time to stay active where you can’t see it.
The better response is controlled and honest. If it’s a tiny surface-level patch, careful DIY cleanup may be possible. If it’s larger, recurring, or tied to a leak, professional removal is the safer move. That matters for health, indoor air quality, and the long-term condition of the house.
Is It Mold Identifying Growth and Knowing the Risk Threshold
On drywall, the question is usually bigger than “what is this spot?” The underlying question is whether the growth is limited to the paint surface or whether moisture has already gotten into the paper facing and gypsum. That distinction changes the cleanup plan.
What mold usually looks and smells like
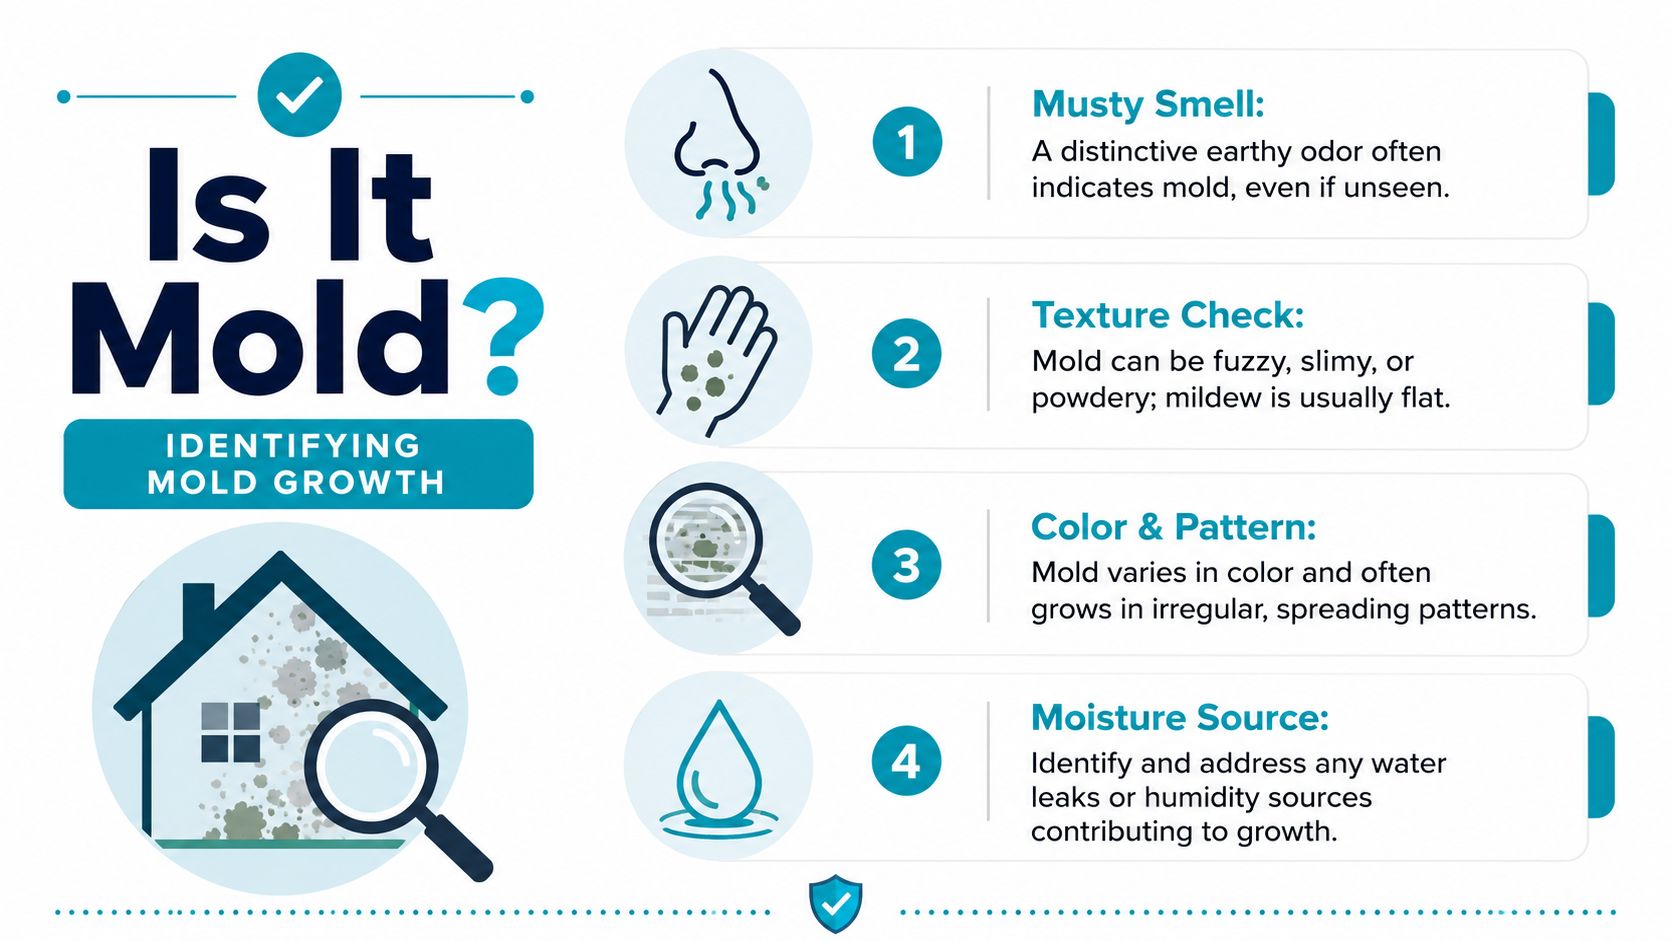
Mold on drywall often shows up as uneven spotting, shadowy staining, or blotchy growth that follows a damp area instead of forming a clean outline. Color alone does not confirm it. Mold can look black, green, gray, white, or brown, and old water stains can look suspicious even when active growth is no longer obvious.
Odor matters. A musty, earthy smell near the wall, especially around baseboards, window corners, exterior walls, or around an old leak, is a strong warning sign that moisture has lingered long enough for growth to start.
A few field clues help separate a harmless mark from a mold problem:
- Irregular edges: Growth often feathers outward or collects along seams, corners, and fastener lines.
- Texture changes: It may appear fuzzy, dusty, slimy, or slightly raised. Sometimes the drywall paper looks stained and rough before visible colonies spread.
- Moisture history: Roof leaks, plumbing seepage, AC condensation, window intrusion, and past flooding all raise concern.
- Material changes: Bubbling paint, softened drywall, swollen baseboards, or crumbling paper usually point to a deeper issue than a simple surface stain.
This quick visual checklist helps homeowners sort out what they’re seeing:
If the wall was recently wet, timing matters. AMPM has a practical breakdown of the mold growth timeline after water damage that helps explain why a small leak can turn into a drywall removal job faster than many homeowners expect.
The threshold that changes the decision
Once visible mold covers a larger section of drywall, this stops being a simple wipe-down problem and becomes a controlled removal problem. Industry guidance commonly uses about 10 square feet as the point where homeowners should stop and bring in qualified help. In practical terms, that is a patch roughly a little bigger than a standard interior door.
That size threshold is only part of the decision. I have seen walls with a spot no larger than a dinner plate that still required professional demolition because the cavity behind it was wet, the insulation was affected, and the drywall face had started to fail. On the other hand, a tiny patch on a painted bathroom wall with no softness and no ongoing moisture source may be manageable with careful DIY cleaning.
The key trade-off is hidden spread. Drywall is porous. If mold has fed into the paper facing or gypsum core, spraying a cleaner may lighten the stain while leaving contaminated material in place.
Surface issue or wall cavity issue
Professional standards matter. Restoration contractors do not judge drywall by appearance alone. We check moisture, look for loss of material integrity, and determine whether the contamination extends beyond what is visible. If the wall cavity is involved, the fix usually means removal, not cleaning.
Two terms homeowners should know are the 2-foot rule and flood cuts. After a significant water loss, damaged drywall is often cut at least 2 feet above the highest point of visible water impact or contamination so the wall cavity can be opened, dried, cleaned, and verified. In larger losses, pros may make a flood cut, a horizontal removal cut that takes out the affected lower section of drywall in a controlled line. That approach is far more reliable than trying to spray through paint and hope the inside of the wall is fine.
A small stain that keeps returning, drywall that feels soft, paint that bubbles, or a musty smell that seems to come from inside the wall usually means the problem is past the DIY stage.
Skip mail-in test kits if your real concern is whether the wall needs to be opened. A moisture reading, a trained inspection, and a scope of removal tell you far more than a sample result without a plan for safe cleanup.
Your First Priority: Personal Safety and Containing the Area
If you scrub or cut into moldy drywall without controlling the area first, you can spread contamination well beyond the stain you see. I’ve seen a small wall spot turn into a cleanup issue in nearby rooms because someone started wiping before isolating the space.

PPE that actually matters
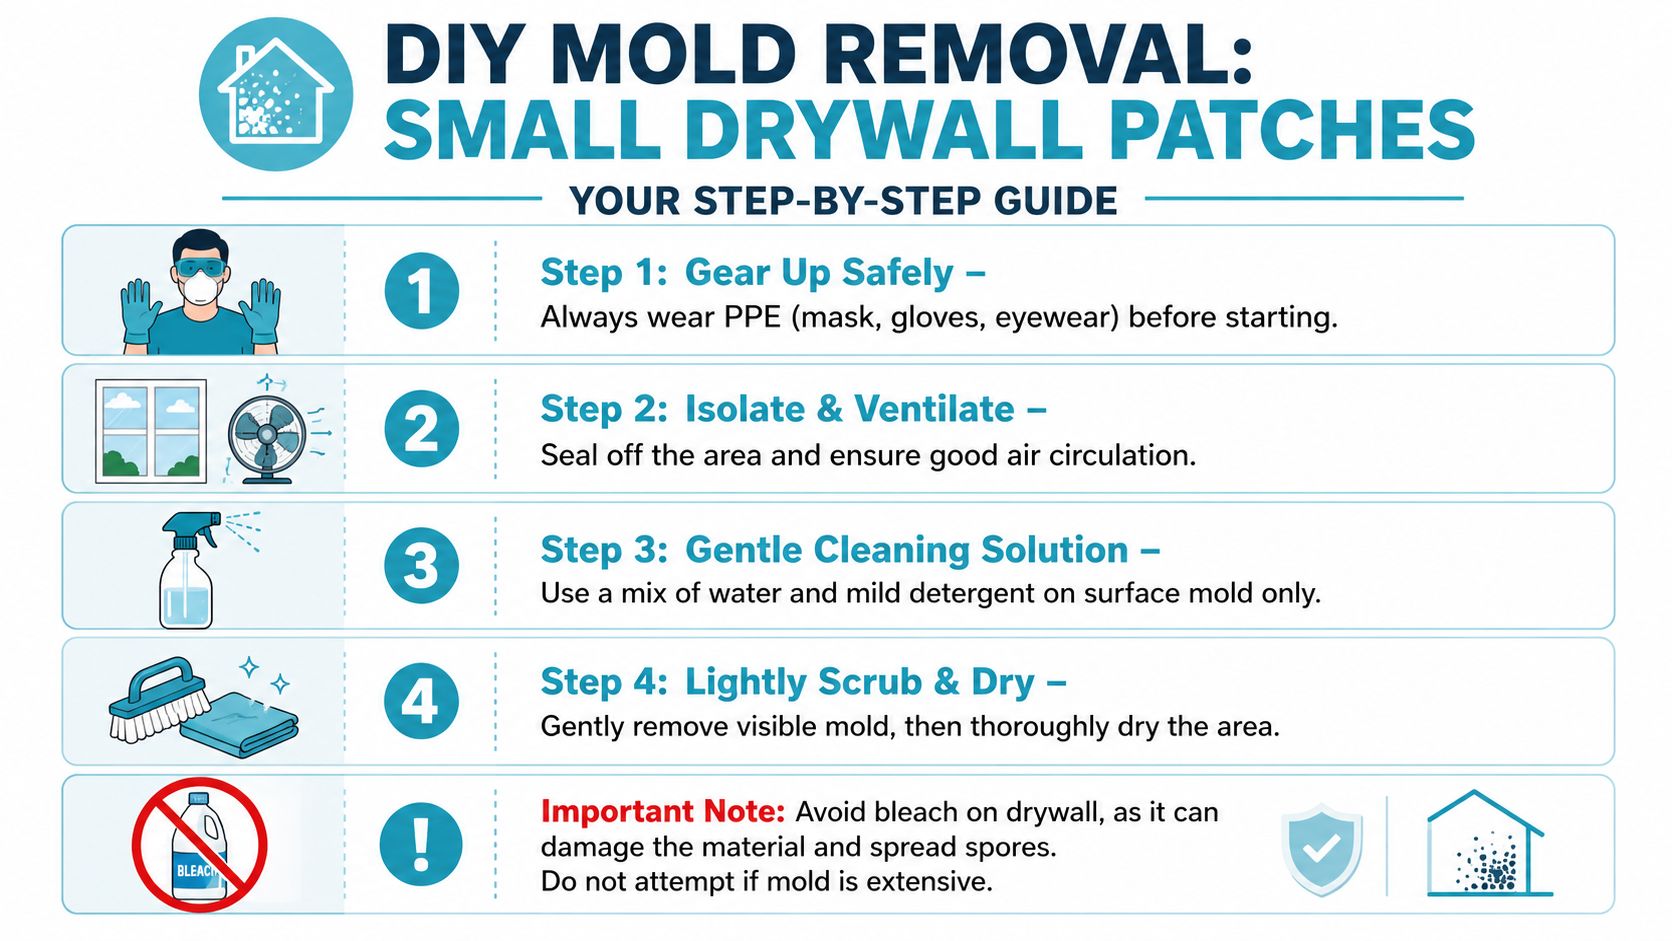
Use protective gear that keeps spores and debris out of your lungs, eyes, and off your skin.
- N95 respirator: Needed if you are wiping, scraping, or removing a small affected area.
- Non-vented goggles: They protect your eyes from dust and cleaning splash.
- Rubber or nitrile gloves: Gloves keep contamination off your hands and wrists.
- Clothes you can wash right away: Do not wear cleanup clothes through the rest of the house.
People with asthma, COPD, immune suppression, or other respiratory concerns should stay out of the work area. If someone in the home is already reacting to the environment, review these symptoms of mold exposure in a home and treat that as a sign to slow down and get help.
Containment stops a small problem from spreading
Professional mold work on drywall starts with isolation for a reason. Drywall dust, loose spores, and bits of contaminated paper facing can go airborne fast once you disturb the surface. That matters even more in Florida homes, where air handlers can pull particles into the system if the area is left open.
For a very small patch, the minimum containment steps are straightforward:
- Close the room door if the area is inside a separate room.
- Tape plastic sheeting over the doorway or around the immediate work zone.
- Take out nearby fabrics and loose items that can trap dust.
- Keep HVAC supply air and random fans from blowing across the area while you work.
- Bag wipes, debris, and disposable gear before carrying them through the house.
HEPA vacuuming during and after removal helps reduce loose debris, and controlled containment is standard practice during drywall mold cleanup, as shown in this DIY homeowner drywall guide.
One more judgment call matters here. If the drywall is soft, the spot is larger than a tiny surface patch, or you may need to cut material out, stop before opening the wall. That is the point where containment, cleanup, and disposal need to be handled like restoration work, not casual house cleaning.
A Guide to DIY Mold Removal on Small Drywall Patches
DIY cleaning has a narrow lane on drywall. It applies to a very small, surface-level spot on painted drywall that is still hard, dry, and unchanged in texture. If the stain keeps returning, the wall feels soft, the paper facing is bubbling, or you suspect the growth started after a leak, surface cleaning is no longer a reliable fix.
That distinction matters on drywall because the material is porous. Once growth gets into the paper facing or below the paint, wiping the surface may improve the appearance without removing the contamination. In professional work, that is the point where removal, not cleaning, becomes the standard. Homeowners dealing with anything beyond a tiny patch should keep that in mind before spending a weekend spraying products on a wall that may still need to be cut out.
What to use and what not to use
Bleach gets a lot of attention, but it is usually a poor choice for drywall. Guidance from Health Canada advises against soaking porous materials and recommends controlled cleaning methods that do not add unnecessary moisture, as outlined in its moisture and mould cleaning recommendations. On a painted drywall surface, too much liquid can soften the paper and make a small problem worse.
For a tiny surface spot, the safer options are simple:
- Undiluted white vinegar
- 3% hydrogen peroxide
Use enough cleaner to wet the surface lightly, not soak the wall. Avoid mixing chemicals. Avoid aggressive scrubbing that tears the paint or fuzzes the drywall paper.
How to clean a tiny surface patch
For painted drywall that is still firm and dry, use a controlled process:
- Put on PPE and keep the area contained.
- Apply undiluted white vinegar or 3% hydrogen peroxide with a cloth or spray bottle.
- Let it dwell briefly, then wipe or lightly scrub the spot.
- Dry the area completely with clean towels and controlled airflow that does not spread debris through the house.
- Watch the area over the next several days. If staining returns, the drywall likely needs professional removal rather than more cleaning.
Keep your pressure light. If the finish starts coming off, the paper facing lifts, or the wall feels soft under your hand, stop work. At that point, the issue has moved out of the safe DIY category.
Keep water to a minimum
The goal is surface cleaning, not saturation. A barely damp cloth works better than flooding the wall with product. In Florida homes, added moisture is part of what keeps mold problems alive, so every extra spray matters.
This is also where homeowners get tripped up by online advice. A wall can look better and still fail the ultimate test. If the source moisture has not been corrected, or if growth extends into the drywall itself, the professional standard often shifts to removing affected drywall, sometimes with a larger cut than homeowners expect. If you want a clearer explanation of where cleaning stops and removal begins, AMPM has a practical guide on the best way to remove mold from drywall.
If you need a separate resource for repairing cosmetic wall damage after the mold issue is resolved, this DIY homeowner drywall guide is useful for patching and finishing work. It does not replace remediation, but it can help once contaminated material has been safely addressed.
How to bag waste safely
Used rags, disposable wipes, and any small contaminated piece should be sealed before they leave the room. Wrap debris in plastic, tape it closed, and bag it before carrying it through the house. Open disposal spreads dust and spores to clean areas.
For a tiny patch, that may be the end of the job. If cleanup exposes damaged drywall, hidden staining, or a larger affected area than you first saw, stop there and bring in a restoration contractor. That is usually the safer call, and in many Florida homes, it is the less expensive call than cleaning, repainting, and then finding out the wall still has to be opened.
When to Call a Pro The Reality of Hidden Mold in Drywall
Most DIY articles often stop too early. They show surface cleaning, maybe mention a spray product, and leave homeowners thinking the problem is solved because the wall looks cleaner. On drywall, appearance is a poor finish line.
Why surface cleaning often fails
Drywall is porous. Mold doesn’t just sit on the paint film waiting to be wiped off. Once it gets into the paper facing or gypsum core, sprays can improve the surface while leaving contamination inside the material. That’s why professionals focus on source removal, not just visual cleanup.
According to the ANSI/IICRC S520 Standard of Care, professional mold remediation generally requires cutting out and replacing drywall extending 24 inches around a visible moldy area to ensure complete removal, because sprays can’t kill the mold’s root system within porous material. That standard is summarized in this discussion of the IICRC 24-inch drywall removal rule.
What a flood cut means in real life
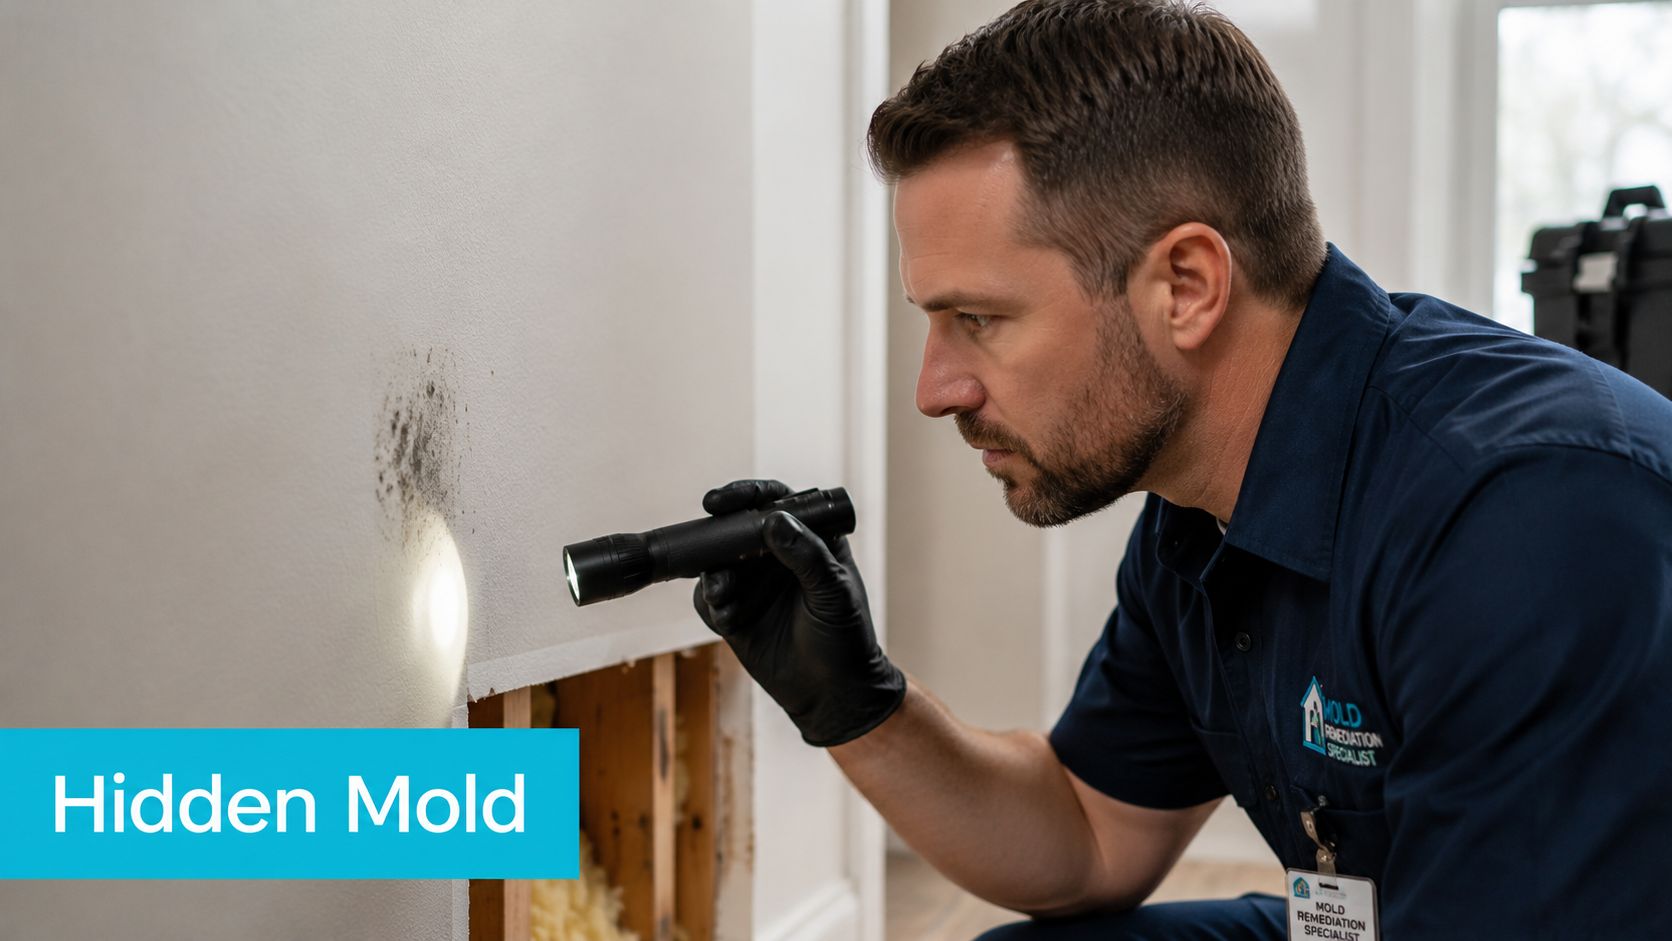
Homeowners hear terms like flood cut and 2-foot rule and aren’t always told what that means. In practice, it means the contaminated drywall and often the insulation behind it are removed beyond the obvious stain line so hidden spread doesn’t remain in place.
Another community discussion on drywall mold removal notes a practical cutting clearance of 12 to 18 inches beyond the visible mold boundary when removing damaged drywall, reflecting the need to account for hidden spread in porous material, as seen in this DIY discussion on treating mold on drywall.
The exact cut line depends on what inspection finds. On a Florida exterior wall, for example, a small visible spot under a window may trace back to a larger wet cavity behind the baseboard or insulation. Opening the wall is how you verify what’s affected.
What pros do that DIY usually doesn’t
Professional remediation isn’t just demolition. The sequence matters:
| Step | Why it matters |
|---|---|
| Containment | Keeps spores from spreading into occupied areas |
| HEPA vacuuming | Removes loose particulate before wiping and cutting |
| Damp wiping with a biocide cleaner | Reduces contamination on remaining structural surfaces |
| Post-remediation inspection | Confirms the result is more than a cosmetic clean |
That sequence comes from a standard professional process described by BluSky in this overview of the mold remediation process.
If the mold started after roof leakage, insurance questions often come up alongside the remediation scope. Homeowners dealing with sheetrock damage from roof intrusion may also find PIA’s expert advice on roof leak insurance helpful as they sort out claim expectations.
AMPM Restoration Services includes material removal or treatment for mold-affected drywall and antimicrobial application after removal as part of its mold process. When hidden spread is a concern, a proper mold inspection for hidden mold behind walls is the right next step.
Restore Your Home and Peace of Mind with AMPM Restoration
If you’re trying to kill mold on drywall, the most important decision is knowing whether you’re dealing with a tiny surface issue or contaminated wall material that needs to come out. Small surface spots can sometimes be cleaned carefully. Anything larger, recurring, soft, or moisture-related needs a different level of response.
That’s especially true in Bradenton, Sarasota, Tampa Bay, Saint Petersburg, Lakewood Ranch, and nearby Gulf Coast communities, where humidity and hidden moisture keep mold active longer than homeowners expect. Cutting corners on drywall mold usually means you clean the symptom and leave the source.
AMPM Restoration is a 24/7 emergency restoration company at 4301 32nd St W b18, Bradenton, FL 34205, serving homeowners and property owners with water damage restoration, mold inspection and mold removal, fire and smoke damage restoration, storm and flood damage restoration, commercial restoration services, and reconstruction. If you want clarity before the damage spreads, schedule a free mold damage inspection. Call 941-946-7807 for a free inspection and estimate. AMPM also helps with insurance claims and offers financing options so you can move forward without guessing.
Frequently Asked Questions About Drywall Mold
These are the questions Florida homeowners ask me after they find a spot on drywall and realize it may be more than a stain. The short answer is this: drywall is porous, hidden moisture is common, and once growth gets past a very small surface patch, cleanup usually means removal, not just spraying and wiping.
| Question | Answer |
|---|---|
| Can I stay in the house if there’s mold on drywall? | That depends on how much drywall is affected, whether anyone in the home has asthma or other respiratory issues, and whether the area will be disturbed during cleanup. If cutting, sanding, or demolition may be needed, sensitive occupants should stay out of the work area, and in many cases out of the home, until proper containment and cleanup are complete. |
| Does painting over mold solve the problem? | No. Paint only covers staining. It does not remove mold growing in porous drywall, inside the paper face, or in the wall cavity, and it does nothing to correct the moisture source. |
| How do I know if the mold is only on the surface? | A tiny, isolated spot on firm, fully dry painted drywall may be surface growth. If the drywall feels soft, the paint is bubbling, the area keeps coming back, there is a musty odor, or the wall has had a leak, I treat that as a likely removal job. In professional work, we also check beyond the visible spot because contamination often extends farther than homeowners expect. |
| Why does mold come back after I clean it? | Mold returns when moisture is still present or when contaminated drywall was cleaned instead of removed. That is why professional remediation uses moisture mapping, controlled demolition, and, when needed, the 2-foot rule or flood cuts to remove damaged material beyond the visibly affected area. |
| Will insurance cover drywall mold removal? | Coverage depends on what caused the damage and how your policy is written. A sudden water loss is handled differently than a long-term leak or humidity problem. AMPM can document conditions and help you work through the insurance claim process. |
| What humidity should I maintain after cleanup? | Keep indoor relative humidity between 30% and 50% after cleanup to reduce the chance of regrowth, according to this sheetrock mold treatment guidance. |
| When does drywall need to be cut out instead of cleaned? | If the growth is more than a small isolated patch, if the drywall is soft or stained through, if moisture is trapped inside the wall, or if the area was affected by a leak or flood, removal is usually the safer approach. In the field, that often means opening the wall far enough to remove compromised material cleanly and verify the cavity is dry before rebuilding. |
If you've found mold on a wall and don't want to guess whether it's safe to clean or time to cut it out, contact AMPM Restoration Services. We provide free inspections and estimates across Bradenton, Sarasota, Tampa Bay, Saint Petersburg, Lakewood Ranch, and surrounding Gulf Coast communities. Call 941-946-7807 any time for 24/7 emergency help, insurance claim assistance, and financing options.