


A ceiling stain appears after an afternoon storm. The water heater starts hissing. Or you notice a musty smell near a wall that looked perfectly normal last week. On Florida's Suncoast, those signs can turn a small plumbing failure into soaked drywall, damaged flooring, and mold concerns before you know where the water is coming from.
Emergency water leak detection is a clock problem, not only a plumbing problem. Slab foundations can hide supply-line failures, aging copper can leak inside walls, and warm, humid conditions make delayed drying more dangerous. The U.S. Environmental Protection Agency says wet or damp areas should be dried within 24 to 48 hours to prevent mold growth in most cases, as explained in its mold and moisture guidance.
The right first move can limit the loss. The wrong move, such as continuing to use a fixture, walking through standing water near outlets, or waiting for a stain to “dry on its own,” can leave you facing a restoration project instead of a repair.
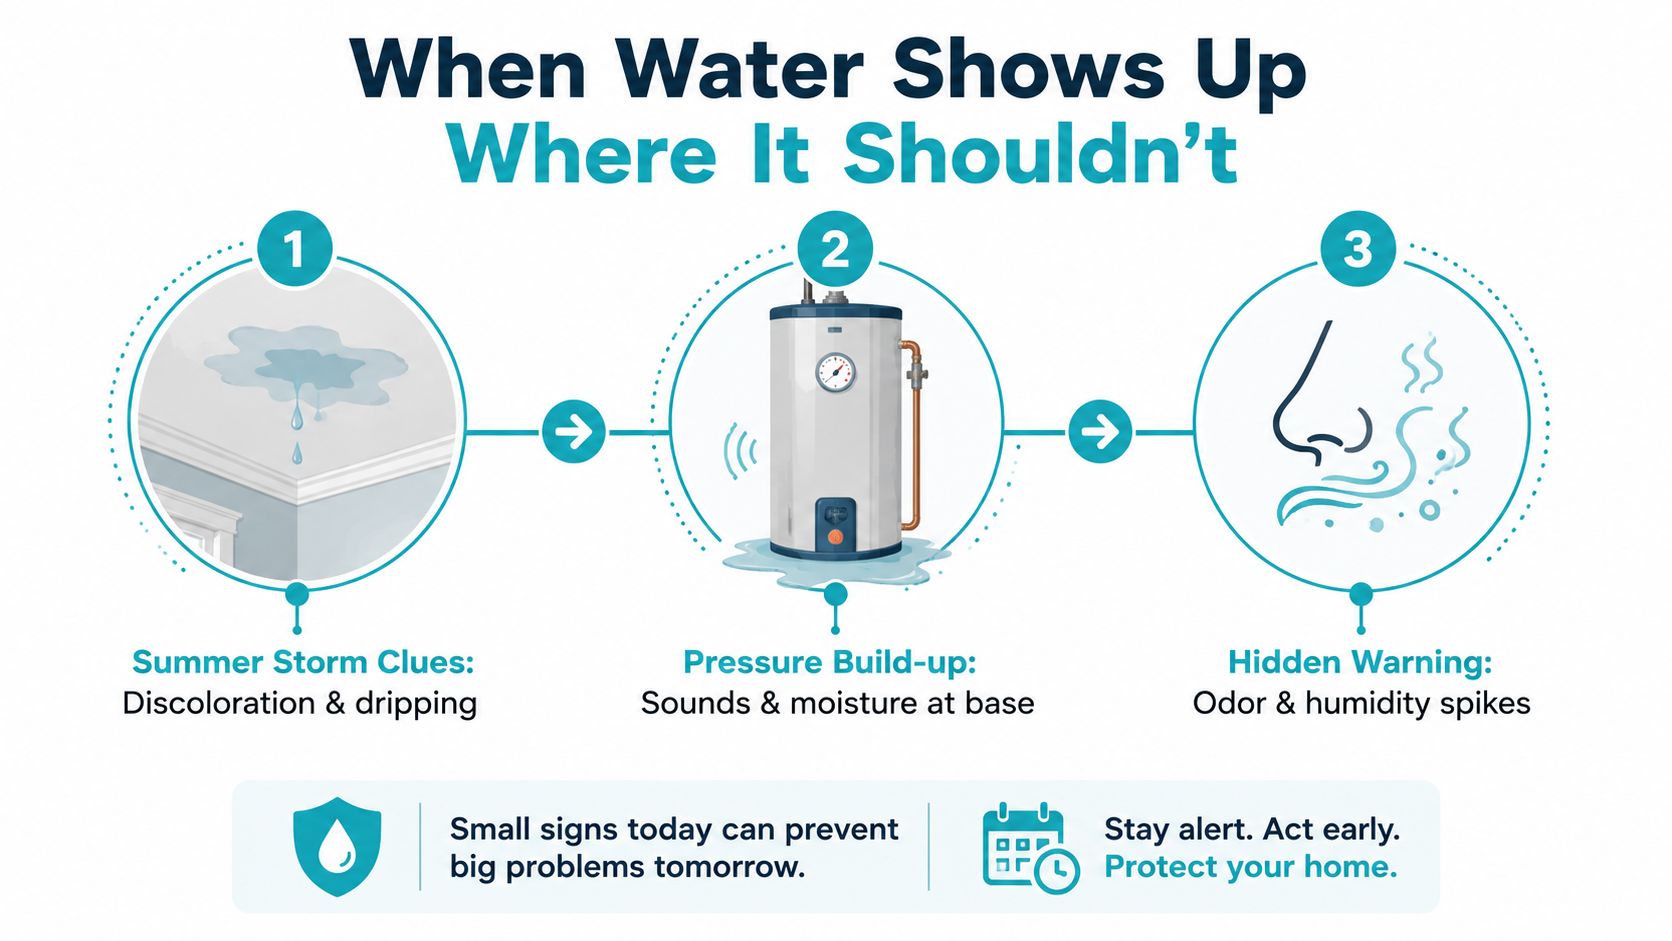
When Water Shows Up Where It Shouldn't
The homeowner usually notices the symptom before the source. A brown ceiling mark spreads beneath an upstairs bathroom. A hot water heater makes a sharp hissing sound while moisture gathers around its base. A closet develops a damp, earthy odor even though no pipe is visibly broken.
That panic is understandable. You may not know whether to grab a bucket, call a plumber, shut off the power, or start moving furniture. In a Florida home, the answer is to control the water and protect people first, then document the scene before cleanup changes the evidence.
Why Suncoast homes need a faster response
Many Bradenton, Sarasota, Lakewood Ranch, and Tampa Bay homes have slab foundations. A leak below the slab may not announce itself with a dramatic burst. Instead, you might see warm flooring, a spreading baseboard stain, unexplained meter movement, or a sound beneath tile.
Older copper plumbing creates another challenge. Corrosion can produce a pinhole leak inside a wall or ceiling cavity, where the first visible sign may be paint bubbling or a musty odor. Seasonal storms add roof and exterior intrusion to the list, while Gulf Coast humidity slows evaporation after materials become wet.
The EPA's WaterSense program says the average home leaks more than 10,000 gallons each year, and household leaks waste more than 1 trillion gallons nationwide annually, roughly the annual water use of more than 11 million homes. Its material also says 10% of homes have leaks wasting 90 gallons or more per day, which puts hidden leaks in practical perspective. These figures are summarized in EPA WaterSense leak information.
A stain isn't merely cosmetic. Use this guide to signs of water damage in walls if you're trying to decide whether a wall symptom needs urgent attention. If water is active, the first hour matters more than identifying the perfect repair method.
Your First 30 Minutes After You Spot a Leak
Start with the main water shutoff. In many Florida properties, it's near the water meter, at the front wall, or where the service line enters the home. Turn it clockwise until it stops. If the valve is difficult to operate, don't force it until the handle breaks. Ask everyone in the home to stop using faucets, toilets, showers, appliances, and the irrigation system.
If the leak is limited to one fixture, use its local shutoff while you locate the main valve. A toilet supply valve, washing-machine valve, or sink valve can stop a branch leak, but a hidden wall or slab leak usually requires the main shutoff.
Make the area safe
Turn off the water heater after shutting off the water. For an electric unit, use the dedicated breaker if you can reach the panel without stepping through water. For a gas unit, follow the manufacturer's emergency directions and don't create a flame or spark near escaping gas. If water has reached outlets, switches, appliances, extension cords, or the electrical panel, stay clear and contact an electrician or emergency professional.
Move small, movable contents to a dry area. Place foil or plastic under furniture legs when practical, but don't drag heavy items across saturated flooring. Avoid using household fans on standing water near electrical sources, and don't enter a ceiling area that is sagging.
Document before mitigation changes the scene
Take wide photographs of each affected room, then close images of stains, wet materials, damaged belongings, appliance connections, and the shutoff position. Record a slow video while narrating what you see. Keep damaged items unless they present a safety hazard, and save receipts for emergency supplies, lodging, cleaning, and any temporary repair.
Shut off the water first. It usually prevents more loss than any other action you can take without specialized equipment.
Call your insurer promptly and request emergency mitigation guidance. A practical first-24-hours water damage response guide can help you avoid unsafe cleanup decisions while a qualified team is on the way.
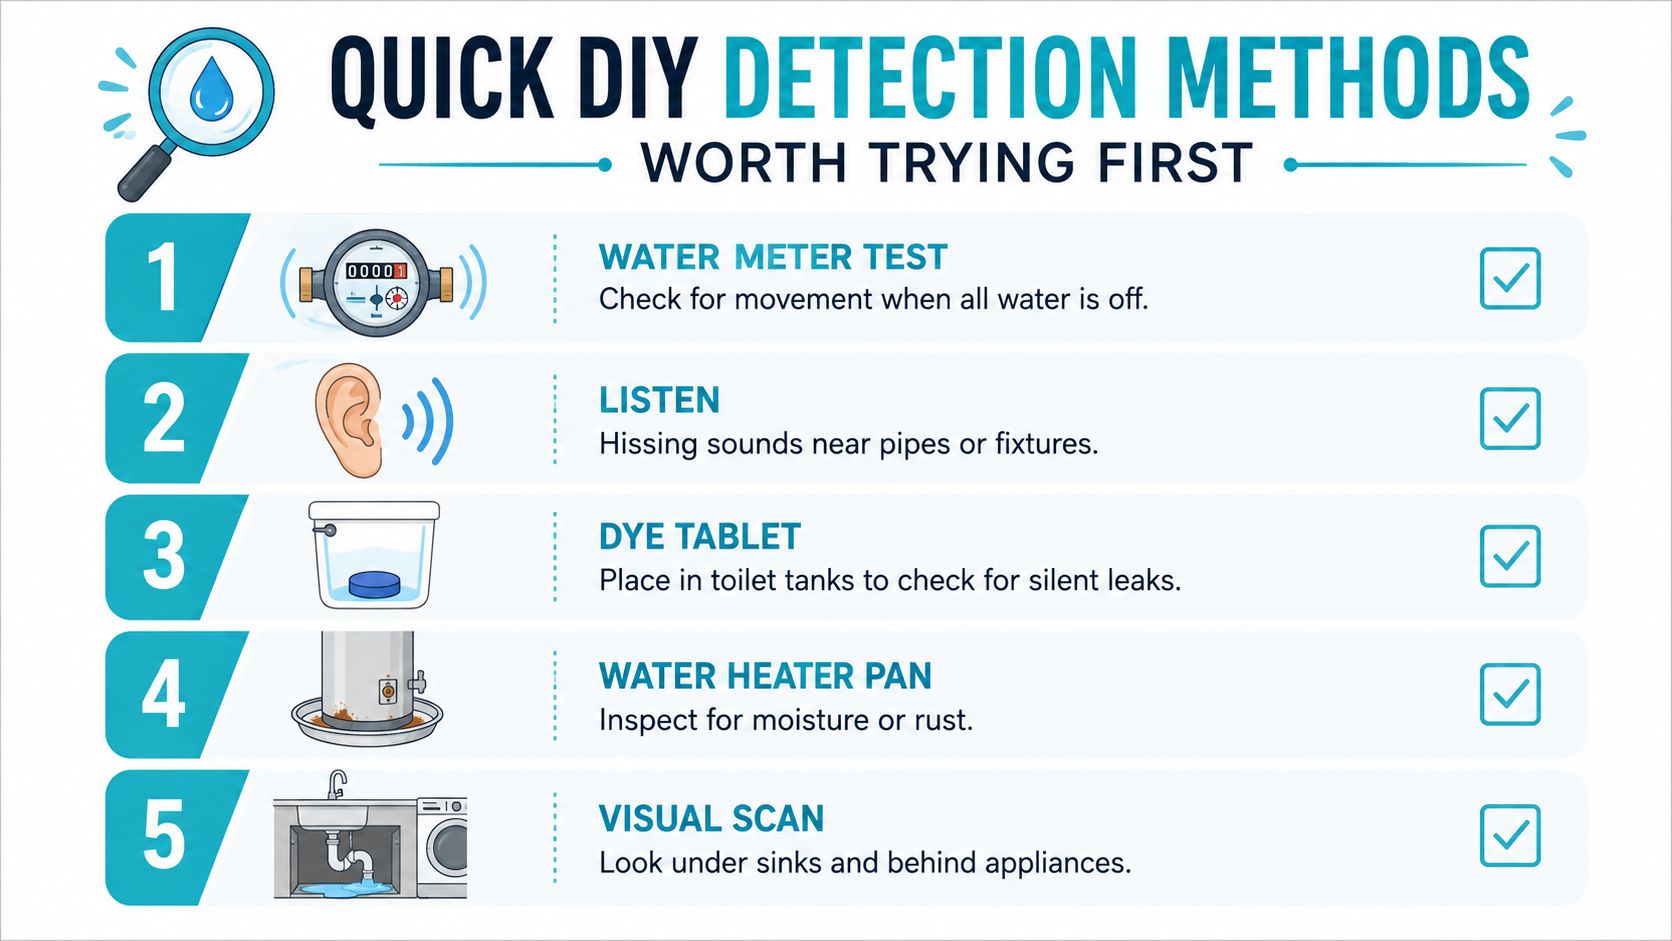
Quick DIY Detection Methods Worth Trying First
Simple checks can identify an accessible fixture leak, but they can't reliably locate every hidden failure. Use them while water is controlled, not as a reason to postpone professional help when materials are already wet.
Checks that can produce a useful answer
Watch the water meter: Turn off every faucet and water-using appliance. If the meter continues moving, water is likely escaping somewhere. This works well for a continuous supply leak, but it won't tell you whether the source is under the slab, inside a wall, or in irrigation piping.
Listen closely: Stand near toilets, cabinet walls, the water heater, and exposed supply lines. Hissing can indicate pressurized water escaping, although air-conditioning equipment, refrigerator lines, and normal plumbing sounds can confuse the search.
Use toilet dye: Add a dye tablet or a small amount of food coloring to the tank, then wait without flushing. Color appearing in the bowl indicates a faulty flapper or valve. This test won't detect a leak in the supply line or drain.
Inspect the water heater pan: Look for fresh moisture, rust trails, corrosion, or water around the temperature and pressure relief discharge. Don't remove safety components or attempt a repair on a pressurized tank.
Scan visible surfaces: Check beneath sinks, behind toilets, around washing machines, near dishwashers, and along baseboards. Swelling, peeling paint, softened trim, and darkened carpet edges can mark migration from a hidden source.
For a broader homeowner reference, these plumbing trouble signs for homeowners can help you compare visible symptoms with common fixture and pipe problems. A flashlight held at a shallow angle can reveal surface changes that overhead lighting hides, but it won't show moisture sealed behind tile or inside a slab.
Know when the home is hiding the answer
A slab leak may produce no visible drip. Water can travel beneath flooring and emerge far from the failed pipe. Thermal changes, acoustic signals, and moisture readings are more useful at that point than opening random sections of drywall.
Use this hidden water damage behind drywall guide when the odor, meter movement, or surface staining doesn't match an accessible fixture. Stop DIY testing when you need to remove finishes, enter a wet electrical area, or guess at the source.
What Professional Leak Detection Actually Looks Like
Professional emergency water leak detection starts with controlled observation, not immediate demolition. The technician reviews what happened, checks the plumbing layout, identifies the wettest areas, and separates active moisture from old staining.
An acoustic sensor listens for the vibration and sound created when pressurized water escapes a pipe. This approach can be useful for supply-line leaks that are hidden beneath flooring, behind walls, or below a slab. It isn't magic. Background equipment, pipe material, water pressure, and building construction affect the signal, so a skilled technician compares readings rather than relying on one sound.
Matching the tool to the failure
Thermal imaging can reveal temperature differences associated with wet materials or moving water. It helps guide the inspection across ceilings, walls, and floors, but a cool image isn't proof of moisture by itself. Air-conditioning patterns, insulation gaps, and shaded surfaces can create similar temperature changes.
A calibrated moisture meter provides confirmation. Technicians use it to compare suspect areas with unaffected materials and to assess moisture within drywall, flooring, trim, and subfloors. The meter doesn't identify the plumbing failure alone, but it helps determine how far the damage has traveled and whether drying is progressing.
Research supports a measured approach to sensor selection. In a 2023 comparative study of acoustic detection in PVC water pipes, PVDF sensors showed the highest sensitivity for 1 mm and 2 mm leaks, with reported sensitivity of 0.4 dB/L/h and 0.33 dB/L/h, compared with SAW and PZT sensors in the same test. The results appear in the Sensors study of acoustic leak detection.
Why impressive accuracy needs context
Other research shows that acoustic and vibration systems can perform strongly when sensor type and pipe conditions match. One 2023 study reported 99.79% accuracy using XGBoost on vibration-sensor data, while a 2024 multi-sensor evaluation reported balanced accuracy of 0.987 for accelerometers in branched networks and 0.997 in looped networks. Results varied across hydrophones and dynamic pressure sensors, and network geometry affected performance. Those findings are available in the water-pipeline vibration study.
That trade-off matters in your home. Equipment helps narrow the search, but the technician still needs building knowledge, moisture mapping, and a safe mitigation plan. A restoration team may combine detection with extraction, drying, sanitization, and repairs, which is the broader role described in what a restoration company does.
Why the 24–48 Hour Mold Window Changes Everything
Water damage doesn't wait for a convenient appointment. The EPA recommends drying wet or damp areas within 24 to 48 hours, and the National Institutes of Health Office of Research Facilities identifies that same period as critical after water infiltration. If the duration is unknown, its guidance says to treat the affected area as though the moisture has existed for more than 48 hours. See the NIH moisture remediation guidance.
Drywall, insulation, carpet, carpet padding, and wood framing are porous. They absorb water, hold it inside cavities, and may remain wet after the visible surface looks better. Florida's warm, humid environment can make a delayed response more consequential, especially when air movement is limited inside walls, cabinets, and floor assemblies.

Two identical leaks, two different outcomes
Consider two homes with the same failed supply line beneath a bathroom floor. In the first, the owner shuts off the water, photographs the damage, and calls for extraction and moisture testing while the affected materials are still in the early drying window. The response can focus on locating the source, removing standing water, setting a drying plan, and saving materials that have not absorbed excessive moisture.
In the second, the owner mops the visible water and waits several days because the floor feels only slightly damp. Moisture remains below the flooring and inside adjacent materials. The job may then require more removal, more detailed containment, mold assessment, and reconstruction.
The difference isn't a promise of a particular repair bill. It is a difference in options. Early detection preserves choices, while delayed detection can remove them.
| Action Taken | Within 24 Hours | After 72 Hours |
|---|---|---|
| Water control | Shutoff and source identification can limit additional spread. | Continued seepage may affect more assemblies and contents. |
| Porous materials | Extraction and structural drying may protect materials that are still recoverable. | Absorbed moisture can require removal and closer evaluation. |
| Odor and air concerns | Drying begins before persistent musty conditions develop. | Musty odors and microbial concerns become harder to separate from hidden moisture. |
| Restoration scope | The team can concentrate on mitigation and targeted repairs. | The project may involve broader remediation and reconstruction decisions. |
Use this mold growth timeline after water damage to understand why the first day isn't a harmless waiting period. Once the water is controlled, drying and verification deserve the same urgency as the initial leak call.
Handling the Insurance Claim Without Losing Your Weekend
Your first claim record should begin before cleanup. Photograph every room from the doorway, then capture close images of the source, water line, damaged finishes, personal property, appliance labels, and any visible mold-like growth. Video helps show the layout and the path of migration.
Don't throw away damaged belongings unless they create a health or safety hazard. Move them to a dry, secure place, keep receipts for emergency purchases, and write down when you discovered the leak, when you shut off the water, and who you contacted. Save plumber findings, restoration estimates, moisture documentation, and invoices in one folder.
Avoid the mistakes that create friction
- Don't wait to report: Notify your insurer promptly and ask what emergency mitigation steps it expects.
- Don't conceal the scene: Avoid painting, removing drywall, or discarding materials before documenting them, unless immediate safety requires it.
- Don't rely on verbal summaries: Request written findings, drying records, photos, and clear descriptions of affected areas.
- Don't assume coverage: Your policy controls coverage, exclusions, deductibles, and limits. Ask the carrier or adjuster to explain the applicable provisions.
Mitigation and repairs are different parts of the process. A carrier may need evidence that emergency work was reasonable and necessary, while the policy may treat the failed plumbing component differently from the resulting water damage. Clear records help the adjuster separate those issues.
AMPM Restoration Services can coordinate directly with an insurance carrier, provide documentation, and assist with the claim process. Insurance claim assistance doesn't replace your policy review, but it can reduce the back-and-forth while the property is being dried. Financing options may also help when the policy doesn't cover the full scope.
Before the adjuster arrives, gather your policy information, photos and video, receipts, appliance or plumbing records, a list of damaged contents, and the names of every company or person who inspected the property.
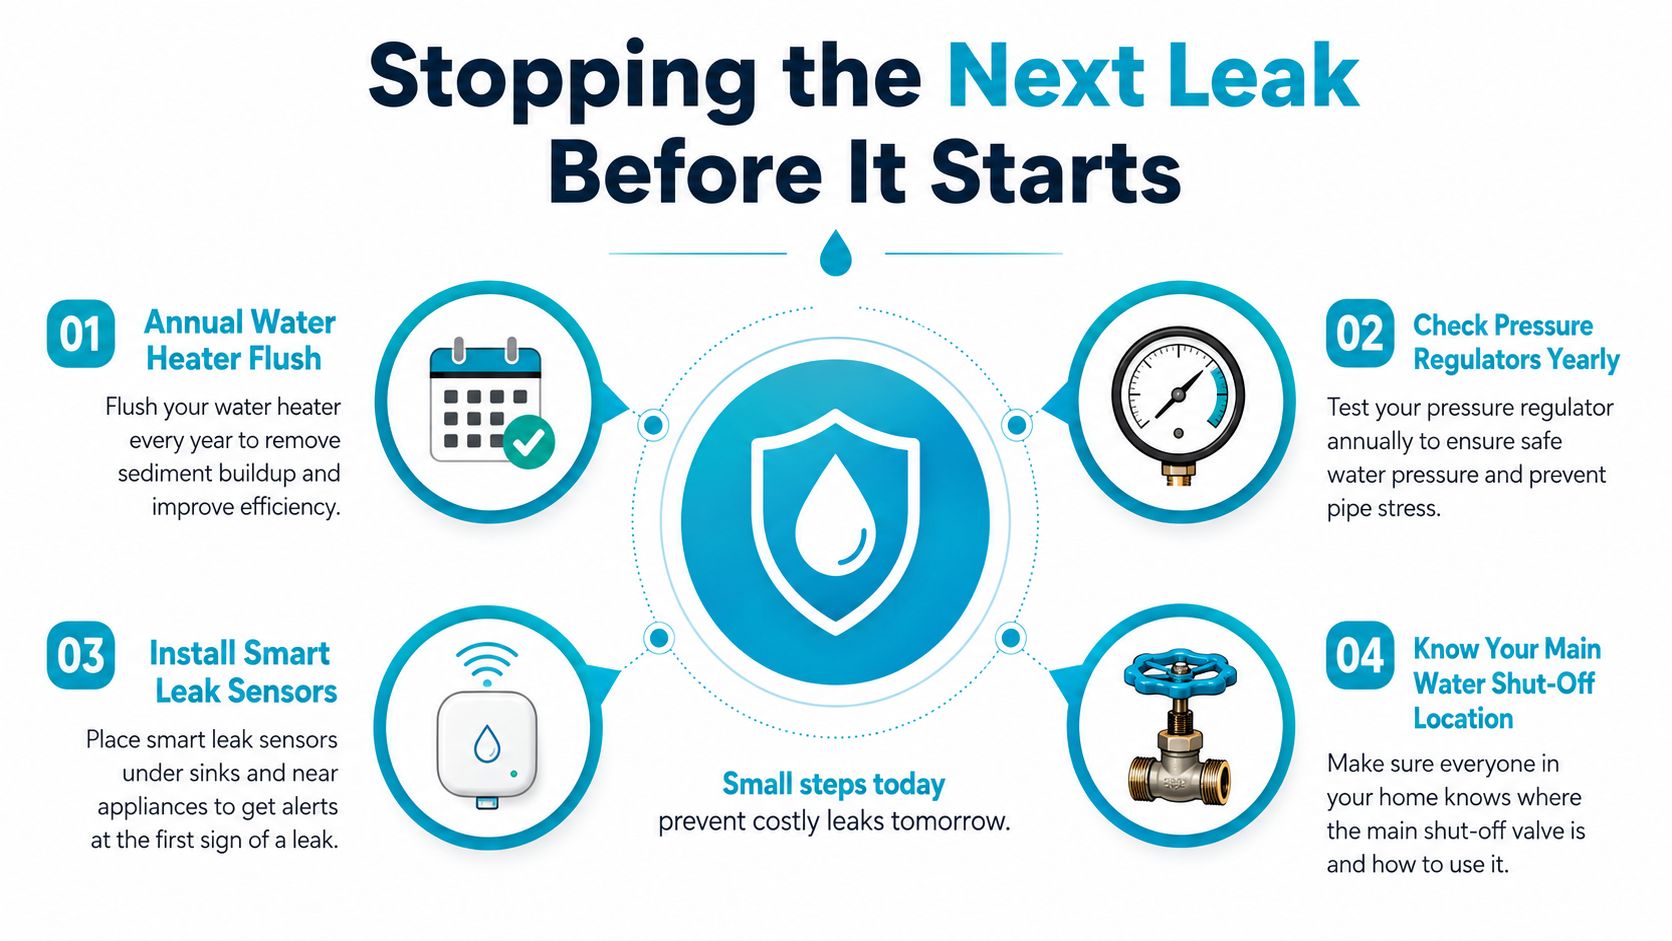
Stopping the Next Leak Before It Starts
Prevention on the Suncoast is a routine, not a single product. Inspect supply lines, shutoff valves, cabinet floors, washing-machine connections, dishwasher hoses, refrigerator lines, water-heater fittings, caulking, and irrigation manifolds during a yearly home walk-through.
Flush and inspect the water heater according to the manufacturer's maintenance guidance. Check pressure regulation during routine plumbing service, because excessive pressure can stress fixtures and pipe joints. Install smart leak sensors under sinks, behind washing machines, near the water heater, and beside other appliances that can release water while nobody is home.
Build a response plan before the alarm
Know where the main shutoff is and make sure every adult in the home can reach it. An automatic shutoff valve can add another layer of protection, but it still needs testing, compatible installation, and a person who responds when the alert arrives.
Research also shows why detection speed isn't the only issue. A 2023 machine-learning study found anomaly detectors could identify emergent leaks within hours and often within the first 24 hours, including gradual and sudden leaks, while keeping false positives limited. Its practical lesson is that alert quality and response workflow matter as much as the sensor itself. Read the study on machine-learning detection of emergent leaks.
When a leak is active or hidden, professional emergency water leak detection protects more than the pipe. It protects the drying window, your documentation, and the choices available for repair.
AMPM Restoration Services provides 24/7 emergency water leak detection, water damage restoration, mold inspection and removal, drying, repairs, and reconstruction for Bradenton, Sarasota, Tampa Bay, Saint Petersburg, Lakewood Ranch, and surrounding Gulf Coast communities. Call 941-946-7807 for a free inspection and estimate, with insurance claim assistance and financing options available, or visit AMPM Restoration Services to request help before a hidden leak becomes a larger restoration problem.
Emergency Water Leak Detection FAQs
How quickly should I call after finding a leak?
Call as soon as you've shut off the water and made the area safe. Fast professional assessment helps identify hidden moisture, start drying, and preserve documentation while the 24 to 48 hour mold-prevention window is still relevant.
Can I find a slab leak myself?
You can look for meter movement, warm flooring, unexplained dampness, or sounds beneath the floor. Those checks may confirm that water is being used somewhere, but they rarely pinpoint the failure. Acoustic detection, thermal imaging, and moisture mapping can narrow the source without unnecessary demolition.
Should I turn off the water heater during a leak?
Yes, shut it down after controlling the water supply. Use the proper electrical breaker or follow the manufacturer's gas instructions, and don't approach the unit through standing water or if gas may be present.
Will insurance cover emergency water damage restoration?
Coverage depends on your policy, the cause of the loss, exclusions, and deductibles. Document the scene, report the loss promptly, retain receipts, and ask for written guidance. A restoration company may assist with carrier communication and supporting records.
What signs suggest hidden water damage?
Persistent musty odor, swollen baseboards, peeling paint, discolored ceilings, warped flooring, unexplained meter movement, and moisture around appliances can indicate concealed damage. A visible surface may be smaller than the wet area behind it.
Does emergency water leak detection include repairs?
The scope varies by provider. A restoration team can often locate the leak, extract water, dry structural materials, sanitize affected areas, coordinate repairs, and manage reconstruction, while specialized plumbing work may require a licensed plumber. Ask what the responding company handles before work begins.