


How to Get Mold Out of a Shower Safely
You notice a dark line spreading across the grout, a few black spots around the caulk, or a musty smell that returns after every shower. In Florida, that pattern is common because the bathroom starts each day with another burst of warm moisture, while the Gulf Coast air may already be humid. Learning how to get mold out of a shower means more than choosing a stronger spray. You need to remove the visible growth safely, match the method to the surface, and stop moisture from feeding the next round.
A clean shower should dry thoroughly after use, have enough air movement to clear steam, and contain intact grout and caulk. Tile, grout, silicone seams, and curtains each need a slightly different approach. The guidance below follows the moisture-control principles used by the U.S. Environmental Protection Agency, the Centers for Disease Control and Prevention, and Health Canada, with the practical realities of homes in Bradenton, Sarasota, Tampa Bay, and nearby Gulf Coast communities in mind.
Why Shower Mold Keeps Coming Back in Florida Homes
A homeowner in Bradenton may scrub a shower wall on Sunday and see the same dark line along the lower grout by the end of the week. The surface looks clean for a short time, but the grout remains damp, the caulk holds moisture at the seam, and the bathroom fan may stop before the room has dried. In Florida, repeated showering adds another moisture cycle before yesterday’s moisture has fully left the room.
That’s why wiping the visible stain alone often fails. Tile may be hard and non-porous, but grout can absorb water, while aging or cracked caulk can allow moisture to linger beneath the surface. A curtain or liner can also stay wet in folds where air doesn’t circulate.
The surface is only part of the problem
Mold growth usually returns when the conditions that support it remain in place. The EPA advises addressing moisture, improving ventilation, cleaning hard surfaces with detergent and water, and drying them completely when mold recurs in a shower or bathroom. The agency also says wet or damp areas should be dried within 24 to 48 hours, as explained in its mold and moisture guidance.
That drying window matters after a leak, an overflowing tub, or a shower that stays wet for long periods. A quick wipe-down can help, but it won’t compensate for a weak exhaust fan, a leaking shower valve, damaged caulk, or water trapped behind tile.
Practical rule: If mold returns to the same seam after the surface has been cleaned and dried correctly, investigate the moisture source instead of repeatedly changing cleaners.
For homeowners who want more background on the local cause, AMPM Restoration’s guide to how humidity causes mold in Florida homes explains why indoor moisture deserves as much attention as the stain itself. Small, limited surface growth may be manageable with careful cleaning. A broad area, hidden moisture, damaged wall material, or persistent odor calls for a professional assessment.
Safety First and What to Gather Before You Clean
Don’t start scrubbing in a closed bathroom with bare hands. Mold, dirty rinse water, and cleaning products can become airborne or splash into your eyes, especially when you work aggressively along grout lines.
Open a window if one is available and turn on the bathroom exhaust fan before cleaning. Keep the door positioned to support airflow without spreading damp air into the rest of the home. Wear non-porous gloves and eye protection, and use a properly fitted mask if the work creates dust or heavy disturbance.

Set up the work area
Remove bottles, razors, bath mats, and other items from the shower. Wash or discard anything visibly contaminated, and protect nearby finishes from dirty runoff. A drain cover or removable strainer can catch loose debris, but don’t block drainage while rinsing.
Gather tools that give you control rather than relying on brute force:
- Scrub brush: Choose firm bristles for grout, but avoid abrasive pads that can scratch tile finishes.
- Old toothbrush: Use it for narrow corners, fixture edges, and the junction between tile and caulk.
- Squeegee: Keep one nearby for removing rinse water from walls and glass.
- Microfiber cloths: Use clean cloths to dry surfaces after rinsing. Don’t reuse a mold-covered cloth elsewhere.
- Spray bottle: Label it for a single cleaner only. Never repurpose a bottle without washing it thoroughly.
- Detergent and water: This is the basic cleaning combination recommended for mold on hard surfaces by the EPA and CDC.
- Bucket and clean rinse water: Frequent rinsing keeps loosened residue from being pushed across the wall.
Keep chemicals separate
Never mix bleach with ammonia or other cleaners. The CDC warns that this combination can create toxic gas, and the same caution applies to combining products casually because one cleaner may react with residue from another.
If you choose diluted bleach for a specific cleanup, the CDC sets a maximum of 1 cup of household laundry bleach per 1 gallon of water in its mold cleanup guidance. The EPA doesn’t recommend bleach as a routine mold-cleanup practice, so detergent and water should be your normal starting point.
Work in manageable areas and stop if you develop breathing irritation, dizziness, or eye discomfort. Don’t create a cloud of spray in a small bathroom, and don’t aggressively sand or scrape moldy material. Porous caulk, drywall, and other materials may need removal rather than more chemical exposure.
How to Get Mold Out of a Shower on Tile Grout Caulk and Curtains
Use a simple flow: loosen residue, scrub the affected surface, rinse thoroughly, and dry completely. Avoid flooding grout or forcing dirty water into gaps. Start at the higher surfaces and work downward so runoff doesn’t soil areas you’ve already finished.

Tile surfaces
Spray or apply detergent solution to a small section of hard tile, then wipe away loosened residue with a microfiber cloth. For visible spots, use a non-abrasive brush and moderate pressure. Rinse with clean water and pull the remaining water downward with a squeegee.
Glazed ceramic and porcelain tile generally tolerate this mechanical cleaning well, but inspect the finish first. Don’t use a harsh abrasive that leaves scratches where soap residue can collect. Dry the tile, corners, and fixture bases instead of assuming the bathroom fan will handle the remaining water.
Grout lines
Grout needs more agitation than tile because its texture can hold soap residue and moisture. Apply detergent and water, let the surface remain wet briefly so residue can loosen, then work along the line with a grout brush or old toothbrush. Rinse thoroughly, checking corners where dirty slurry tends to collect.
For additional guidance on effective methods for grout stains, look for techniques that emphasize controlled scrubbing and thorough rinsing rather than covering discoloration. A stained line isn’t automatically a mold colony, and whitening the surface doesn’t prove that the moisture problem has been solved.
Don’t force the brush: Excessive pressure can damage weak grout and drive water into cracks. If the grout is crumbling, cracked, or repeatedly darkens from within, cleaning may no longer be the right repair.
Caulk seams
Caulk is the point where many DIY cleanups reach their limit. If mold is sitting on the surface of sound caulk, detergent cleaning and careful drying may help. If the caulk is peeling, split, soft, or discolored throughout its depth, remove the failed material and replace it rather than repeatedly spraying the seam.
Cut out old caulk carefully, clean the exposed joint, and allow the area to dry completely before resealing. New caulk won’t solve a leak behind the joint, so inspect the surrounding tile and plumbing if moisture continues.
Curtains, liners, and doors
Remove fabric curtains and launder them according to their care instructions. Plastic liners can often be cleaned separately with detergent and water, then rinsed and dried fully before rehanging. Don’t bunch a wet curtain against the tub wall, because folded material dries slowly.
For glass doors, clean the glass, bottom track, corners, and drain openings. Tracks can hold stagnant water and residue even when the glass looks clear. Use a small brush for the track, rinse without overflowing nearby trim, and dry the channel.
If contaminated textiles have been stored with clean items, AMPM’s guide on how to remove mold from clothes provides separate handling considerations. Keep cleaned curtains and household fabrics away from the bathroom until they’re fully dry.
Choosing the Right Cleaner for Shower Mold
The strongest-smelling cleaner isn’t automatically the most effective choice. The EPA’s routine recommendation for mold on hard surfaces is detergent and water, followed by complete drying, while its bleach guidance says bleach isn’t recommended as a routine mold-cleanup practice.
Use the surface and the condition of the material to make the decision. Tile may tolerate careful scrubbing, while damaged grout and mold-stained caulk can deteriorate when repeatedly soaked.
Shower Mold Cleaner Options Compared
| Cleaner | Best For | Caution |
|---|---|---|
| Detergent and water | Routine cleaning of hard tile, glass, and other non-porous surfaces | Rinse residue and dry completely |
| Diluted household bleach | A limited situation where you choose bleach for cleanup on a compatible surface | CDC maximum is 1 cup per 1 gallon of water; never mix with ammonia or other cleaners, as explained by the CDC |
| Vinegar | A household option some people use for mineral or soap residue on compatible materials | Don’t assume it replaces moisture control, and don’t combine it with bleach |
| Baking soda paste | Gentle agitation for residue and some grout-cleaning tasks | Rinse thoroughly and avoid turning porous material into a saturated paste |
| Commercial mold cleaner | A labeled product with directions suited to the surface | Follow the label, provide ventilation, and never combine products |
Bleach can make a dark mark look lighter, but appearance alone doesn't establish that the underlying problem is gone. It can also create a safety hazard when mixed with incompatible products, and repeated wetting may be unhelpful for porous or failing materials.
Vinegar and baking soda can have a place in household cleaning, but neither one fixes a leaking shower, weak ventilation, or cracked sealant. For a fuller discussion of product choices and the limits of surface treatment, see AMPM Restoration's article on the truth about mold removal. The practical priority remains consistent: remove visible contamination, rinse the surface, and dry the shower completely.
Keep Your Shower Mold Free With Ventilation and Daily Habits
Cleaning removes what you can see. Daily moisture control determines whether that result lasts, especially in Bradenton, Sarasota, Tampa Bay, and other Gulf Coast homes where humid outdoor air can make bathroom drying difficult.
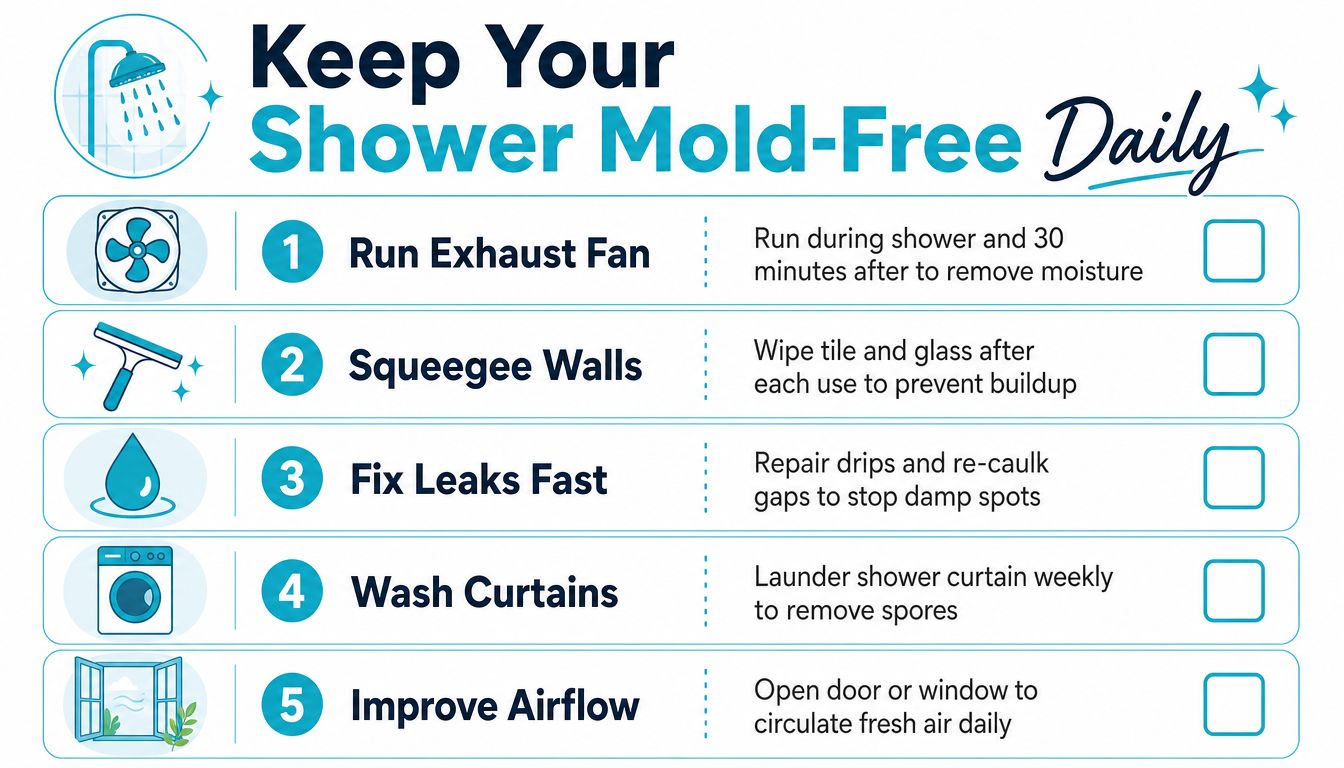
Run the exhaust fan during the shower and for at least 30 minutes afterward, following Health Canada's bathroom guidance at Addressing moisture and mould in your home. Open a window or bathroom door when conditions allow, and make sure the fan moves air rather than making noise.
Build a routine that matches the climate
Health Canada recommends maintaining relative humidity between 30% and 50%, while the CDC advises keeping humidity no higher than 50% all day. A small hygrometer can show whether the room remains damp after the fan stops, though the fix may require better ventilation or broader humidity management.
Use this practical rhythm:
- After every shower: Squeegee tile and glass, spread the curtain open, and wipe pooling water from ledges and tracks.
- During the week: Check corners, grout intersections, and caulk for darkening or dampness.
- After leaks or heavy water exposure: Dry affected areas within 24 to 48 hours, following EPA and CDC moisture-control guidance.
- During maintenance: Repair cracked grout, failed caulk, dripping fixtures, and plumbing leaks promptly.
For broader indoor humidity reduction tips, consider the whole home rather than treating the shower as an isolated room. AMPM's mold prevention strategies can also help homeowners organize moisture checks beyond the daily squeegee habit.
When Shower Mold Means You Need Professional Help in Florida
DIY cleaning has a clear boundary. The EPA says homeowners can generally handle mold contamination smaller than about 10 square feet, while larger areas or mold inside walls should be handled by a professional, as outlined in its mold cleanup recommendations.
Call for an assessment when the affected area exceeds that cutoff, when mold keeps returning after proper cleaning and drying, or when a musty odor remains. Soft drywall, loose tile, damaged backer material, recurring moisture around plumbing, and mold that appears to sit behind tile all suggest a source that surface scrubbing can't reach.
A professional can help distinguish a cosmetic stain from a moisture problem involving wall cavities, failed seals, or hidden leaks. AMPM Restoration Services provides mold inspection and removal, water damage restoration, leak-related drying, sanitization, and reconstruction support from 4301 32nd St W b18, Bradenton, FL 34205, serving Bradenton, Sarasota, Tampa Bay, Saint Petersburg, Lakewood Ranch, and surrounding Gulf Coast communities. Learn more about when professional mold removal is needed.
Don't keep escalating chemicals when the shower keeps getting wet. Call 941-946-7807 for a free inspection and estimate from AMPM Restoration, with insurance claim assistance and financing options available for qualifying restoration work.
For recurring shower mold, water damage, or hidden moisture concerns, AMPM Restoration Services offers professional mold inspection, removal, drying, sanitization, and reconstruction support across Florida's Suncoast. Call 941-946-7807 for a free inspection and estimate, and ask about insurance claim assistance and financing options.