

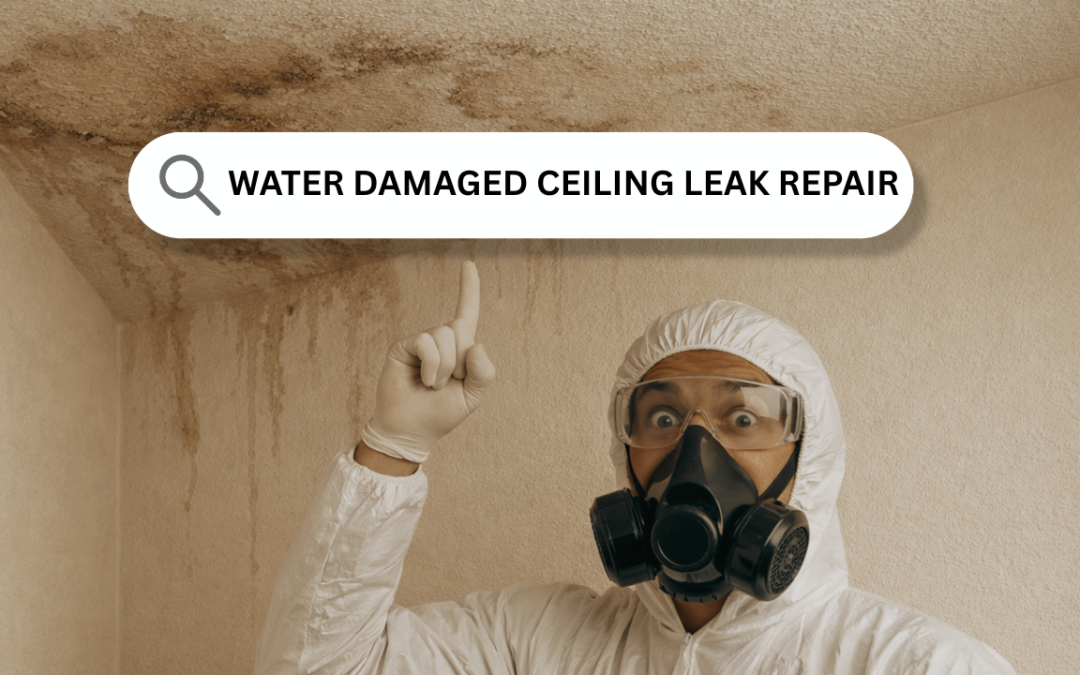
It’s a moment every Florida homeowner dreads—that sinking feeling when you spot a dark brown stain spreading across your ceiling or feel a tell-tale drip. Discovering a water damaged ceiling leak is an immediate red flag that requires a fast response. What you do in the next few minutes can mean the difference between a small repair and catastrophic damage to your Bradenton or Sarasota home. For fast, reliable help, AMPM Restoration is ready 24/7 to restore your property and peace of mind.
Your Emergency Action Plan for a Water Damaged Ceiling Leak
A ceiling leak isn’t just a cosmetic problem; it’s a sign that water is silently wreaking havoc on your home’s structure. Whether it’s from a relentless subtropical storm hammering your roof in Lakewood Ranch or a burst pipe in an upstairs bathroom in St. Petersburg, you have to act fast. Stopping the water and containing the damage immediately is your best defense against widespread destruction and the rapid onset of mold, which absolutely loves our humid Florida climate. As your local, insurance-friendly restoration expert, AMPM Restoration is here to guide you.
This quick reference guide will help you identify what you’re seeing and what to do first.
Immediate Response Guide for Ceiling Leaks
| Visual Sign | Likely Source | Critical First Action |
|---|---|---|
| Small, brownish ring | Slow roof leak or minor plumbing drip | Monitor and schedule an inspection; contain drips if active. |
| Large, spreading wet spot | Active roof leak or significant pipe failure | Shut off power to the area, then shut off the main water valve. |
| Sagging or bulging drywall | Heavy water accumulation from a major leak | Shut off power and water immediately. Carefully puncture the center of the bulge to drain it. |
| Active dripping | Any active leak | Place a bucket underneath and shut off the water source. |
These steps are your first line of defense before a professional team arrives. The infographic below breaks down the three most critical actions to take as soon as you discover a leak.
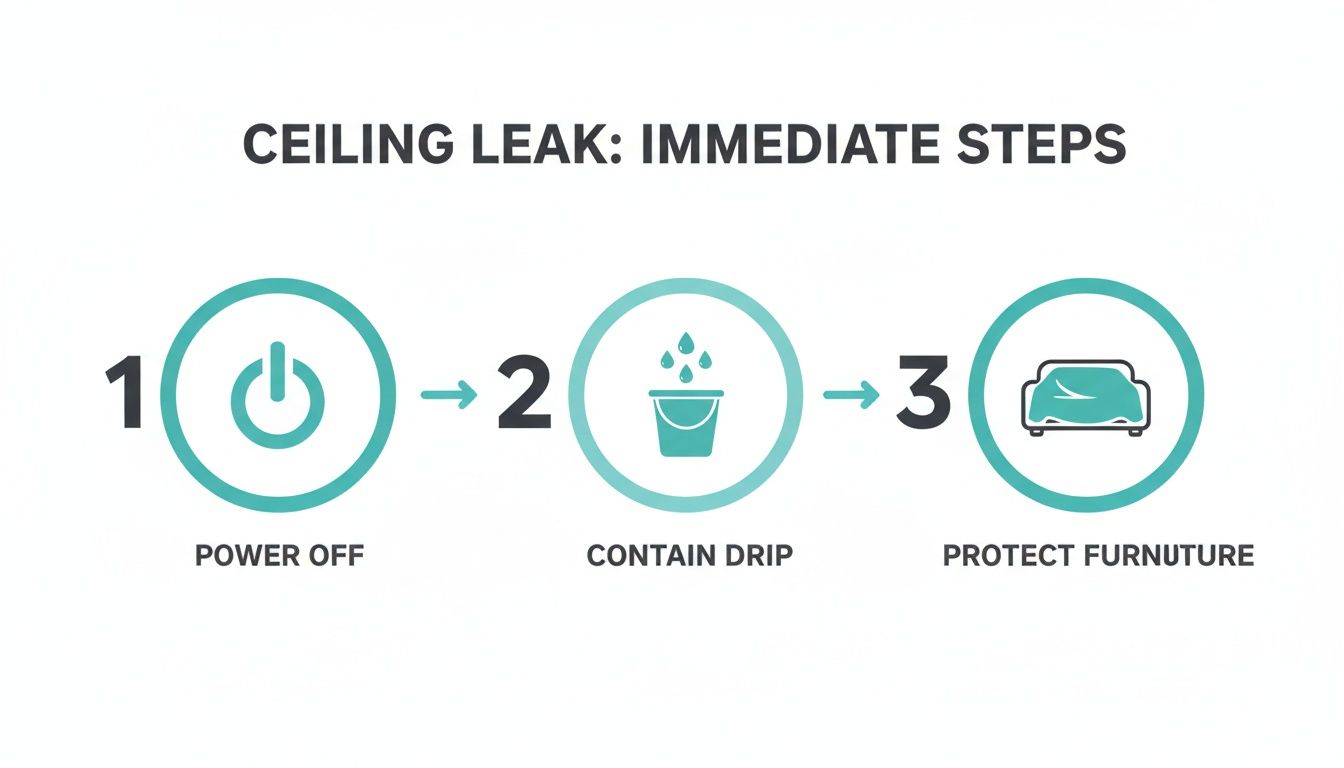
As you can see, safety comes first. Prioritizing electrical hazards before dealing with the water and your belongings ensures you manage the emergency safely and effectively.
Safety First Before Anything Else
Your absolute first priority is safety. Water and electricity are a lethal mix. If the leak is anywhere near light fixtures, ceiling fans, or smoke detectors, don’t touch a thing.
- Head straight to your home’s main electrical panel and turn off the breaker for the affected area.
- If you’re not sure which breaker it is, play it safe and shut off the main breaker for the entire house.
Expert Tip: Never, ever stand in pooling water while trying to access your electrical panel. If the area is already flooded, stay out and call a professional electrician and an emergency restoration service like AMPM Restoration right away at 941-946-7807.
Stop the Water at Its Source
Once you’ve made the area electrically safe, the next job is to stop more water from coming in. This is how you prevent a small problem from becoming a massive one. Most of the time, a water damaged ceiling leak is caused by a plumbing failure inside your home.
Find your home’s main water shut-off valve—it’s usually in the garage, a utility closet, or on an exterior wall. Turn the valve clockwise until it stops. This cuts off the water supply to the whole house. If you’re certain the leak is from a specific toilet or washing machine, you can just use its local shut-off valve.
For a deeper dive into initial response, check out our guide on what to do in the first 24 hours of emergency water damage.
Contain and Protect Your Property
With the immediate dangers handled, it’s time to focus on damage control. Water can ruin flooring, furniture, and electronics in a matter of minutes.
Get buckets, pots, or even waterproof tarps and place them directly under the drip. If you see the ceiling sagging or bulging, that’s a bad sign—it means a lot of water is trapped and it could collapse. If that’s the case, carefully take a small screwdriver and puncture the very center of the bulge. This will let the water drain in a controlled way into your bucket and relieve the pressure, which might just save the entire section of drywall from crashing down.
Finally, get any furniture, electronics, and personal items out of the way. If something is too heavy to move, cover it completely with thick plastic sheeting. This initial mitigation is what you do while you wait for the professionals from AMPM Restoration to get there.
Documenting Ceiling Damage for Your Insurance Claim
Once you’ve handled the immediate safety issues, your mind will jump straight to the insurance claim. But before you move or clean anything, stop. This is where you need to switch gears and think like an investigator. Thoroughly documenting the damage is the single most important thing you can do to ensure a smooth claim process for a water damaged ceiling leak.
For homeowners anywhere along Florida’s Gulf Coast, from Bradenton up to Saint Petersburg, this step isn’t just a suggestion—it’s absolutely critical for getting a fair settlement.
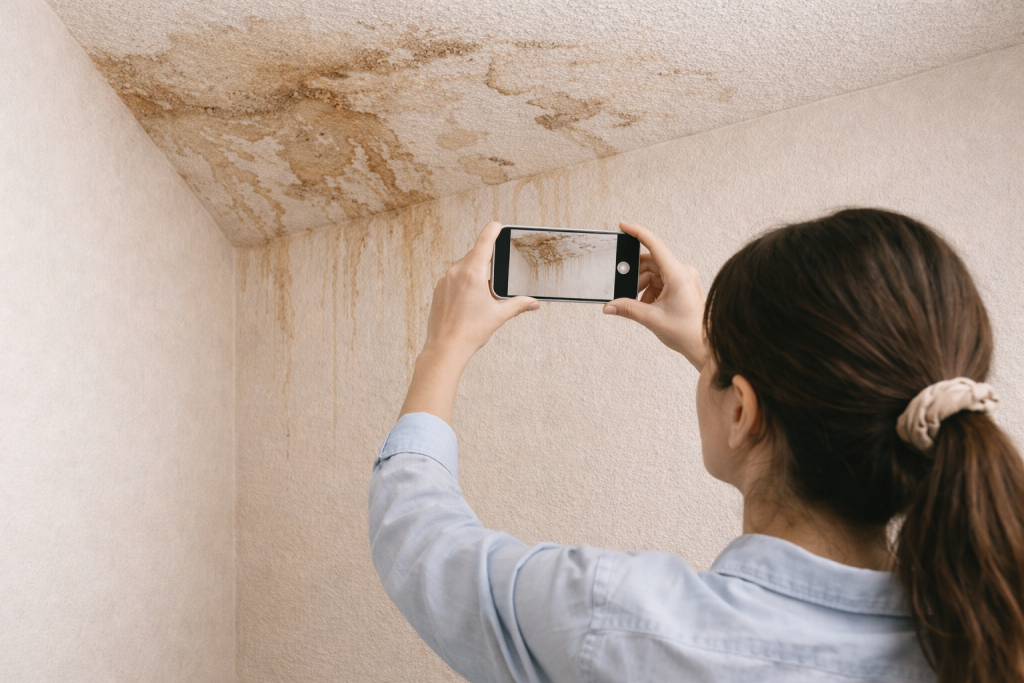
Grab your smartphone, because it’s now your most important tool. Start by taking videos and photos from every angle imaginable. Don’t just snap one picture of the stain; get the whole room to show the context, then zoom in for the gritty details.
What Your Visuals Need to Show
Your job is to build a complete visual story of the damage exactly as you found it. Be systematic and capture it all.
- Wide Shots: Take photos and videos of the entire room and the affected ceiling. This shows the adjuster the overall scale of the problem.
- Close-Ups: Get detailed shots of the water stain itself, any active drips, and spots where paint is bubbling or drywall is starting to sag.
- Damaged Belongings: Photograph every piece of furniture, electronic device, rug, or personal item that got wet. For high-value items, get pictures of the model and serial numbers.
- The Source: If you can safely see where the leak started (like a rusted pipe under a sink upstairs), get a picture of that, too.
This initial visual proof is non-negotiable. Insurance adjusters depend on it to confirm the extent of the water damaged ceiling leak and the property loss you’ve suffered. Without it, you’re starting the conversation from a weak position.
Create a Detailed List of Damaged Items
Photos are powerful, but they don’t tell the whole story. You also need a written log. Go through the house, room by room, and list every single thing the water touched.
For each item, jot down:
- A quick description (e.g., “8×10 wool area rug”).
- Its approximate age and what you paid for it.
- The estimated cost to replace it today.
- A note referencing the photo or video you took of it.
This inventory will be a lifesaver when you’re filling out claim forms. During a stressful time, a good Insurance Claim Documentation Checklist can help keep you organized. It’s also smart to learn more about what homeowners should know about insurance restoration services so you’re prepared for the calls you’ll be making.
Most importantly, do not throw away any damaged items—not a piece of soggy drywall or a ruined sofa cushion. Your insurance adjuster will need to see these things in person. Tossing them out early could seriously hurt your claim. At AMPM Restoration, we walk our clients through this entire documentation phase, using our local expertise to make sure nothing gets missed and your claim is set up for success from the start.
The Hidden Dangers of Ceiling Leaks in Florida’s Climate
That first dark spot on your ceiling is easy to ignore. But here on Florida’s Gulf Coast, from Saint Petersburg down to Bradenton, a water damaged ceiling leak is never just a simple drip. It’s an open invitation for some serious problems, thanks to our relentless humidity. The real trouble isn’t the water you can see; it’s the moisture getting trapped inside your drywall, insulation, and wooden beams.
That trapped moisture, supercharged by our local heat and humidity, creates the perfect breeding ground for mold. It becomes a race against the clock. Mold colonies can explode in as little as 24-48 hours, turning a small stain into a major health hazard that threatens your home’s very structure.
The Rapid Onset of Mold and Its Health Risks
Once a ceiling leak gets into those dark, unventilated spaces—like your attic or the gap between floors—mold growth is practically a sure thing. The spores are always in the air; they’re just waiting for water. For many local homeowners we help in the Bradenton and Sarasota areas, this is the most alarming part of discovering a leak.
Mold isn’t just ugly. Certain types release mycotoxins into your air, triggering a whole range of health issues. These problems are often worse for kids, the elderly, and anyone with existing respiratory conditions. You can read more about the specific health effects of mold exposure in our detailed article.
Keep an eye out for common symptoms like:
- Persistent coughing and sinus congestion
- Itchy eyes, skin, or a sore throat
- Headaches and unexplained fatigue
- Worsening asthma or other breathing problems
The Threat to Your Home’s Structural Integrity
While you’re worrying about mold, a persistent water damaged ceiling leak is quietly eating away at your home’s skeleton. The materials holding your house together—wood studs, joists, and subflooring—were never meant to stay wet. When they do, it leads to disaster.
- Wood Rot: Water literally dissolves the structure of wood, causing it to get soft, weak, and eventually crumble. This “dry rot” can seriously compromise your home’s ability to support its own weight.
- Drywall Degradation: Once drywall gets saturated, it loses all its strength. You’ll see it start to sag and bulge right before it collapses.
- Compromised Insulation: Wet insulation is useless. It gets compacted, loses its ability to keep your home cool, and becomes a soggy welcome mat for mold.
Understanding how materials react to constant moisture is key. For example, looking into the best flooring for humid climates offers insights into moisture resistance that apply to your entire home’s structure.
A common mistake is thinking a slow, tiny drip isn’t a big deal. We’ve found those are often the most destructive. They let water soak into structural wood for weeks or months, causing massive rot before you even see a stain on the ceiling.
This is exactly why you need a professional to take a look. A water damaged ceiling leak is a serious issue that demands expert attention. At AMPM Restoration, our IICRC-certified technicians do more than just patch the hole. We bring in advanced moisture meters and thermal imaging cameras to hunt down and dry out every last pocket of hidden moisture. This is the only way to truly stop mold and prevent the expensive, long-term damage a water damaged ceiling leak can cause in your Florida home.
Deciding Between Ceiling Repair and Replacement
Once the professionals have dried everything out, you’re left with the big question: what’s next for your ceiling? It’s the decision every Florida homeowner faces after dealing with a water damaged ceiling leak. Should you go for a simple repair, or is a full replacement the only safe route? The right answer really depends on a few key factors, and making the smart choice is crucial for your home’s safety and value.
This isn’t just about making it look good again; it’s about making sure no hidden problems are left behind. A small, contained leak that was caught right away might just need a quick patch and paint job. But if the water sat for a while or the damage is widespread, a simple repair could be like putting a band-aid on a much bigger issue.
Key Factors That Influence Your Decision
When our team at AMPM Restoration shows up to a water damaged ceiling leak in a Sarasota or Bradenton home, we look at three main things to guide our recommendation. These are the same things you should be thinking about.
- Size and Duration of the Leak: There’s a world of difference between a tiny, faint stain from a drip that lasted an hour and a ceiling that was soaked for a whole weekend while you were away. The longer water saturates drywall or plaster, the weaker it gets.
- Ceiling Material and Texture: Drywall acts like a sponge. Once it’s saturated, it loses its structural integrity and can get mushy and crumbly. Plaster is a bit tougher but can still crack and pull away from the lath. Popcorn ceilings are especially tricky—they soak up water, are almost impossible to patch seamlessly, and often contain old materials that are better off gone completely.
- Presence of Mold or Structural Decay: This is the absolute dealbreaker. If we see any signs of mold or if the wooden joists behind the drywall show any rot, repair is off the table. Those compromised materials must be removed and replaced to protect your home’s structure and your family’s health. You can learn more about what to look for in our guide on the signs of ceiling water damage.
A sagging or bulging ceiling is a non-negotiable sign that replacement is necessary. This means the drywall is completely saturated and has failed. Trying to repair a sagging ceiling isn’t just a bad idea—it’s unsafe and will eventually lead to a collapse.
Repair vs Replacement: Real-World Scenarios
To make it clearer, let’s walk through two common situations we see all the time in the Tampa Bay area.
Scenario for Repair:
A homeowner in Lakewood Ranch notices a small, discolored ring on their living room ceiling after a heavy downpour. They call us right away. We trace it back to a minor flashing issue on the roof, which gets fixed quickly. Our moisture meter shows the drywall is only slightly damp in a 1-foot spot and dries completely within 24 hours using our equipment. In this case, cutting out a small square, patching it, and then re-texturing and painting is the perfect fix.
Scenario for Replacement:
A family in Saint Petersburg gets home from vacation and finds a huge part of their kitchen ceiling is stained and drooping. The culprit was a slow-draining AC condensation line in the attic. The drywall is saturated, the insulation above is soaked, and you can smell that distinct musty odor. This absolutely requires a full replacement of that section. The wet insulation has to go, the area needs to be treated for potential mold, and new drywall must be installed to solve the problem for good.
The intense weather we get in this region plays a huge role in these decisions. Water damage from ceiling leaks often spikes after a big storm, with water intrusion accounting for a significant percentage of property damage claims. You can learn more about the impact by checking out some water damage restoration industry statistics.
Ultimately, a water damaged ceiling leak demands a careful, expert evaluation. At AMPM Restoration, our full-service reconstruction solutions mean we can handle the job from start to finish. We offer a seamless transition from drying and mitigation to the final repairs, restoring your home with a single, trusted team.
How Professionals Handle Ceiling Leak Restoration
That small, dried water stain on your ceiling might seem like a simple DIY fix, but a water damaged ceiling leak often hints at a much bigger problem lurking out of sight. For homeowners all along Florida’s Gulf Coast, from Bradenton to the greater Tampa Bay area, knowing when to call a pro is one of the most important decisions you can make. Guessing wrong can lead to hidden moisture, serious structural damage, and a mold problem that costs a fortune to fix later on.
Some situations are non-negotiable emergencies. If you see stains that are actively growing, notice any sagging or bulging in the drywall, or if the water has been sitting for more than 24 hours, it’s time to pick up the phone. Any leak caused by storm damage also needs an immediate professional inspection—the visible damage is often just the tip of the iceberg.
What To Expect When You Call AMPM Restoration
When you’re staring at a water damaged ceiling leak, you need a team that’s fast, clear, and reliable. At AMPM Restoration, located at 4301 32nd St W b18, Bradenton, FL 34205, we’ve built our entire process around restoring not just your property, but your peace of mind. Our IICRC-certified technicians take charge of every single step, so nothing gets missed.
Here’s what happens the moment you reach out to us at 941-946-7807:
- Guaranteed 1-Hour Response: We promise to be on-site within an hour of your call, 24/7. Water damage doesn’t wait, and neither do we.
- Free, Detailed Inspection: Our pros use advanced tools to find the real source of the leak and see exactly how far the moisture has spread—even inside your walls.
- A Clear Plan and Estimate: You’ll get a transparent, no-obligation estimate and a straightforward action plan. You’ll know precisely what we’re going to do before we start.
Our Advanced Restoration Process
Once you give us the green light, we get to work immediately. We follow a proven, systematic process to get your home back to its safe, pre-loss condition as fast as possible. This is way more than just a surface-level cleanup.
Here’s how our professionals tackle a water damaged ceiling leak:
- Advanced Leak Detection: First, we find the source. Using non-invasive gear like thermal imaging cameras and moisture meters, we pinpoint the exact origin of the leak without tearing your home apart.
- Rapid Water Extraction: Next, we get the water out. We use high-powered, commercial-grade pumps and vacuums to remove all standing water before it can soak deeper into your home’s structure.
- Structural Drying and Dehumidification: This is the most critical step. We strategically place industrial air movers and heavy-duty dehumidifiers to pull every last drop of moisture from your drywall, wood framing, and insulation. This is what stops mold before it can start.
- Mold Prevention and Remediation: We treat the entire affected area with antimicrobial agents to kill any chance of mold growth. If we find existing mold, our certified team follows strict industry protocols to remove it safely.
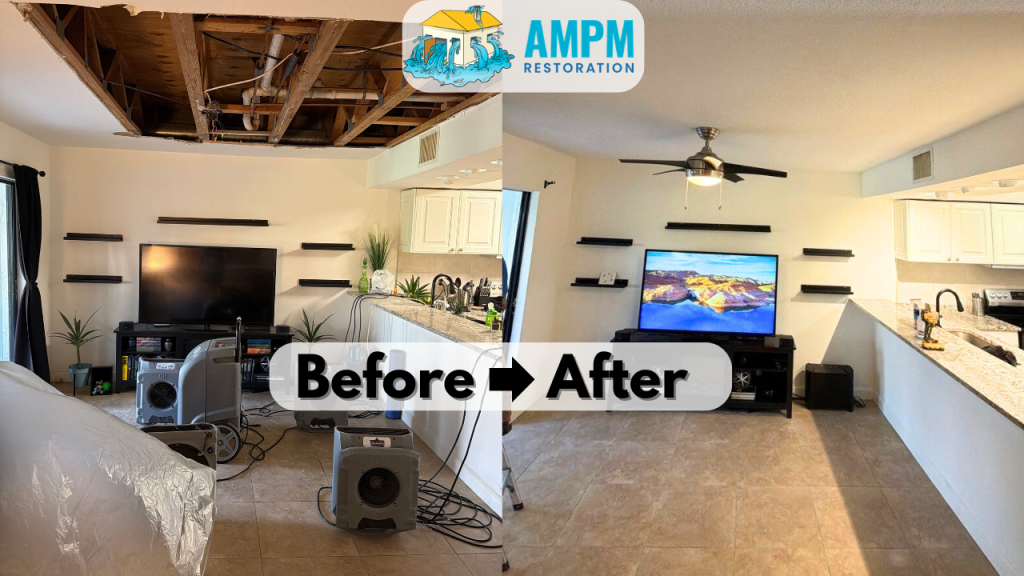
- Complete Reconstruction: We’re a full-service company, which means we don’t just dry your home—we rebuild it. Our in-house reconstruction crew handles everything from replacing drywall and matching textures to priming and painting, making your ceiling look like nothing ever happened.
Choosing a professional team means you get a complete solution, not a temporary fix. At AMPM Restoration, we manage the entire project from the initial emergency call to the final coat of paint. We even offer direct insurance billing and financing options to take the financial stress off your shoulders. For homeowners across Manatee and Sarasota counties, we become your single point of contact, simplifying the whole process from start to finish.
Preventing a Future Water Damaged Ceiling Leak
The best way to deal with a water damaged ceiling leak is to stop it before it starts. While our AMPM Restoration team is on call 24/7 for any emergency in Bradenton, Sarasota, and across the Gulf Coast, a bit of proactive care can save you a world of stress and expense.
Think of it as a simple health checkup for your home. A little preventative maintenance goes a long way, especially here in Florida, protecting your property from the headaches of a major restoration project.
Your Florida Gulf Coast Maintenance Checklist
Living on the Gulf Coast throws unique challenges at our homes, from brutal sun that cooks roofing materials to thick, humid air that loves finding its way inside. Your best defense is a simple, consistent maintenance routine tailored to our climate.
Try working these tasks into your regular home care schedule:
- Roof and Attic Inspections: Give your roof a good look-over at least twice a year, and always after a big storm. You can use binoculars from the ground to check for any shingles that are missing, cracked, or curling. Inside, pop your head into the attic. See any daylight peeking through? Notice water stains on the wood or feel any damp insulation? Those are red flags.
- Gutter Cleaning: Clogged gutters are one of the top culprits behind roof leaks. When rainwater has nowhere to go, it backs up under the shingles and seeps right into your roof’s structure. Clean them out every spring and fall to keep water flowing away from your house, not into it.
- Appliance Hose Checks: The rubber supply hoses on your washing machine, dishwasher, and refrigerator’s ice maker get old, dry, and brittle. Check them every six months for any bulges, cracks, or tiny drips. Swapping them out for braided steel hoses is a cheap and easy upgrade that can prevent a flood.
Everyone in your household should know where the main water shut-off valve is. Don’t wait for an emergency to start searching. Find it now—it’s usually in the garage, a utility closet, or on an outside wall. Test it once a year to make sure it hasn’t seized up.
Small Checks That Prevent Big Disasters
Beyond the big-ticket items, a few other spots in your home are notorious for starting a water damaged ceiling leak. A quick walkthrough every few months can make all the difference.
Take a peek under the sinks in your kitchen and bathrooms for any tell-tale water stains. Check the drain pan and line for your HVAC unit, a very common source of slow, sneaky leaks here in Florida. That kind of simple, regular vigilance is truly the key to catching a hidden leak before it has a chance to cause thousands in damage.
Frequently Asked Questions About Water Damaged Ceiling Leaks
That dark, growing stain on your ceiling brings a flood of questions and a whole lot of stress. When you’re dealing with a water damaged ceiling leak, you need clear answers, and you need them fast. Here are answers to the six most common questions our team at AMPM Restoration hears every day from homeowners across Bradenton, Sarasota, and the Gulf Coast.
How much does it cost to fix a water damaged ceiling leak in Florida?
The cost varies widely based on the leak’s source, the extent of the damage, and the materials involved. A minor leak caught early may only cost a few hundred dollars to repair. However, if the water damaged ceiling leak led to saturated insulation, structural rot, or significant mold growth, the cost for full restoration and reconstruction can climb into the thousands. AMPM Restoration provides a free, detailed inspection and estimate to give you a clear picture. We also offer financing options to help manage the cost.
Will my homeowner’s insurance cover ceiling water damage?
Typically, yes, if the damage is from a “sudden and accidental” event, like a burst pipe or appliance failure. Standard policies are designed to cover this. However, claims for damage from slow leaks or lack of maintenance are often denied. That’s why immediate action and thorough documentation are crucial. At AMPM Restoration, we have extensive experience working with all major insurance carriers and can assist with your claim to help ensure you get the coverage you deserve.
Can I just paint over a water stain on my ceiling?
No, this is a critical mistake. Painting over a water stain on a ceiling does not solve the problem. It traps moisture within the drywall and wood, creating a perfect environment for mold to thrive and for structural materials to rot. The stain will eventually bleed through the new paint, and the underlying water damaged ceiling leak will cause a much more expensive problem down the line. The leak must be fixed and the area professionally dried first.
Is a sagging or bulging ceiling an emergency?
Yes, absolutely. A sagging ceiling is a clear sign that the drywall is saturated with water and has lost its structural integrity. It is in immediate danger of collapsing, which poses a serious safety risk to anyone and anything below it. If you see this, evacuate the area immediately and call AMPM Restoration’s 24/7 emergency line at 941-946-7807 for urgent assistance.
How long does the ceiling leak restoration process take?
For a typical water damaged ceiling leak, the full restoration process from the initial call to the final repair takes about 1-2 weeks. The first 24 hours are focused on water extraction and setting up drying equipment. The structural drying phase, which is vital for preventing mold, usually lasts 3-5 days. Once the area is confirmed to be completely dry, our reconstruction team can begin repairs, which may take several more days depending on the scope. If you’d like to dive deeper, you can read more about water damage questions.
Why should I call AMPM Restoration for a ceiling leak?
When you have a water damaged ceiling leak in the Bradenton, Sarasota, or Tampa Bay area, you need a fast, reliable, and professional team. AMPM Restoration is a locally-owned, IICRC-certified company that guarantees a 1-hour on-site response time, 24/7. We provide free inspections, offer direct insurance billing and financing options, and manage the entire project from water removal and mold remediation to full reconstruction. We are dedicated to restoring your property and your peace of mind.
Don’t let a small leak turn into a catastrophe. If you’re facing a water damaged ceiling leak, AMPM Restoration is on standby 24/7. Call us right now at 941-946-7807 for a free, no-obligation inspection and a detailed estimate. We’ll help with the insurance claim and even offer financing to make the recovery as smooth as possible.