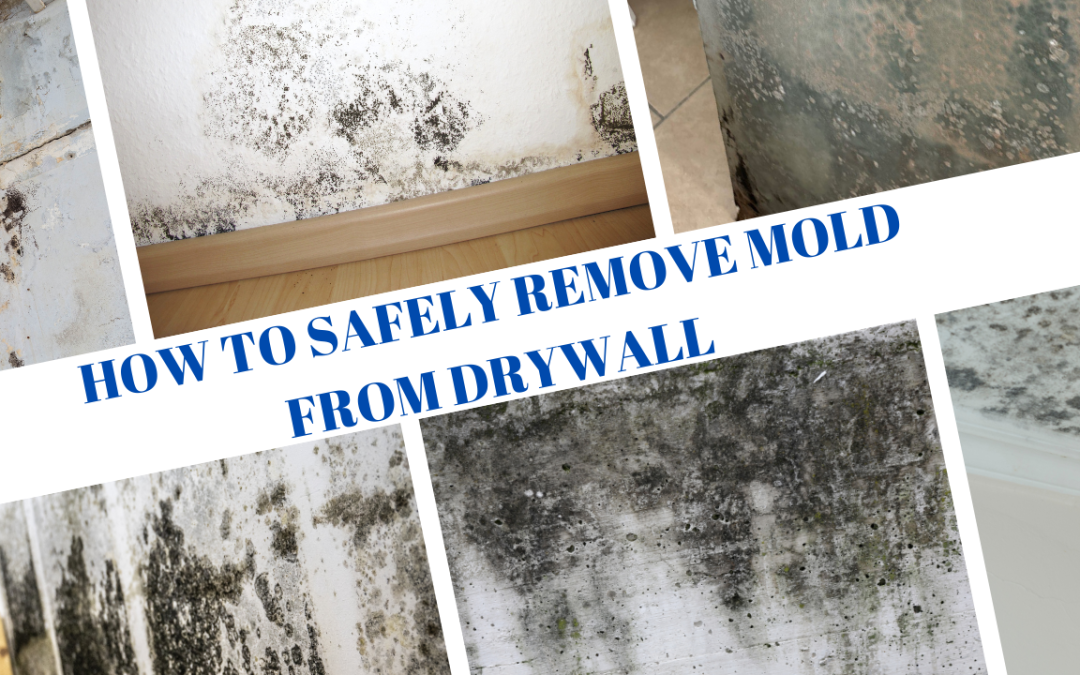
That unsettling feeling when you spot mold on your drywall is something no Bradenton homeowner wants to experience. Knowing how to safely remove that mold is absolutely critical—not just for your home’s structure, but for your family’s well-being. This guide on how to safely remove mold from drywall breaks the process down into four key actions: assessing the damage, containing the area to prevent spore spread, completely removing the affected materials, and preparing the area for a professional repair.
This initial assessment is your first and most important decision point. It determines everything that comes next.
Your First Steps After Finding Mold on Drywall
Finding mold creeping up a wall in your Bradenton home can be jarring. Before you grab a scrub brush and a bottle of bleach, pause. Your immediate reaction can either contain the problem or make it a whole lot worse.
The number one rule is simple: do not disturb the mold. Don’t touch it, scrub it, or even point a fan at it. Doing so can launch millions of microscopic spores into the air, spreading the contamination throughout your house. In the humid climate of Sarasota and the Tampa Bay area, those spores will happily find new damp spots to call home.
Conduct A Visual Inspection
Your first job is to get a sense of the problem’s scope. Is it just a few small spots on the surface, or are you seeing signs of something bigger lurking beneath?
Here’s what to look for:
- Size: How big is the visible patch? A few little specks under a window might be manageable. But if you’re looking at a patch bigger than a dinner plate, it often points to a much more serious underlying issue. The EPA generally advises that any area over 10 square feet needs a professional.
- Drywall Condition: Gently press on the wall near the mold. Does it feel soft, spongy, or crumbly? If the drywall gives way, it has absorbed significant moisture. At that point, it’s beyond cleaning and must be completely replaced.
- Source of Moisture: Mold can’t grow without water. Your most important detective work is finding where that water is coming from. Understanding how to detect water leaks in walls is a huge help here. Check for leaky pipes, roof damage after a storm, window condensation, or just the high humidity we all deal with on the Gulf Coast.
This initial look is so important because once mold gets into drywall, it’s incredibly tough to get out. The porous paper and gypsum core act like a sponge, wicking up moisture from a hidden leak or just the thick Florida air.
Drywall is notoriously the most difficult material for mold remediation, accounting for roughly 35.7% of the global mold remediation service market in 2023. Its porous nature is the perfect breeding ground, readily absorbing moisture from leaks, floods, or the high humidity we see across the Suncoast in places like Bradenton and Sarasota.
DIY vs. Professional Mold Removal: A Quick Assessment
Use this guide to determine if your drywall mold issue is manageable on your own or requires immediate professional help from a certified team like AMPM Restoration.
| Scenario | Recommended Action | Reasoning |
|---|---|---|
| Small spot (under 1 sq. ft.) on a hard, non-porous surface. | DIY | Can often be cleaned with proper PPE and cleaning agents if the source of moisture is fixed. |
| Mold patch larger than a dinner plate or over 10 sq. ft. | Professional | Large-scale contamination requires specialized containment and equipment to prevent cross-contamination. |
| Drywall feels soft, spongy, or is visibly damaged. | Professional | The material is compromised and needs to be safely removed and replaced, not just surface-cleaned. |
| Mold returns after you’ve cleaned it. | Professional | This indicates a hidden moisture source or that the initial cleaning didn’t fully remove the roots. |
| You smell a strong, musty odor but can’t see the mold. | Professional | Mold is likely growing behind walls, under floors, or in your HVAC system, requiring expert detection. |
| Anyone in the home has allergies, asthma, or is immunocompromised. | Professional | Don’t risk it. Disturbing mold can release toxins and spores that are especially harmful to sensitive individuals. |
If your situation falls into any of the “Professional” categories, it’s best not to take any chances.
For a deeper dive into what to look for, check out our guide on the five signs of mold damage in homes. Trying to tackle a significant mold problem without the right training and gear can expose your family to harmful spores and often leads to incomplete removal, meaning the mold will just come right back.
When in doubt, the safest bet is always to call a certified team like AMPM Restoration. We offer a free, no-obligation inspection to help you understand the full scope of the damage and figure out the safest way forward.
Setting Up Essential Safety and Containment Measures
Before you even dream of touching that moldy drywall, you need to shift your mindset. Treat the area like a full-blown biohazard zone—because it is. This isn’t just professional jargon; it’s the most critical step in learning how to safely remove mold from drywall.
The biggest mistake we see homeowners in Bradenton and Sarasota make is disturbing mold without the right precautions. They take a small, localized issue and accidentally blast microscopic spores throughout their entire house, turning a simple fix into a contamination nightmare. Knowing how to safely remove mold from drywall starts with protecting yourself and your home first.
Your main goal here is to stop those invisible spores from going airborne. Once they’re in the air, your HVAC system becomes a superhighway, delivering them to every room in your house. In Florida’s humidity, those spores will find a new place to land and start a new colony before you know it.
Assembling Your Personal Protective Equipment (PPE)
Do not, under any circumstances, skimp on your safety gear. We’re not talking about a simple dust mask and garden gloves. Mold spores can trigger serious respiratory problems, skin irritation, and allergic reactions.
Here is the absolute minimum PPE you need to have on before you start:
- Respirator: An N95 respirator is the baseline. For real protection, we strongly recommend a P100 half-face respirator with fresh cartridges. It must create a perfect seal on your face, or it’s useless.
- Eye Protection: Get a pair of non-vented safety goggles. The vented kind has tiny holes that are more than big enough for spores to get in and irritate your eyes.
- Gloves: You’ll want heavy-duty, long-cuffed rubber gloves. They should come up your forearm to keep mold and cleaning agents off your skin.
- Body Covering: The pros use disposable, full-body Tyvek suits with a hood. This is a non-negotiable. It stops you from carrying spores out of the room on your clothes.
Taking this level of precaution is crucial. Inhaling or even touching certain molds can lead to a long list of health issues. You can learn more about the specific health effects of mold exposure in our detailed guide on the topic.
Creating a Secure Containment Zone
Wearing the right PPE protects you, but building a containment zone protects the rest of your house. This process isolates the workspace, creating a physical barrier that stops spores and dust from escaping. Think of it like building a secure room-within-a-room.
First things first: shut down your HVAC system entirely. Next, grab some thick 6-mil plastic sheeting and seal off every doorway and opening. Overlap the plastic seams and tape them down tight with painter’s tape. For an entrance, you can cut a vertical slit and tape another flap of plastic over it to create a self-sealing door.
Don’t forget to cover all the air vents, registers, and even electrical outlets in the room. Spores can and will find their way through the smallest gaps.
Pro Tip: Set up a “clean room” area right outside your containment zone. This is where you’ll keep your tools and supplies. When you exit the work area, you can take off your disposable suit and bag it right there before walking into the rest of your home. It’s a simple step that drastically cuts the risk of cross-contamination.
Establishing Negative Air Pressure
For the most effective containment, professionals always create what’s called negative air pressure. It might sound technical, but the idea is simple: you want more air being pulled out of the contaminated room than is coming in. This ensures any airborne spores are vented directly outside, not into your living room.
You can achieve this by placing a box fan in a window, sealing the gaps around it with plastic, and pointing it to blow air outward. For a more professional setup, a specialized HEPA-filtered air scrubber is used.
This constant outward flow creates a gentle vacuum inside the containment zone. Air from the rest of the house will be slowly pulled into the workspace through any tiny gaps, effectively trapping the spores inside before they’re exhausted outdoors. It’s the gold standard for a reason.

A Practical Guide to Removing Mold-Damaged Drywall
Once your safety gear is on and the containment area is sealed tight, it’s time to tackle the main event: removing the moldy drywall. This is where careful, methodical work really matters. Your goal isn’t just to cut out the ugly spots you can see, but to remove the entire colony—including the invisible roots that spread much further than you’d think.
Before you make a single cut, lightly mist the moldy area with a spray bottle of water. This simple trick weighs down the spores and keeps them from going airborne the second you disturb the wall. Think of it like dampening dust before you sweep; it keeps the mess from getting everywhere.
This safety process is non-negotiable. It’s the foundation for any successful DIY mold removal job.

As you can see, personal protection, containment, and proper ventilation have to be in place before you even think about touching that wall.
The Right Way to Cut Out Damaged Drywall
With the surface misted, you can mark your cutting lines. This is one time when it’s much better to be generous. Mold’s root system, called hyphae, burrows deep into the drywall’s paper and gypsum core, extending far past the visible stains.
Crucial Tip: As a firm rule, measure and mark a line at least 12 inches beyond the edge of any visible mold on all sides. Giving yourself this wide margin is the single best way to make sure you’ve removed the entire colony and its root structure.
Using a sharp utility knife, carefully score the lines you’ve marked. It will probably take a few passes to cut all the way through the drywall. Keep your cuts as clean and straight as you can—it will make patching things up later so much easier. Whatever you do, avoid aggressive sawing that could shake the wall and send spores flying.
Safely Bagging and Disposing of Debris
This part of the job has to be done with extreme care, and it all happens inside your sealed containment zone. Never, ever carry exposed moldy drywall through your home.
Have heavy-duty, 6-mil thick construction debris bags ready inside the work area. As you pull out sections of drywall, place them directly into the bags. I find it’s easiest to cut the drywall into smaller, manageable pieces that won’t risk tearing the plastic.
- Double-Bag Everything: Once a bag is about two-thirds full, seal it tight with tape. Then, put that entire sealed bag inside a second one and seal it, too. This double-bagging technique is your best protection against rips and leaks.
- Wipe Down the Bags: Before you take the sealed bags out of the containment zone, wipe down the outside of each one with a damp cloth to remove any stray dust or spores.
- Clear a Path: Make sure you have an unobstructed path from your containment exit to the outdoors. You want to get that debris out of your house with minimal fuss.
Don’t forget to check your local regulations. Communities like Bradenton and Lakewood Ranch have specific rules for disposing of mold-contaminated building materials, so be sure you know what’s required.
The 10 Square Foot Rule
It’s absolutely critical to know the limits of a DIY project. Learning how to safely remove mold from drywall is as much about recognizing when to call for help as it is about technique. A key guideline here comes straight from the Environmental Protection Agency (EPA).
For safe DIY removal, experts say to stick to contamination under 10 square feet. Anything larger, and you’re in professional territory. A pro team will bring in N95 respirators, HEPA vacuums, and negative air machines to guarantee spores are contained. Botched DIY jobs can aerosolize up to 70% more spores, making respiratory irritation and other health issues much worse.
And don’t forget, mold isn’t always obvious. You might fix the drywall but still have a problem with mold behind baseboards. If that musty smell lingers, the source is likely hiding somewhere else.
For a deeper dive into the science, check out our article on the truth about what it takes to kill mold. If you’re looking at a big problem, calling a certified team like AMPM Restoration is the safest move for your Sarasota property.
Cleaning and Drying the Area to Prevent Regrowth

Getting that moldy drywall out is a huge step, but don’t put your tools away just yet. This is where you truly win or lose the war against mold. Just letting the exposed wall cavity “air out” is practically an invitation for regrowth, especially here in Florida’s humid climate.
The next phase is all about meticulous cleaning and, most importantly, aggressive drying. This goes far beyond just wiping things down; it’s about systematically removing the moisture that let mold get a foothold in the first place. This step is what makes all your hard work on how to safely remove mold from drywall actually last.
Cleaning the Exposed Wood Framing
Now that the drywall is gone, you need to focus on the exposed wood studs, sill plates, and any surrounding sheathing. Even if you can’t see any visible mold on the wood, you have to assume that microscopic spores have settled everywhere during the removal process.
First, grab a HEPA-filtered vacuum and thoroughly clean the entire cavity. This will suck up any loose spores and dust. After that, use a stiff wire brush to physically scrub the surfaces of all the exposed wood. This dislodges any stubborn, embedded particles and gets the wood ready for cleaning.
Once you’ve scrubbed everything down, wipe all the framing with a cloth dampened with a good antimicrobial cleaner. Make sure you follow the product’s directions perfectly—the goal is to disinfect, not to add more moisture back into the wood.
Why Aggressive Drying Is So Critical
Drying isn’t just a step; it’s the most important part of preventing mold from coming right back. Along the Gulf Coast, from St. Petersburg to Sarasota, just opening a window won’t do the trick. The air outside is often too humid to effectively dry out building materials that have been soaked.
Water damage from Florida’s frequent storms is a primary factor in 70-80% of mold cases on drywall. Safe and effective removal hinges on rapid drying, ideally within 48 hours, by using commercial-grade dehumidifiers to drop the wood’s moisture content below 15%. Unchecked saturation can lead to the growth of harmful molds like Stachybotrys, which has been linked to symptoms like coughing and skin rashes. You can read more about the impact of water damage on the industry on Barchart.com.
This is where you need to bring in the heavy-duty equipment. To get the area properly dry, you’ll need:
- Commercial Dehumidifiers: These aren’t your average household units. They are designed to pull gallons of water from the air and materials every single day.
- High-Velocity Air Movers: You’ve probably seen these “carpet fans” before. We place them strategically to blast dry air across wet surfaces, which dramatically speeds up evaporation.
Your target is to get the moisture content of the wood studs below 15%. The only way to know for sure is with a moisture meter, a tool that gives you an instant digital reading. Don’t even think about putting up new drywall until you’ve hit that number.
Applying a Protective Sealant
Once the wood is confirmed to be bone-dry, there’s one last step you can take for some serious long-term peace of mind. Applying a mold-resistant or antimicrobial sealant to the clean framing adds an incredible layer of protection.
These special coatings create a non-porous barrier that makes it nearly impossible for any stray spores to take root in the future. Many of them even contain fungicides that actively stop growth. While it’s no replacement for good moisture control, it’s a smart final touch to ensure this problem doesn’t come back.
For a broader look at keeping your whole house protected, check out our guide on how to prevent mold in your entire home.
When to Call a Professional for Mold Remediation
It’s tempting to grab some bleach and a sponge when you see a small spot of mold, and for tiny, surface-level issues, that might work. But knowing when to step back and call for professional help is the most important part of safely handling mold on drywall. What looks like a simple weekend project can quickly turn into a health hazard and a much bigger property damage nightmare, especially here in Florida.
There are a few clear red flags that signal the problem is beyond a DIY fix. Recognizing them is crucial because the line between a manageable spot and serious contamination isn’t always obvious.
The Mold Covers a Large Area
The simplest rule comes down to size. The U.S. Environmental Protection Agency (EPA) is very clear on this: if the mold patch is larger than 10 square feet—think a 3-foot by 3-foot area—it’s time to call in the pros.
A patch that big points to a serious underlying moisture problem that’s likely been festering for a while. It also means the air is thick with spores, which dramatically increases the health risks and the chance of spreading the problem. Trying to tear out a large section of moldy drywall without professional containment almost guarantees you’ll send those spores traveling throughout your Bradenton home.
The Contamination Is From a Sewage Leak or Flood
Not all water damage is the same. If the mold grew after a sewage backup or flooding from a storm, you’re dealing with what we call Category 3 water, or “black water.”
This water is heavily contaminated with bacteria, pathogens, and other hazardous waste. Simply touching materials soaked in it is a major health risk. Professional restoration companies like AMPM Restoration are trained and equipped to safely manage these biohazards, ensuring the area is not only mold-free but also properly sanitized.
The Mold Keeps Coming Back
You’ve scrubbed a small mold spot, only for it to reappear a few weeks later. This is a dead giveaway that you have a deeper problem. It means your initial cleanup didn’t get the mold’s root system, or more likely, you never found and fixed the hidden moisture source that’s feeding it.
Professionals don’t just wipe away the mold you can see; our job is to figure out why it grew in the first place.
At AMPM Restoration, we use advanced diagnostic tools that a homeowner simply doesn’t have access to. Thermal imaging cameras allow us to see temperature differences inside walls to pinpoint hidden leaks or pockets of moisture, and sensitive moisture meters can detect dampness that feels dry to the touch. This technology lets us find and fix the root cause, not just the symptom.
Advanced Tools and Certified Expertise
A professional remediation team brings more than just experience; we bring specialized equipment designed for one purpose: to make your home safe again. We use commercial-grade air scrubbers with HEPA filters that capture 99.97% of airborne particles, cleaning the air inside the containment zone while we work. A box fan in a window just can’t compete.
Our team is IICRC-certified, which means we follow the industry’s highest standards for remediation. For a deeper dive into our process, you can learn more about when you need professional mold removal in our detailed guide. If you’re facing any of these situations in your Sarasota, Tampa Bay, or St. Petersburg property, don’t take the risk.
Restoring Your Home and Peace of Mind
Figuring out how to safely remove mold from drywall really comes down to one thing: protecting your family and your home. While a tiny spot of surface mold might look like a simple DIY project, anything more serious needs a professional touch to make sure it’s gone for good. Here along Florida’s Suncoast, from Bradenton and Sarasota up through Tampa Bay, taking a chance on mold just isn’t worth the risk.
Don’t gamble with your family’s health or the value of your property. AMPM Restoration is your trusted local expert, serving communities across Bradenton, Sarasota, Tampa Bay, and Saint Petersburg. Our IICRC-certified team is dedicated to restoring both your property and your peace of mind with fast, reliable, and insurance-friendly service.
If you’ve discovered mold, don’t wait. Call us anytime, 24/7, at 941-946-7807 for a completely free inspection and a no-nonsense estimate. We can even help with insurance claims and offer financing options to make the process as smooth as possible.
Frequently Asked Questions About Safely Removing Mold From Drywall
Can I just paint over mold on drywall?
No. Painting over mold is one of the worst things you can do. The paint simply hides the mold, which will continue to grow and eat away at the drywall underneath. It does not solve the problem and allows the mold to keep releasing spores into your home. The only correct way to handle mold on drywall is complete removal of the affected material.
What are the signs of hidden mold inside my walls?
The most common sign is a persistent musty or earthy smell that you can’t locate. Other signs include bubbling or peeling paint, discolored patches (yellow or brown), or areas of drywall that feel soft, swollen, or warped. If you notice these issues, especially after a leak or in a humid area, it’s a strong indicator of hidden mold growth.
How much does professional drywall mold removal cost in Florida?
The cost varies based on the size and severity of the contamination. A small, contained job might cost a few hundred dollars, while a large-scale remediation involving significant structural damage could cost several thousand. At AMPM Restoration, we provide a free, on-site inspection and a detailed, transparent estimate. We also offer insurance claim assistance and financing options to help our Bradenton, Sarasota, and Tampa Bay clients.
Is black mold on drywall more dangerous than other molds?
While “black mold” (Stachybotrys chartarum) has a frightening reputation, the truth is that all types of indoor mold growth should be considered a potential health risk. The color of the mold is not a reliable indicator of its danger. Any mold can trigger allergies, asthma, and other respiratory issues, so all mold should be removed safely and completely by a professional.
How quickly can mold grow on wet drywall in Florida’s climate?
Disturbingly fast. In Florida’s warm and humid environment, mold can begin to grow on damp drywall in as little as 24 to 48 hours. This is why it is critical to address any water intrusion—from a storm, flood, or pipe leak—immediately. Fast action from a 24/7 emergency service like AMPM Restoration can prevent a small water issue from becoming a major mold problem.
How do you ensure the mold doesn’t come back?
Our professional process focuses on a permanent solution. After safely removing all contaminated drywall, we identify and address the original moisture source. We then use HEPA vacuums to clean the exposed structure, treat the area with an antimicrobial sealant to prevent future growth, and perform a full reconstruction, often with mold-resistant materials. Our work is backed by a satisfaction guarantee, giving our clients in Lakewood Ranch and surrounding communities lasting peace of mind.
If you’re dealing with a mold issue, don’t let it get worse. AMPM Restoration is on call with 24/7 emergency services to protect your property and your health.
Call us now at 941-946-7807 for a free, no-obligation inspection and estimate. We offer insurance claim assistance and financing options to restore your home—and your peace of mind—as quickly as possible.